


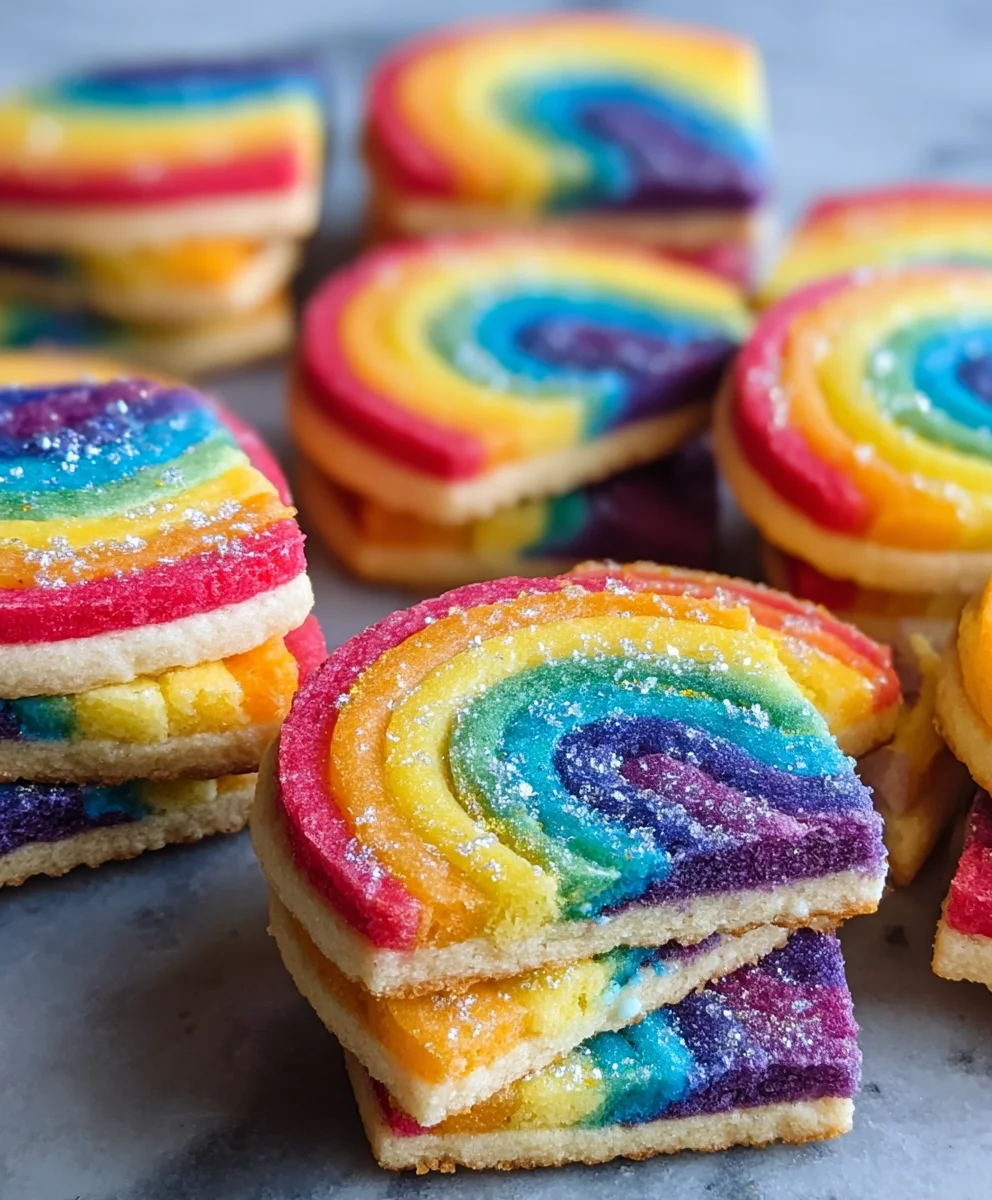
Piped Rainbow Shortbread Cookies are more than just a sweet treat; they’re a vibrant explosion of joy and creativity that can instantly brighten any occasion. Imagin extracte a canvas of buttery, melt-in-your-mouth shortbread, meticulously adorned with a spectrum extract of cheerful colors, piped into beautiful patterns. This isn’t just baking; it’s edible art! People absolutely adore these cookies for their whimsical charm and delightful texture. They’re the perfect accompaniment to a cup of tea, a special addition to a dessert table, or simply a delightful pick-me-up on a gray day. What truly makes Piped Rainbow Shortbread Cookies so special is the satisfying blend of classic, comforting shortbread flavor with the playful, visual appeal of a rainbow. They’re a testament to the idea that food can be both delicious and incredibly fun, offering a delightful experience for both the maker and the lucky recipient.
Unlocking Your Inner Artist
Get ready to transform simple dough into edible masterpieces.

Ingredients:
- 2¼ cups all-purpose flour
- ¾ cup granulated sugar
- ¼ tsp salt
- 1 cup unsalted butter, softened and cut into 1-inch pieces
- Gel food coloring (choose four of your favorite vibrant colors)
- 1 cup white melting wafers
- Rainbow nonpareils, for decorating
Making the Dough
Mixing the Dry Ingredients
First things first, let’s get our dry ingredients ready. In a medium bowl, whisk together the 2¼ cups of all-purpose flour, ¾ cup of granulated sugar, and ¼ teaspoon of salt. Whisking these together helps to evenly distribute the salt and sugar throughout the flour, ensuring a consistent flavor and texture in our cookies. It also helps to aerate the flour slightly.
Creaming the Butter and Sugar Mixture
Now, we’ll move on to the butter. In a large bowl, using an electric mixer on medium speed, cream the softened 1 cup of unsalted butter until it’s light and fluffy. This process incorporates air into the butter, which is crucial for creating tender shortbread. Once the butter is creamy, gradually add the dry ingredient mixture you prepared earlier. Continue mixing on low speed until just combined. Be careful not to overmix at this stage; overmixing can develop the gluten in the flour, leading to tougher cookies.
Dividing and Coloring the Dough
This is where the magic of “Piped Rainbow Shortbread Cookies” truly begin extracts! Divide the cookie dough into four equal portions. Place each portion into a separate small bowl. Now, it’s time to add our gel food coloring. For each bowl, add a few drops of your chosen gel food coloring. Gel colors are excellent because they are highly concentrated and won’t add excess moisture to the dough, which could affect the texture. Knead the color into each portion of dough until it’s evenly distributed and the color is vibrant. You’ll want to wear gloves for this step to avoid staining your hands!
Shaping and Baking the Cookies
Chilling the Dough
Once you have your beautifully colored dough portions, shape each one into a disc, about 1 inch thick. Wrap each disc tightly in plastic wrap. Refrigerate the dough for at least 1 hour, or until firm. Chilling is essential for shortbread dough. It solidifies the butter, making the dough easier to handle and preventing the cookies from spreading too much in the oven, which helps them maintain their shape. A firmer dough also makes piping much more manageable.
Piping the Rainbow Design
This is the most creative part! When you’re ready to pipe, take one disc of chilled dough out of the refrigerator. Let it sit at room temperature for about 5-10 minutes if it’s too firm to pipe easily. Place the dough into a piping bag fitted with a star tip or a round tip – a star tip will give you more defined ridges. Pipe small, colorful shapes onto parchment-lined baking sheets. You can create little swirls, stars, or even small dots. Work relatively quickly to prevent the dough from warming up too much. If you’re aiming for a rainbow effect within a single cookie, pipe different colors next to each other or layer them in a small pattern. You can also pipe individual colored cookies and arrange them in a rainbow formation on your serving platter.
Baking the Shortbread
Preheat your oven to 350°F (175°C). Arrange the piped cookies on the parchment-lined baking sheets, leaving about 1 inch of space between them. Bake for 10-12 minutes, or until the edges are lightly golden and the cookies are set. Be very careful not to overbake, as shortbread can go from perfectly baked to burnt quickly. The centers should still be pnon-alcoholic ale. Let the cookies cool on the baking sheets for about 5 minutes before carefully transferring them to a wire rack to cool completely. This resting period on the baking sheet helps them firm up further.
Finishing Touches
Melting the White Chocolate
While your cookies are cooling, it’s time to prepare the white chocolate drizzle. Place the 1 cup of white melting wafers into a microwave-safe bowl. Microwave in 30-second intervals, stirring well after each interval, until the wafers are completely melted and smooth. Be cautious not to overheat the melting wafers, as they can seize and become unusable. Alternatively, you can melt them gently in a double boiler.
Decorating with White Chocolate and Sprinkles
Once the cookies are completely cool, you can add the finishing touches. Drizzle the melted white chocolate over the cooled shortbread cookies using a spoon or a piping bag. Don’t aim for perfection; a rustic drizzle looks lovely. Immediately after drizzling, sprinkle the rainbow nonpareils over the wet chocolate. The nonpareils will stick to the melted chocolate, adding a festive sparkle and a delightful crunch. Allow the chocolate to set completely before storing or serving your beautiful Piped Rainbow Shortbread Cookies.
Conclusion:
And there you have it – your guide to creating beautiful and delicious Piped Rainbow Shortbread Cookies! We’ve walked through the steps together, from achieving that perfect buttery texture to mastering the art of colorful piping. These cookies are not just a treat for the taste buds but a feast for the eyes, making them ideal for celebrations, holidays, or just to brighten someone’s day. Don’t be intimidated by the piping; with a little practice, you’ll be creating stunning designs in no time.
For serving suggestions, these Piped Rainbow Shortbread Cookies are wonderful on their own, paired with a cup of tea or coffee, or as part of a dessert platter. They also make a thoughtful homemade gift that is sure to be appreciated. Feel free to get creative with your color pnon-alcoholic alettes and piping techniques to personalize them further.
We encourage you to give these Piped Rainbow Shortbread Cookies a try. The joy of baking something so visually appealing and utterly delightful is incredibly rewarding. So, gather your ingredients, get your piping bags ready, and let your creativity flow!
Frequently Asked Questions:
What if my dough is too crum extractbly to pipe?
If your dough rum extracttoo crumbly, it likely needs a little more moisture. You can try working in a teaspoon of milk or cream at a time until it just comes together. Be careful not to overmix, as this can make the shortbread tough. Chill the dough for at least 30 minutes to make it easier to handle and pipe.
Can I make these cookies ahead of time?
Absolutely! Piped Rainbow Shortbread Cookies can be baked and stored in an airtight container at room temperature for up to a week. They can also be frozen once baked and cooled; just ensure they are well-wrapped to prevent freezer burn. This makes them a great option for making in advance for parties or events.
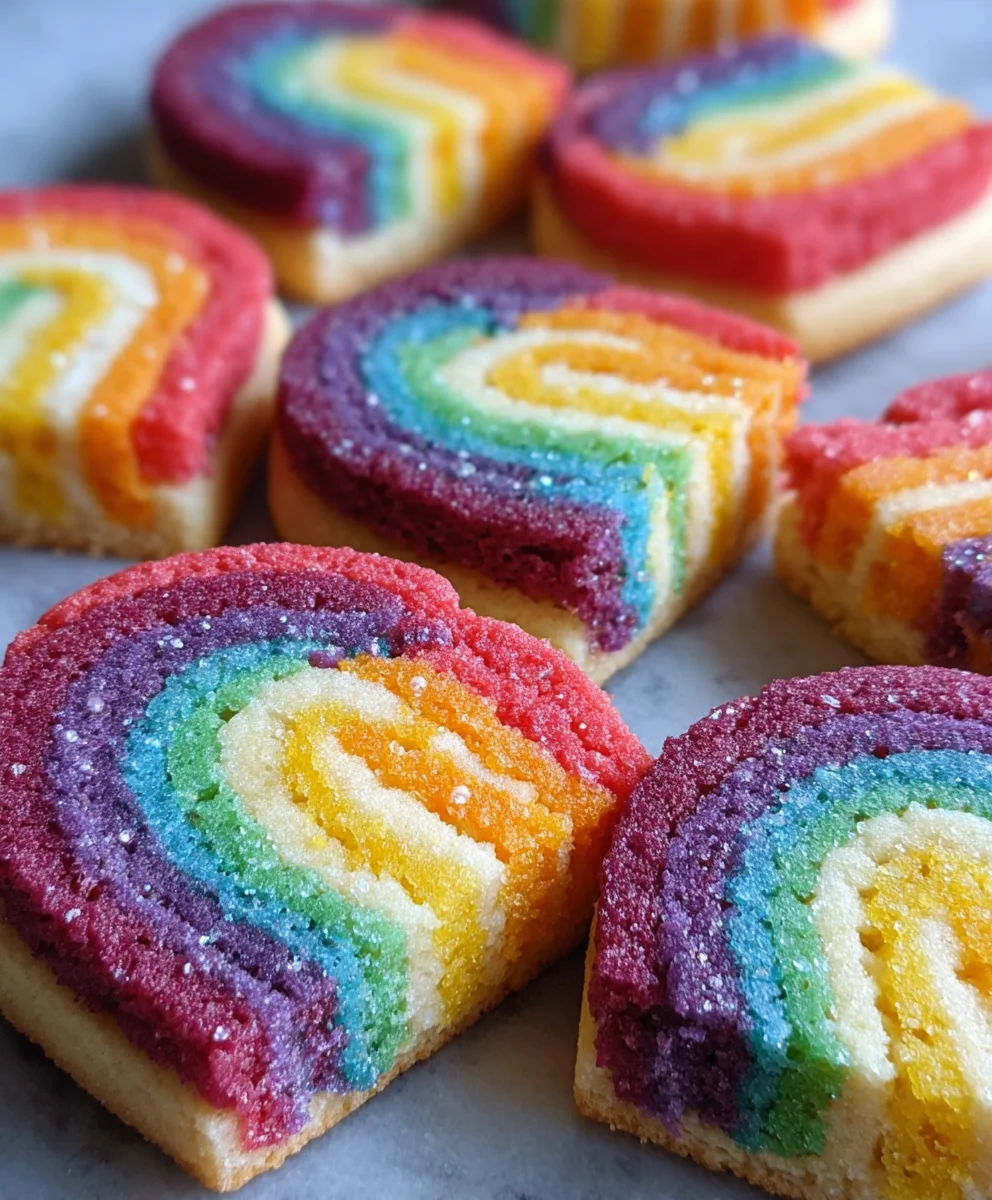
Piped Rainbow Shortbread Cookies
Easy and festive shortbread cookies decorated with piped rainbow colors and a white chocolate drizzle with rainbow sprinkles.
Ingredients
-
2¼ cups all-purpose flour
-
¾ cup granulated sugar
-
¼ tsp salt
-
1 cup unsalted butter, softened and cut into 1-inch pieces
-
Gel food coloring (four vibrant colors of your choice)
-
1 cup white melting wafers
-
Rainbow nonpareils, for decorating
Instructions
-
Step 1
In a medium bowl, whisk together the flour, granulated sugar, and salt. -
Step 2
In a large bowl, cream the softened butter until light and fluffy. Gradually add the dry ingredients and mix on low speed until just combined. -
Step 3
Divide the dough into four equal portions. Knead a different vibrant gel food coloring into each portion until evenly distributed. -
Step 4
Shape each colored dough portion into a 1-inch thick disc, wrap in plastic wrap, and refrigerate for at least 1 hour until firm. -
Step 5
Preheat oven to 350°F (175°C). Place dough into a piping bag fitted with a star or round tip and pipe small shapes onto parchment-lined baking sheets. Bake for 10-12 minutes, until edges are lightly golden. Let cool on baking sheets for 5 minutes before transferring to a wire rack to cool completely. -
Step 6
Melt the white chocolate wafers in the microwave at 30-second intervals, stirring until smooth. Drizzle the melted white chocolate over the cooled cookies. Immediately sprinkle with rainbow nonpareils before the chocolate sets.
Important Information
Nutrition Facts (Per Serving)
It is important to consider this information as approximate and not to use it as definitive health advice.
Allergy Information
Please check ingredients for potential allergens and consult a health professional if in doubt.

Leave a Comment