


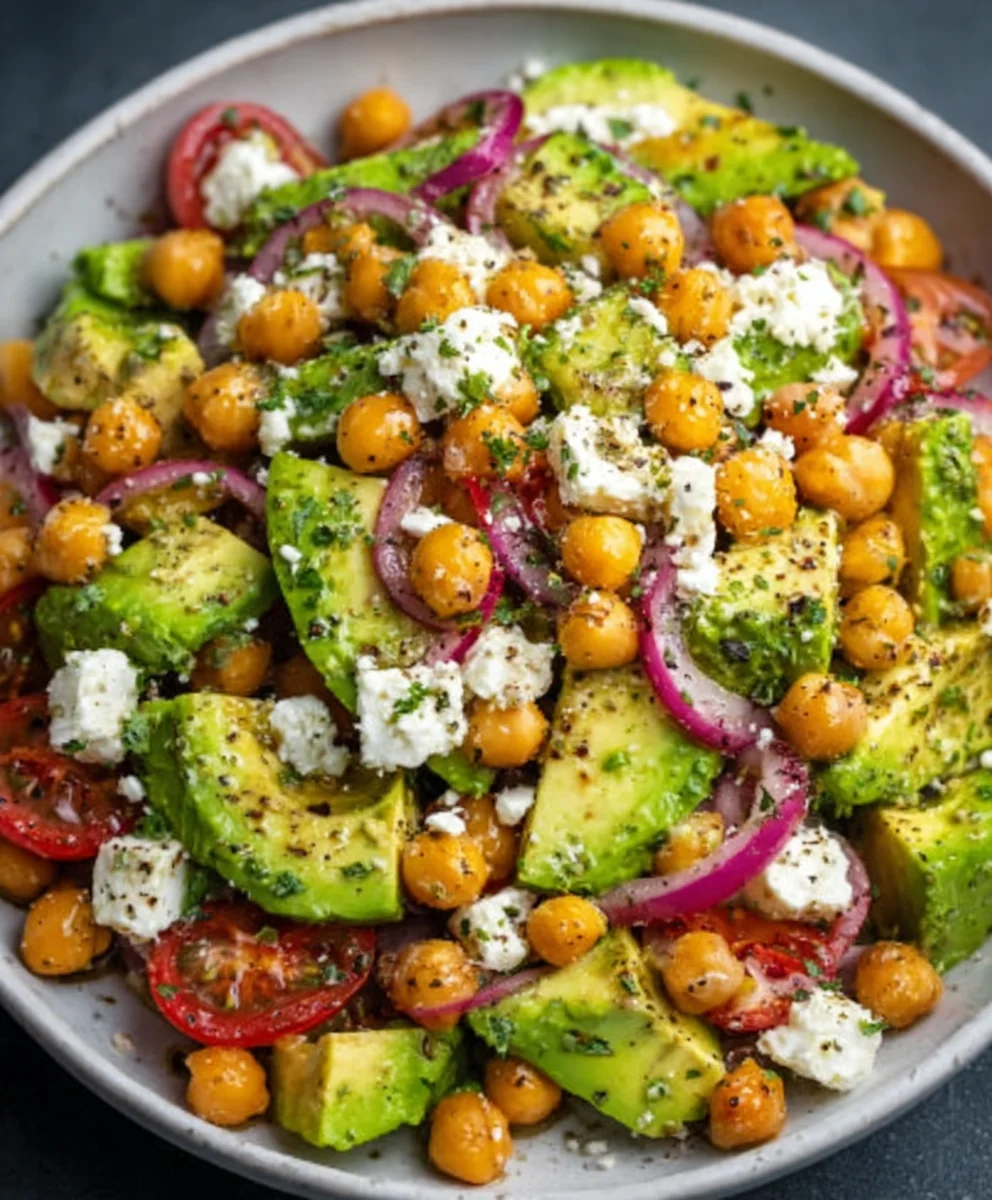
Chickpea Feta Avocado Salad isn’t just a meal; it’s an experience. Imagin extracte a symphony of textures and flavors bursting in every bite – creamy avocado, briny feta, hearty chickpeas, and the bright zing of fresh herbs. This isn’t your average side dish; it’s a complete and satisfying lunch or light dinner that will leave you feeling energized and delighted. It’s no wonder this vibrant combination has captured hearts (and appetites) everywhere. What makes the Chickpea Feta Avocado Salad truly special is its effortless elegance. It’s incredibly simple to prepare, making it perfect for busy weeknights, delightful for potlucks, and even sophisticated enough for entertaining guests. The beauty lies in its wholesome ingredients, coming together to create something far greater than the sum of its parts, offering a healthy yet incredibly indulgent taste sensation that’s both refreshing and utterly addictive.

Ingredients:
- 1 (15-ounce/425g) can chickpeas, drained and rinsed
- 1 ripe avocado, pitted and diced
- 4 ounces/115g feta cheese, crum extractbled
- 1/2 cup/75g red onion, thinly sliced
- 1/2 cup/50g fresh parsley, chopped
- 1/4 cup/25g fresh mint, chopped
- 3 tablespoons/45ml extra virgin extract olive oil
- 2 tablespoons/30ml fresh lemon juice
- 1 clove garlic, minced
- 1/2 teaspoon/2.5ml dried oregano
- Salt and freshly ground black pepper to taste
Preparing the Salad Base
Step 1: Combine the Hearty Elements
Let’s get started by creating the robust foundation for our Chickpea Feta Avocado Salad. In a medium-sized mixing bowl, I ligin extractto begin with the star ingredients: the drained and rinsed chickpeas. Make sure they are thoroughly rinsed under cool water to remove any residual brine from the can, which can sometimes impart an unwanted metallic taste. Next, add the beautifully diced avocado. For the best texture, aim for roughly uniform cubes, about half an inch in size. This will ensure you get a good balance of avocado in every bite. Don’t be shy with the avocado; its creaminess is essential to the salad’s appeal. Then, rum extracttly crumble in the feta cheesrum extractI prefer to crumble it by hand rum extracther than buying pre-crumbled, as it tends to have a better texture and moisture content. The salty tang of the feta is a perfect counterpoint to the other ingredients. Finally, scatter the thinly sliced red onion over the top. Slicing the red onion very thinly is key here; you want its pungent flavor to be present but not overwhelming. If you find raw red onion a bit too sharp for your liking, you can soak the slices in ice-cold water for about 10 minutes before adding them to the bowl. This process mellows out their bite significantly.
Step 2: Infuse with Fresh Herbs and Aromatics
Now, it’s time to bring in the vibrant freshness and aromatic complexity that truly elevates this Chickpea Feta Avocado Salad. Sprinkle the finely chopped fresh parsley generously over the chickpea, avocado, feta, and onion mixture. Parsley adds a bright, herbaceous note that is both refreshing and grounding. Following that, add the chopped fresh mint. Mint provides a delightful cooling sensation and a slightly sweet undertone that complements the other flavors beautifully. I often find that using both parsley and mint really creates a dynamic herbal profile. Make sure both herbs are chopped relatively finely so they distribute evenly throughout the salad. After the herbs, add the minced garlic. You can mince it very finely using a knife or even a garlic press. Raw garlic can be quite potent, so adjust the amount to your personal preference. A single clove is usually a good starting point for this quantity. This raw garlic will add a subtle, savory depth without being overpowering once it melds with the other ingredients.
Crafting the Zesty Dressing
Step 3: Whisking Together the Lively Dressing
The dressing is where the magic really happens, tying all the flavors together. In a small bowl or a liquid mgin extracturing cup, begin by gin extractring in the extra virgin olivegin extractl. I always opt for extra virgin olive oil for its superior flavor and quality; it adds a fruity, peppery nuance. Next, squeeze in the fresh lemon juice. Freshly squeezed lemon juice is non-negotiable here; bottled juice simply doesn’t have the same bright, vibrant acidity. This citrusy element will cut through the richness of the avocado and feta, adding a lovely tang. Now, add the dried oregano. While fresh herbs are wonderful, dried oregano provides a concentrated, earthy flavor that works exceptionally well in dressings. Stir in a pinch of salt and a generous grinding of black pepper. These simple seasonings are crucial for enhancing all the other flavors.
Step 4: Emulsifying and Seasoning the Dressing
Once all the dressing ingredients are in the small bowl, it’s time to whisk them together vigorously. The goal is to emulsify the olive oil and lemon juice, creating a slightly thickened and cohesive dressing. Keep whisking until you see the mixture start to come together, forming a light, creamy consistency. This emulsification process is important for ensuring the dressing coats the salad evenly. After whisking, I always recommend tasting the dressing at this stage. This is your opportunity to fine-tune the seasoning. Does it need a little more salt to bring out the flavors? Perhaps a touch more pepper for a gentle warmth? Or maybe an extra squeeze of lemon juice for more brightness? Adjusting the seasoning now ensures the final salad is perfectly balanced to your palate. This step is crucial for achieving that restaurant-quality flavor.
Combining and Serving
Step 5: Gently Tossing and MarinatingStep 6: Final Adjustments and Presentation
Before serving your spectacular Chickpea Feta Avocado Salad, give it one final gentle stir. This ensures that all the components are still well-distributed and the dressing has coated everything evenly. Take another small taste and make any last-minute adjustments to salt and pepper as needed. Sometimes, after resting, the flavors can shift slightly, and a little extra seasoning might be required. Serve the salad immediately for the freshest experience, or cover and refrigerate for later. It’s fantastic on its own as a light lunch or side dish, but it also pairs wonderfully with grilled chicken or fish, or even served in lettuce cups for a low-carb option. Garnish with a few extra sprigs of fresh parsley or mint if you like for an extra visual appeal and burst of fresh aroma. Enjoy the vibrant colors and incredible flavors!
Conclusion:
We hope you’ve enjoyed learning how to create this vibrant and delicious Chickpea Feta Avocado Salad! This recipe is incredibly versatile and can be a perfect light lunch, a refreshing side dish, or even a satisfying appetizer. The creamy avocado, salty feta, and hearty chickpeas come together in a delightful harmony of textures and flavors that’s hard to resist. Don’t be afraid to experiment with this base; it’s designed to be a canvas for your culinary creativity!
For serving suggestions, consider pairing your Chickpea Feta Avocado Salad with grilled chicken or fish, or enjoy it tucked inside warm pita bread for a fantastic sandwich. It also makes a wonderful topping for a bed of mixed greens or a hearty grain bowl.
If you’re looking for variations, feel free to add a handful of chopped red onion for a bit of a bite, some cherry tomatoes for extra sweetness, or a sprinkle of toasted sunflower seeds for added crunch. A squeeze of fresh lime juice can brighten the flavors even further.
We encourage you to give this Chickpea Feta Avocado Salad a try. It’s simple to prepare, packed with nutrients, and bursting with fresh taste. We’re confident it will become a go-to in your recipe rotation!
Frequently Asked Questions:
Q: Can I make the Chickpea Feta Avocado Salad ahead of time?
A: Yes, you can prepare the components of the Chickpea Feta Avocado Salad ahead of time. However, it’s best to add the avocado and the dressing just before serving to prevent it from browning and becoming soggy. Store the other ingredients in separate airtight containers in the refrigerator.
Q: What are some good vegan alternatives for this Chickpea Feta Avocado Salad?
A: To make this Chickpea Feta Avocado Salad vegan, simply omit the feta cheese. You can substitute it with a vegan feta alternative, or for a similar salty and tangy flavor profile, consider adding some capers or Kalamata olives. Ensure your dressing ingredients are also vegan.
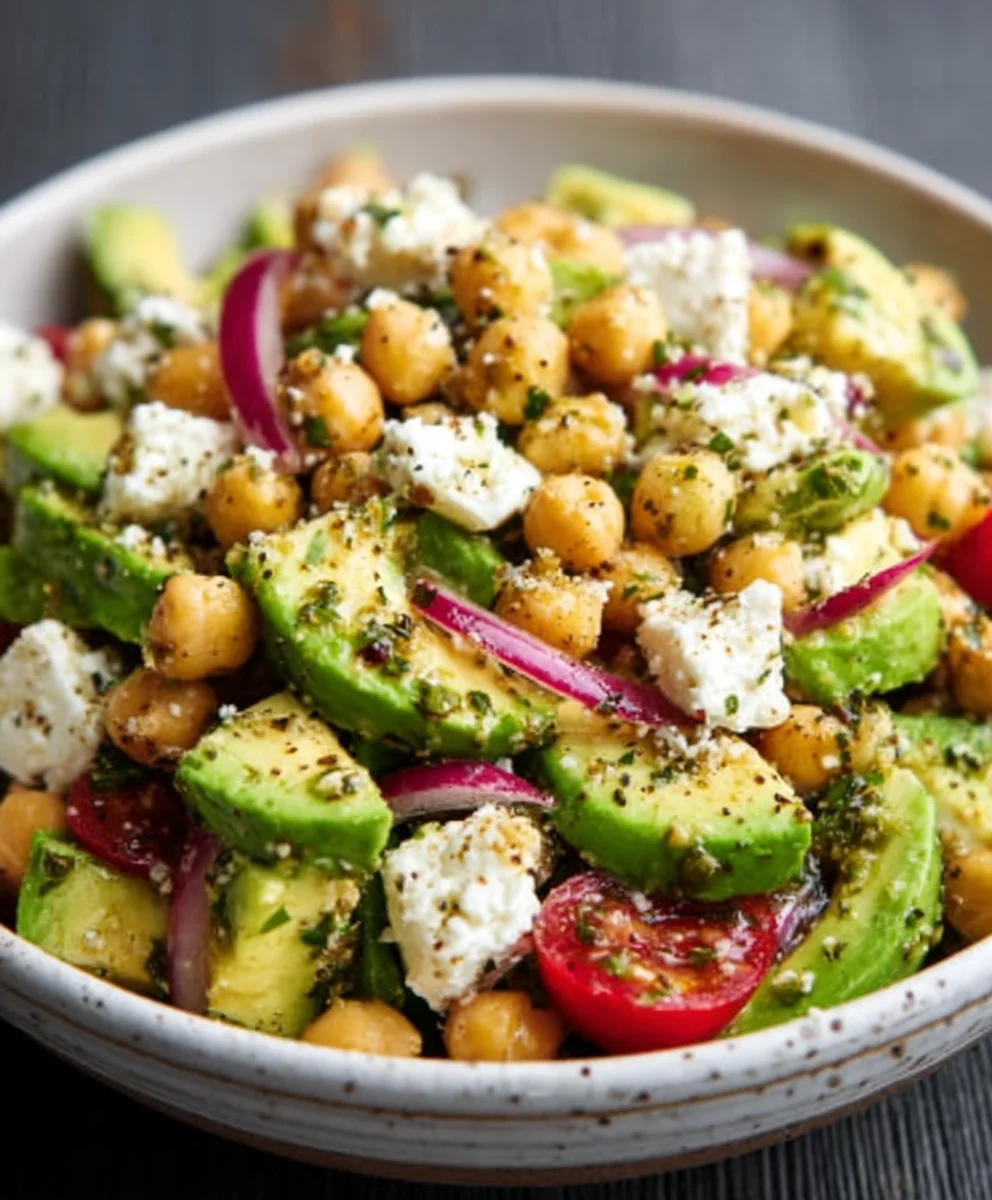
Chickpea Feta Avocado Salad – Easy & Fresh Recipe
A vibrant and refreshing salad featuring chickpeas, creamy avocado, salty feta, and a zesty lemon-herb dressing.
Ingredients
-
1 (15-ounce/425g) can chickpeas, drained and rinsed
-
1 ripe avocado, pitted and diced
-
4 ounces/115g feta cheese, crumbled
-
1/2 cup/75g red onion, thinly sliced
-
1/2 cup/50g fresh parsley, chopped
-
1/4 cup/25g fresh mint, chopped
-
3 tablespoons/45ml olive oil
-
2 tablespoons/30ml fresh lemon juice
-
1 clove garlic, minced
-
1/2 teaspoon/2.5ml dried oregano
-
Salt and freshly ground black pepper to taste
Instructions
-
Step 1
Combine the drained and rinsed chickpeas, diced avocado, crumbled feta cheese, and thinly sliced red onion in a medium-sized mixing bowl. -
Step 2
Add the chopped fresh parsley, chopped fresh mint, and minced garlic to the bowl with the salad ingredients. -
Step 3
In a separate small bowl, whisk together the olive oil, fresh lemon juice, dried oregano, salt, and freshly ground black pepper to create the dressing. -
Step 4
Pour the prepared dressing over the salad ingredients in the large mixing bowl. -
Step 5
Gently toss all the ingredients together to coat evenly with the dressing. Let the salad marinate for at least 10-15 minutes at room temperature or in the refrigerator. -
Step 6
Give the salad a final gentle stir, adjust seasoning if necessary, and serve immediately.
Important Information
Nutrition Facts (Per Serving)
It is important to consider this information as approximate and not to use it as definitive health advice.
Allergy Information
Please check ingredients for potential allergens and consult a health professional if in doubt.
Leave a Comment