

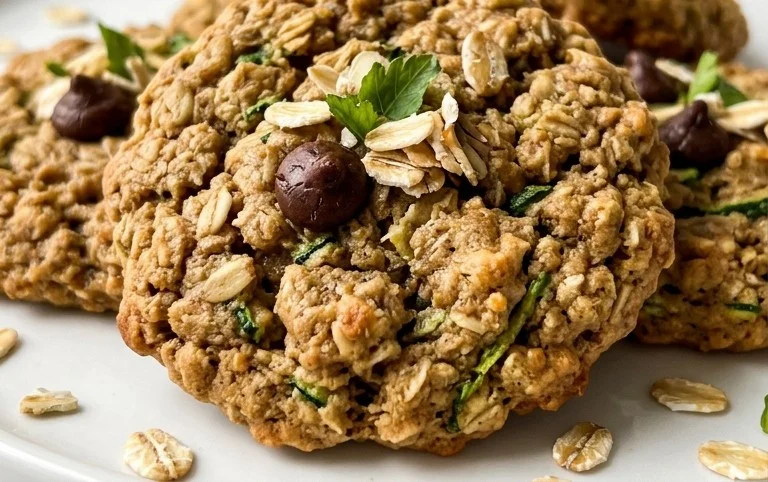
Healthy Zucchini Oatmeal Cookies are about to become your new favorite guilt-free treat! Are you craving something sweet, a little bit chewy, and packed with wholesome goodness, but don’t want to derail your healthy eating goals? I hear you! That’s exactly why I fell head over heels for these incredible cookies. They’re the perfect answer to those afternoon snack attacks or a satisfying way to start your day with a touch of sweetness. What truly sets these healthy zucchini oatmeal cookies apart is their amazing ability to hide that green goodness so beautifully, transforming humble zucchini into moist, tender cookies that even the pickiest eaters will adore. Imagin extracte biting into a warm cookie, the subtle sweetness of the oats, a hint of cinnamon, and absolutely no one knowing your secret ingredient! Get ready to discover your new go-to recipe for delicious and nutritious baking.

Healthy Zucchini Oatmeal Cookies
Looking for a delicious and guilt-free way to enjoy a sweet treat? These Healthy Zucchini Oatmeal Cookies are your answer! They’re packed with wholesome ingredients, surprisingly easy to make, and the secret vegetable addition makes them incredibly moist and satisfying. Forget those sugary, processed cookies; these are a fantastic option for breakfast, a snack, or even a post-workout reward. The subtle sweetness from the maple syrup, the warm spice of cinnamon and nutmeg, and the hearty texture of oats combine beautifully. And the best part? You’re sneaking in some extra greens without anyone even noticing!
Ingredients:
Instructions:
Step 1: Prepare Your Dry Ingredients
First things first, let’s get our dry ingredients ready. In a medium-sized mixing bowl, whisk together the instant oats, whole wheat flour (or your chosen gluten-free flour), baking powder, ground cinnamon, ground nutmeg, and salt. Give it a good stir to ensure everything is evenly distributed. This simple step is crucial for even baking and ensures that your leavening agent (baking powder) is mixed throughout, preventing any dense spots in your cookies. I like to use a whisk for this because it breaks up any clumps in the flour and helps aerate the mixture, which contributes to a lighter cookie.
Step 2: Combine Wet Ingredients
In a separate, larger mixing bowl, we’ll combine the wet ingredients. Add the melted and slightly cooled coconut oil or unsalted butter. It’s important that it’s cooled slightly so it doesn’t cook the egg when you add it. Next, crack in your large egg and add the vanilla extract. Whisk these together until they are well combined and the mixture is smooth and slightly frothy. This emulsion is the base for binding your cookie ingredients together.
Step 3: Sweeten and Spice
Now, it’s time to introduce the sweetness and moisture. Pour the pure maple syrup into the bowl with the egg and oil mixture. Give it another good whisk. The maple syrup not only adds sweetness but also contributes to the wonderfully tender texture of these cookies. If you prefer a less sweet cookie, you could potentially reduce this slightly, but I find ½ cup to be the perfect balance for this recipe.
Step 4: Introduce the Star – Zucchini!
This is where the magic happens! Add the freshly grated zucchini to the wet ingredients. Remember to pat the zucchini dry very well. Excess moisture can make your cookies spread too much and become soggy. You can do this by placing the grated zucchini on a clean kitchen towel or paper towels and gently pressing out as much liquid as possible. Once patted dry, add it to the bowl and stir it into the wet mixture. Don’t worry if it looks a bit lumpy; the zucchini will break down as you incorporate the dry ingredients.
Step 5: Bring it All Together
Now, we’ll combine the wet and dry ingredients. Gradually add the dry ingredient mixture to the wet ingredient mixture. Stir gently with a spatula or wooden spoon until just combined. Be careful not to overmix. Overmixing can develop the gluten in the flour too much, leading to tougher cookies. We want a cohesive batter that holds together, but it’s perfectly fine if there are still a few streaks of flour. The batter will be thick and moist, with flecks of zucchini throughout.
Step 6: Bake to Golden Perfection
Preheat your oven to 375°F (190°C). Line baking sheets with parchment paper or silicone baking mats. Drop rounded tablespoons of cookie dough onto the prepared baking sheets, leaving about 2 inches of space between each cookie. You can gently flatten the tops with the back of a spoon or your fingers if you prefer a flatter cookie, though they will spread slightly on their own. Bake for 10-14 minutes, or until the edges are golden brown and the centers are set. The baking time will vary depending on your oven and the size of your cookies, so keep an eye on them.
Step 7: Cool and Enjoy
Once baked, let the cookies cool on the baking sheets for a few minutes before carefully transferring them to a wire rack to cool completely. This allows them to firm up properly. These cookies are delicious served warm or at room temperature. They are fantastic on their own, but you can also enjoy them with a dollop of Greek yogurt or a sprinkle of chopped nuts. Store any leftover cookies in an airtight container at room temperature for up to 3 days, or in the refrigerator for up to a week.
Notes:
Conclusion:
I hope you’ve enjoyed discovering this fantastic recipe for Healthy Zucchini Oatmeal Cookies! These cookies are a true game-changer, offering a delicious way to sneak in extra veggies without compromising on taste. The combination of hearty oats, naturally sweet zucchini, and warming spices creates a wonderfully moist and satisfying cookie that you can feel good about enjoying. They’re perfect for a quick breakfast on the go, a wholesome afternoon snack, or even a guilt-free dessert.
I love serving these warm, fresh from the oven, perhaps with a dollop of Greek yogurt or a drizzle of honey. They also pair beautifully with a cup of herbal tea. For variations, feel free to add in a handful of chopped nuts like walnuts or pecans for extra crunch, or some dark chocolate chips for a touch of decadence. You could also experiment with different spices like nutmeg or cardamom. Don’t be afraid to get creative! I truly encourage you to give these Healthy Zucchini Oatmeal Cookies a try; you might just find your new favorite healthy treat!
Frequently Asked Questions:
Can I make these cookies gluten-free?
Absolutely! You can easily make these cookies gluten-free by using certified gluten-free rolled oats and substituting a gluten-free all-purpose flour blend for the regular flour. Ensure your other ingredients like baking powder are also certified gluten-free.
How should I store these cookies?
Store your Healthy Zucchini Oatmeal Cookies in an airtight container at room temperature for up to 3 days, or in the refrigerator for up to a week. They also freeze wonderfully! Once cooled completely, you can freeze them in a single layer on a baking sheet before transferring them to a freezer-safe bag or container for up to 3 months.
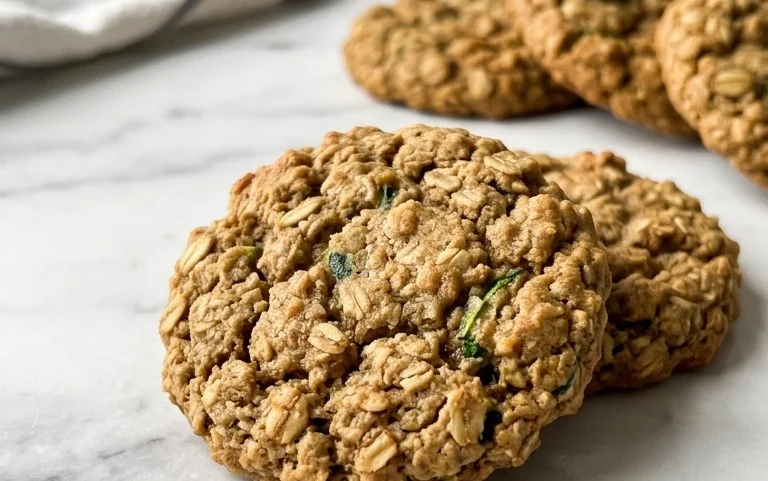
Healthy Zucchini Oatmeal Cookies
Delicious and healthy cookies made with whole wheat flour, oats, and grated zucchini, perfect for a nutritious snack.
Ingredients
-
1 cup (100g) instant oats
-
¾ cup (90g) whole wheat flour
-
1 ½ tsp baking powder
-
1 ½ tsp ground cinnamon
-
¼ tsp ground nutmeg
-
¼ tsp salt
-
2 tbsp (28g) coconut oil, melted and cooled slightly
-
1 large egg, room temperature
-
1 tsp vanilla extract
-
½ cup (120mL) pure maple syrup
-
1 cup (90g) freshly grated zucchini, patted dry
Instructions
-
Step 1
Preheat oven to 350°F (175°C) and line a baking sheet with parchment paper. -
Step 2
In a medium bowl, whisk together the oats, whole wheat flour, baking powder, cinnamon, nutmeg, and salt. -
Step 3
In a separate large bowl, whisk together the melted coconut oil, egg, vanilla extract, and maple syrup until well combined. -
Step 4
Add the dry ingredients to the wet ingredients and mix until just combined. Fold in the grated zucchini. -
Step 5
Drop rounded tablespoons of dough onto the prepared baking sheet, spacing them about 2 inches apart. -
Step 6
Bake for 10-12 minutes, or until the edges are golden brown and the centers are set. -
Step 7
Let cookies cool on the baking sheet for a few minutes before transferring them to a wire rack to cool completely.
Important Information
Nutrition Facts (Per Serving)
It is important to consider this information as approximate and not to use it as definitive health advice.
Allergy Information
Please check ingredients for potential allergens and consult a health professional if in doubt.



Leave a Comment