


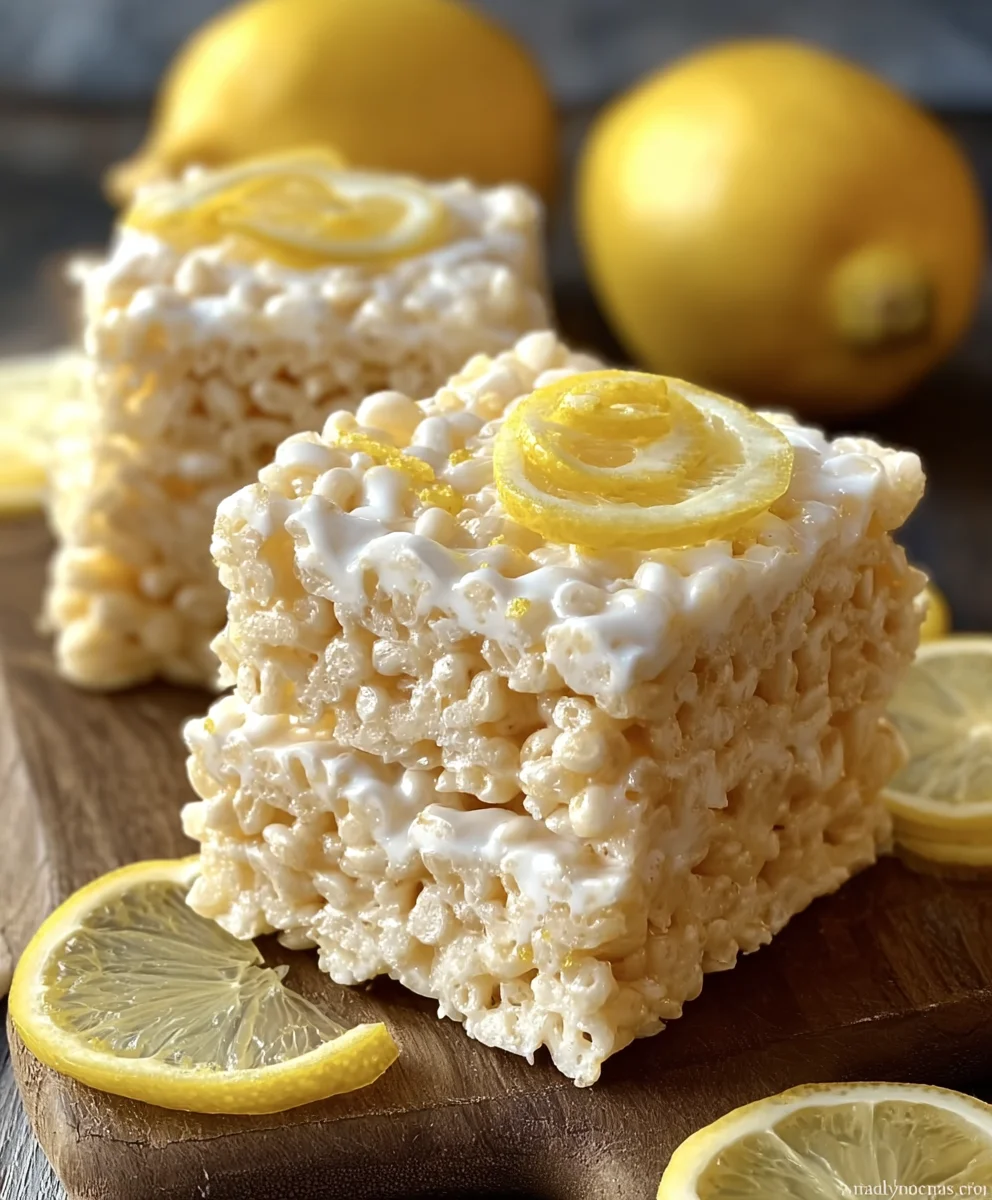
Lemon Krispie Treats are about to redefine your understanding of a classic! Forget the usual sugary sweetness; we’re infusing this beloved childhood staple with a bright, zesty tang that will awaken your taste buds. Have you ever craved a nostalgic bite that also feels sophisticated and wonderfully refreshing? That’s precisely the magic we’re conjuring today. These aren’t just any Rice Krispie treats; they are a sunbeam in dessert form, perfect for a cheerful afternoon snack, a delightful addition to a picnic, or even a unique dessert for your next gathering. The secret to their irresistible allure lies in the perfect balance of crunchy cereal, gooey marshmallow, and the vibrant, unmistakable zest of fresh lemons. Prepare to fall in love all over again with these delightful Lemon Krispie Treats.

Ingredients:
- 5 tablespoons butter, melted
- 1 (8 ounce) package Lemon Meringue Marshmallows
- 4 cups crispy cereal
- 1½ cups white chocolate chips, divided
- Yellow Jimmies/Sprinkles (optional)
Preparing Your Workspace and Ingredients
To begin extract crafting these delightful Lemon Krispie Treats, the first crucial step is to prepare your baking pan. You’ll need a 9×13 inch baking pan. Generously grease this pan with cooking spray or butter. This step is absolutely vital to prevent the sticky Krispie Treat mixture from adhering to the pan, ensuring that your treats can be easily removed once cooled. Alternatively, you can line the pan with parchment paper, leaving an overhang on the sides to help you lift the entire slab out cleanly. Once your pan is ready, melt the butter. Place the 5 tablespoons of butter in a large microwave-safe bowl or a saucepan over low heat on the stovetop. Melt it until it’s completely liquid and smooth. Be careful not to let it brown; we just want it to be fully melted and ready to work with.
Melting the Lemon Meringue Marshmallows
Now comes the star ingredient for our zesty flavor: the Lemon Meringue Marshmallows. In the same large bowl (or saucepan if you used the stovetop) containing the melted butter, add the entire 8-ounce package of Lemon Meringue Marshmallows. Return the bowl to the microwave and heat in 30-second intervals, stirring well after each interval, until the marshmallows are mostly melted and smooth. Alternatively, if you used a saucepan, keep the heat on low and stir continuously until the marshmallows are fully melted and have a smooth, glossy consistency. It’s important to stir frequently to prevent scorching, as marshmallows can burn quickly. The lemon meringue variety will impart a wonderfully subtle tartness and a delightful fruity aroma as they melt, setting the stage for our unique twist on the classic treat.
Combining the Cereal and Marshmallow Mixture
Once your marshmallows are perfectly melted and smooth, it’s time to introduce the crispy cereal. Add the 4 cups of crispy cereal directly into the bowl with the melted marshmallow and butter mixture. Using a sturdy spatula or a large spoon, gently but thoroughly fold the cereal into the marshmallow mixture. Ensure that every single piece of cereal is coated. This step requires a bit of elbow grease, as the mixture will be quite sticky. The goal is to distribute the marshmallow coating evenly. Work relatively quickly, as the marshmallowsgin extractll begin to set as they cool. Taking your time and ensuring complete coating will result in well-bound, chewy, and crispy treats. If you find it very difficult to stir, you can lightly grease your hands or the spatula with a little extra butter or cooking spray to help manage the stickiness.
Pressing the Krispie Treats into the Pan
With the cereal thoroughly coated, it’s time to transfer the mixture to your prepared baking pan. Carefully spoon the sticky mixture into the greased 9×13 inch pan. Do not pack it down aggressively at this stage; just spread it out as evenly as possible. To press the mixture firmly and evenly into the pan, you can use a few techniques. Lightly greasing your hands with butter or cooking spray is a popular method. Another effective trick is to use the bottom of a greased glass or a piece of parchment paper placed over the mixture and gently press down. The key is to create a compact, even layer. Over-packing can make the treats too dense and hard, while under-packing will result in crum extractbly treats. Aim for a layer that is about ¾ to 1 inch thick. Ensure the top surface is as smooth as possible for an aesthetically pleasing finish, especially if you plan to add drizzles later.
Cooling and Preparing for White Chocolate Dipping
Allow the pressed Krispie Treats to cool completely in the pan. This usually takes at least 1 hour at room temperature. Patience is key here; cutting into them while still warm will result in a messy, gooey disaster. Once they are fully cooled and firm, you can carefully lift the entire slab out of the pan using the parchment paper overhang, or if you greased the pan directly, gently invert it onto a cutting board. You can then cut the slab into your desired shapes – squares, rectangles, or even use cookie cutters for fun shapes. While the Krispie Treats are cooling, you can prepare for the white chocolate element. In a microwave-safe bowl, place 1 cup of the white chocolate chips. Microwave in 30-second intervals, stirring thoroughly after each interval, until the chips are completely melted and smooth. Be cautious not to overheat, as white chocolate can seize if it gets too hot. You want a smooth, dippable consistency.
Dipping, Drizzling, and Decorating Your Lemon Krispie Treats
Once the white chocolate is melted and the Krispie Treats are cut, it’s time for the finishing touches. You can dip the bottom half of each individual Krispie Treat into the melted white chocolate, or use a spoon to generously drizzle the melted chocolate over the tops. If you are dipping, place the chocolate-covered treats onto a parchment-lined baking sheet to set. If drizzling, apply the chocolate in a zigzag pattern. For an extra burst of color and fun, immediately after drizzling or dipping, sprinkle the Yellow Jimmies/Sprinkles (if using) over the still-wet white chocolate. The sprinkles will adhere beautifully. Allow the white chocolate to set completely. You can speed this process up by placing the baking sheet in the refrigerator for about 15-20 minutes. Once the white chocolate is firm, your Lemon Krispie Treats are ready to be enjoyed! These are best served at room temperature.
Conclusion:
And there you have it – a delightful batch of Lemon Krispie Treats! We’ve walked through creating these vibrant and zesty squares, perfect for a sunny afternoon treat or a cheerful addition to any gathering. The simple yet satisfying combination of crispy cereal, gooey marshmallows, and a bright burst of lemon makes these a universally loved confection. Whether you’re a seasoned baker or just starting out, this recipe is wonderfully approachable and yields impressive results.
For serving suggestions, these Lemon Krispie Treats are fantastic on their own, but they also pair beautifully with a cup of tea or a glass of cold milk. Consider cutting them into fun shapes for parties or drizzling them with a simple lemon glaze for an extra touch of elegance. Don’t be afraid to get creative with variations! Adding a sprinkle of poppy seeds can enhance the visual appeal and add a subtle nutty flavor. A touch of yellow food coloring can amplify the sunny hue, or for a more complex flavor profile, try incorporating a hint of finely grated lemon zest directly into the marshmallow mixture.
I truly hope you enjoy making and, more importantly, savoring these Lemon Krispie Treats. They are a wonderful reminder that deliciousness doesn’t have to be complicated. So gather your ingredients, get ready for some sticky fun, and enjoy the bright, tangy goodness!
Frequently Asked Questions:
Q1: Can I make Lemon Krispie Treats ahead of time?
Absolutely! Lemon Krispie Treats are best made a few hours to a day in advance. This allows them to set properly and develop their signature chewy texture. Store them in an airtight container at room temperature. They will stay fresh for up to 3 days.
Q2: My Krispie Treats are too hard. What went wrong?
If your Lemon Krispie Treats turned out too hard, it’s likely because the marshmallow mixture was cooked for too long after melting. It’s important to remove the heat as soon as the marshmallows are fully melted and combined with the butter and lemon. Overcooking can cause the sugar to crystallize too quickly, resulting in a hard texture.
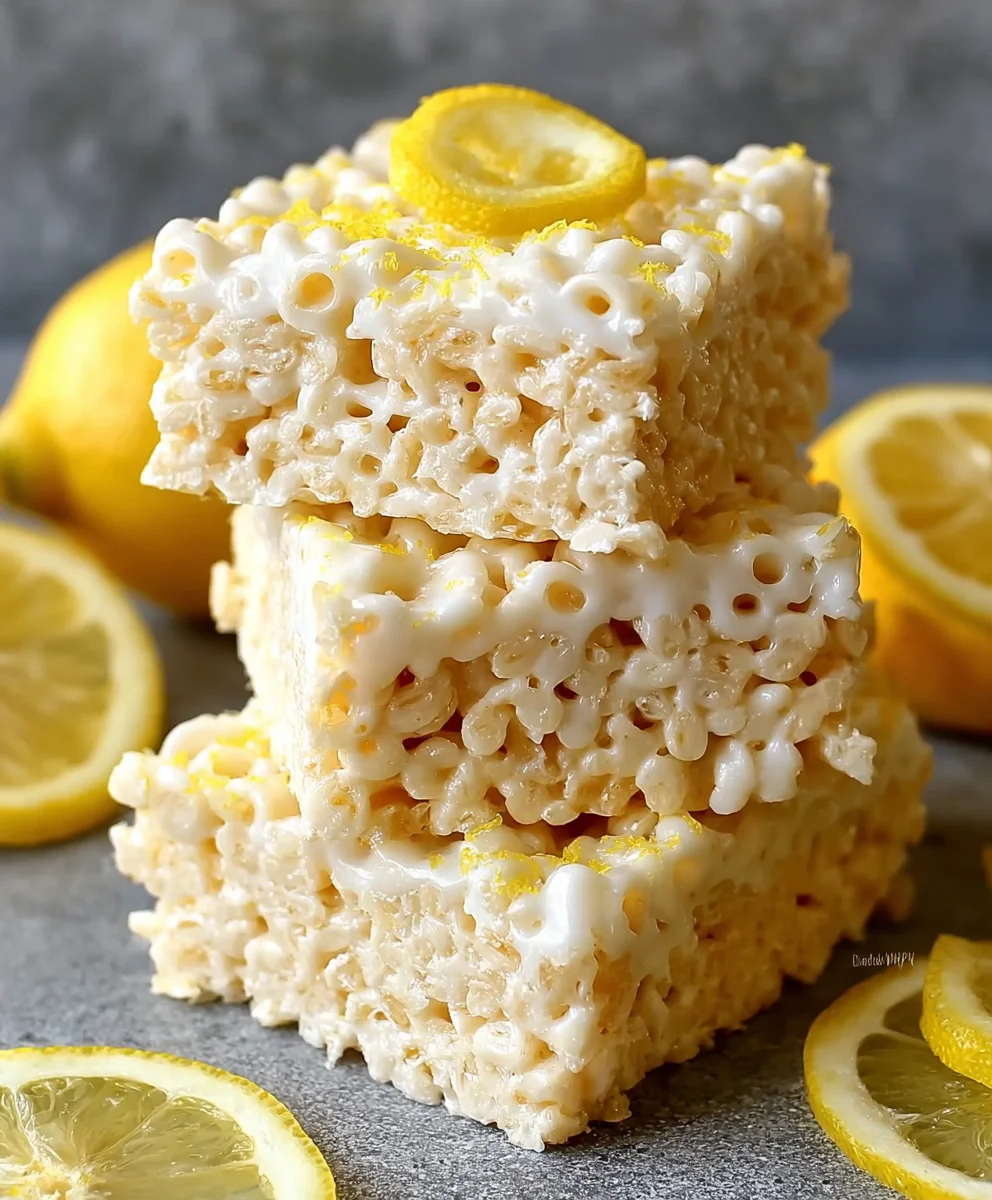
Zesty Lemon Krispie Treats-Quick & Easy Recipe
A delightful twist on a classic, these Zesty Lemon Krispie Treats are quick, easy to make, and packed with bright citrus flavor.
Ingredients
-
5 tablespoons butter, melted
-
1 (8 ounce) package Lemon Meringue Marshmallows
-
4 cups crispy cereal
-
1 cup white chocolate chips, for melting
-
0.5 cup white chocolate chips, for drizzling
-
Yellow Jimmies/Sprinkles (optional)
Instructions
-
Step 1
Prepare a 9×13 inch baking pan by generously greasing it with cooking spray or butter. Melt 5 tablespoons of butter in a large microwave-safe bowl or saucepan. -
Step 2
Add the 8-ounce package of Lemon Meringue Marshmallows to the bowl with the melted butter. Heat in 30-second intervals in the microwave, stirring after each, until mostly melted and smooth. Alternatively, melt on low heat on the stovetop, stirring continuously. -
Step 3
Once marshmallows are melted and smooth, add 4 cups of crispy cereal. Gently but thoroughly fold the cereal into the marshmallow mixture until every piece is coated. Work quickly as the mixture will begin to set. -
Step 4
Spoon the sticky mixture into the prepared baking pan and spread evenly. Lightly grease your hands or use the bottom of a greased glass or parchment paper to press the mixture firmly and evenly into a compact layer, about ¾ to 1 inch thick. -
Step 5
Allow the Krispie Treats to cool completely in the pan for at least 1 hour at room temperature. Once cooled and firm, lift the slab out and cut into desired shapes. -
Step 6
Melt 1 cup of white chocolate chips in a microwave-safe bowl in 30-second intervals, stirring until smooth. Reserve the remaining 0.5 cup for drizzling. -
Step 7
Dip the bottom half of each Krispie Treat into the melted white chocolate, or drizzle generously over the tops. Place on a parchment-lined baking sheet. Immediately sprinkle with Yellow Jimmies/Sprinkles if desired. Allow the chocolate to set completely, refrigerating for 15-20 minutes to speed up the process.
Important Information
Nutrition Facts (Per Serving)
It is important to consider this information as approximate and not to use it as definitive health advice.
Allergy Information
Please check ingredients for potential allergens and consult a health professional if in doubt.

Leave a Comment