

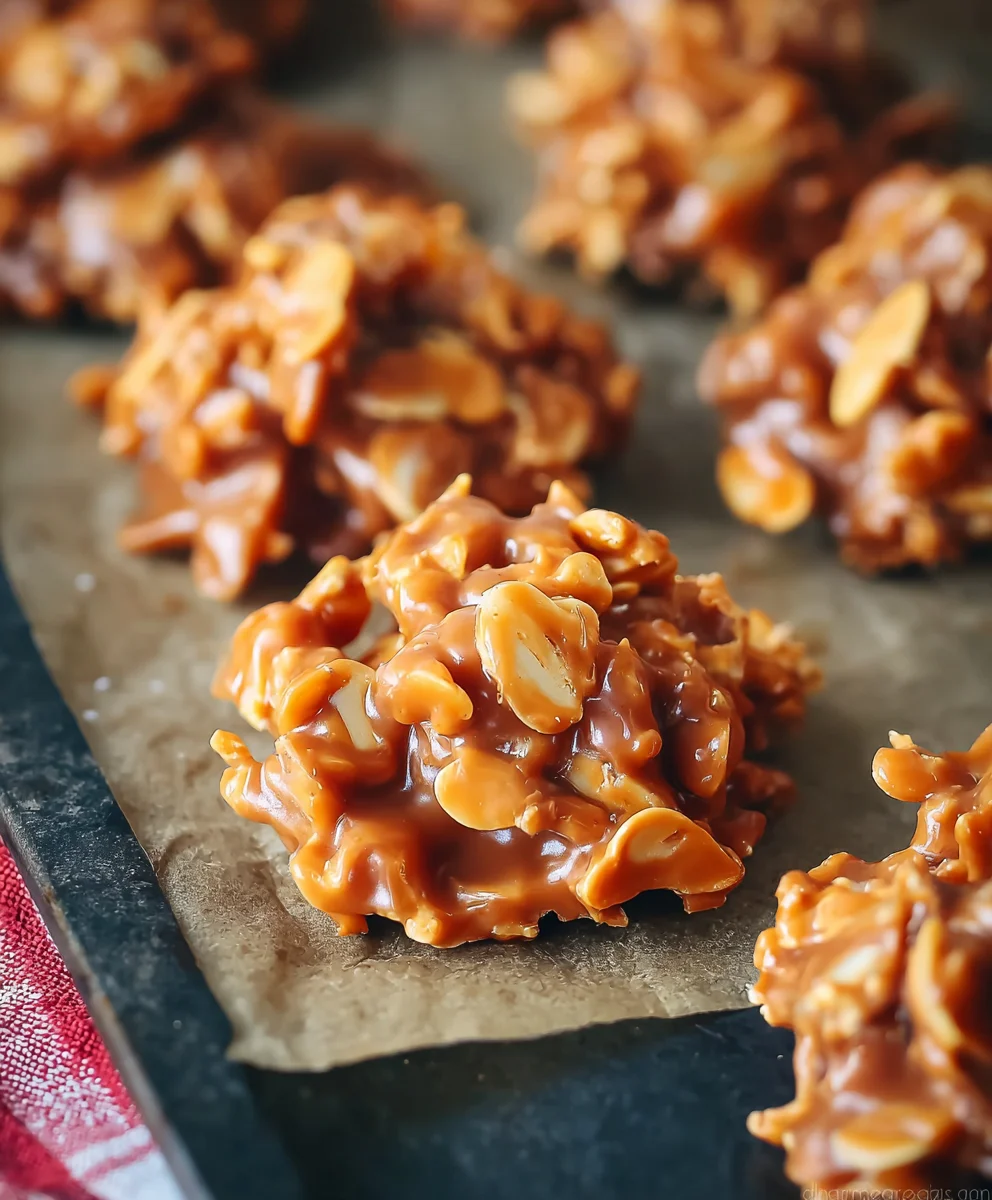
Caramel Clusters are more than just a sweet treat; they’re a delightful explosion of textures and flavors that has captured hearts for generations. Imagin extracte the satisfying crunch of toasted nuts, enveloped in a warm, gooey caramel, all enrobed in rich, decadent chocolate. It’s this perfect harmony of contrasting elements that makes Caramel Clusters so utterly irresistible. People adore them for their comforting familiarity, evoking childhood memories and cozy moments, while also offering a sophisticated indulgence perfect for sharing (or not!). What truly sets this particular recipe apart is its surprisingly simple preparation, allowing anyone to achieve that homemade magic. Forget those store-bought versions; we’re about to unlock the secrets to creating truly exceptional Caramel Clusters right in your own kitchen, ensuring every bite is a moment of pure bliss.

Ingredients:
- 1/4 cup milk
- 1/2 cup unsalted butter
- 14 oz bag (about 50) Kraft caramels, wrappers removed
- 5-6 cups cornflakes
Melting the Caramels
First, we need to get our caramel base nice and smooth. Grab a large, heavy-bottomed saucepan. A good quality saucepan will help distribute the heat evenly, preventing scorching, which is crucial when working with delicate caramel. Add the 1/2 cup of unsalted butter to the saucepan. We’re using unsalted butter so we have complete control over the saltiness of our finished Caramel Clusters. Let the butter melt over low heat. We want it to melt gently, not brown or sizzle aggressively. Once the butter is completely melted, add the 1/4 cup of milk. The milk helps to thin out the caramel slightly and contributes to its creamy texture. Stir these together until they are well combined.
Now it’s time for the star of the show: the Kraft caramels. Make sure you’ve removed all the wrappers from your 14 oz bag of caramels. This is probably the most time-consuming part of the preparation, so I like to do it while the butter and milk are warming up. Add the unwrapped caramels to the saucepan with the melted butter and milk. Continue to stir constantly over low heat. You’ll notice the caramels will start to soften and then melt. Be patient here; the key is low and slow. If the heat is too high, the caramel can burn, giving your clusters an unpleasant bitter taste. Keep stirring until the caramel mixture is completely smooth and no lumps remain. It should have a glossy, flowing consistency. Once smooth, remove the saucepan from the heat immediately to prevent any further cooking or thickening.
Incorporating the Cornflakes
With our smooth, luscious caramel base ready, it’s time to add the crunch that defines our Caramel Clusters. Get a very large mixing bowl. I mean really large – you need ample space to toss everything without making a mess. Measure out about 5 cups of cornflakes and add them to the large mixing bowl. It’s important to have your cornflakes ready to go before the caramel is off the heat, as the caramel will start to thicken as it cools. We want to work quickly to ensure the caramel coats the cornflakes evenly.
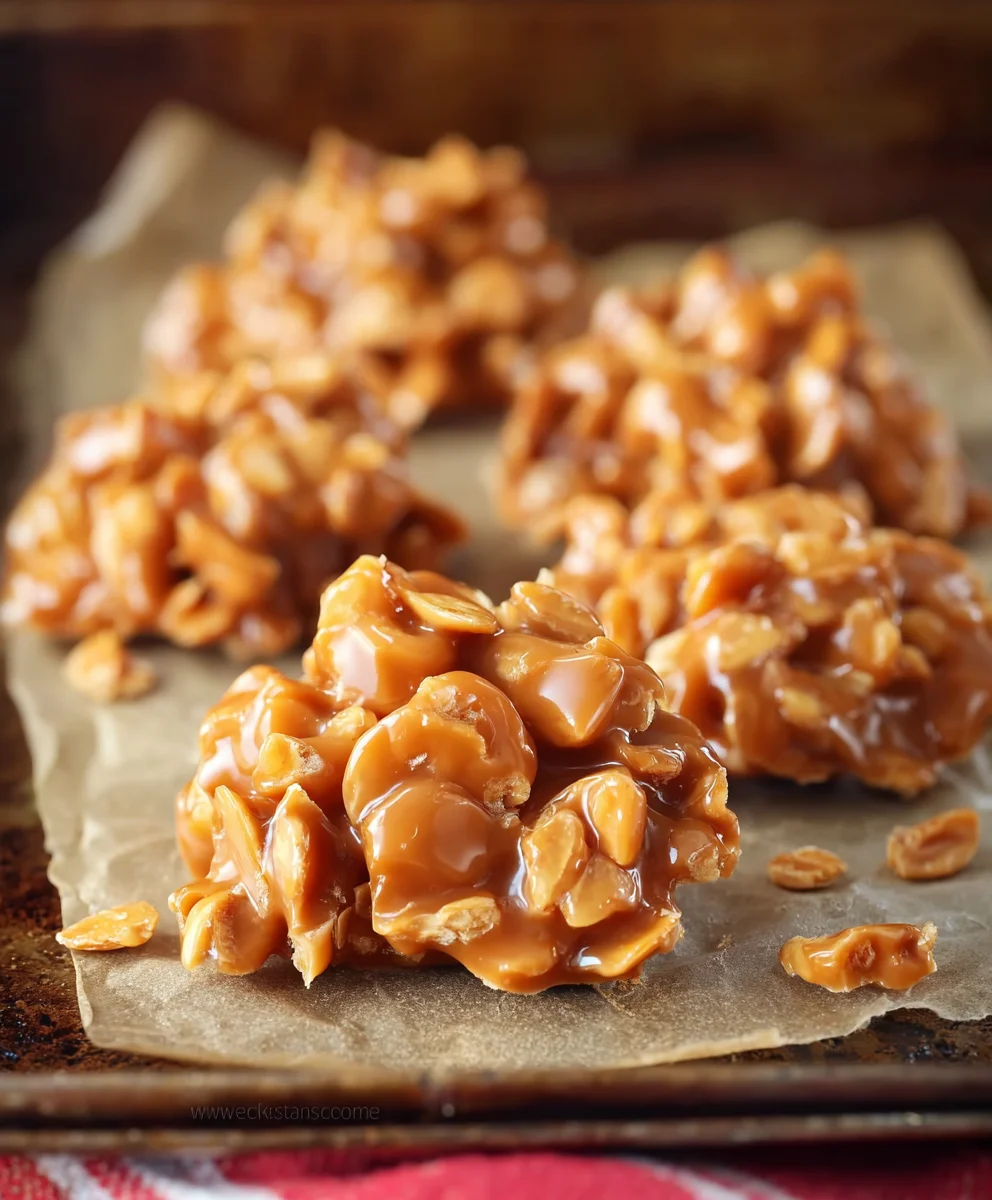
Now, carefully pour the hot, melted caramel mixture over the cornflakes in the large bowl. You might be tempted to pour it all at once, but I find it helps to pour about half of the caramel over the cornflakes and then gently start to fold it in with a large spatula or wooden spoon. This initial step helps to coat a portion of the cornflakes and prevents a large clump of them from sticking together at the bottom. Once you’ve mixed in about half the caramel and a good portion of the cornflakes are coated, pour the remaining caramel over the top. Continue to gently fold and mix. The goal is to coat as many cornflakes as possible with the caramel. Don’t worry if a few remain uncoated; this adds to the rustic charm of homemade Caramel Clusters. You’re looking for a mixture where the cornflakes are well-distributed and glistening with caramel.
Shaping the Clusters
This is where our Caramel Clusters start to take their distinctive form. You’ll need parchment paper or wax paper for this stage. Line several baking sheets with parchment paper or wax paper. This step is essential to prevent the sticky caramel from adhering to your baking sheets, making cleanup a breeze and ensuring your clusters don’t break apart when you remove them. You can also lightly grease the parchment paper with a little cooking spray or butter if you’re concerned about sticking, though usually, parchment paper is sufficient.
Using two spoons, or a small cookie scoop, scoop up portions of the caramel-coated cornflake mixture. Aim for bite-sized clusters, about the size of a large walnut or a small golf ball. Don’t overthink the shape; they are meant to be rustic. As you scoop, gently drop the mounds onto the prepared baking sheets. Try to leave a little space between each cluster, as they might spread slightly as they cool. Continue this process until all the caramel-coated cornflakes have been scooped and placed on the baking sheets. If the mixture becomes too stiff to scoop easily, you can briefly warm the remaining caramel in the saucepan over very low heat for a few seconds, stirring constantly, to loosen it up again. This is a good technique if you find yourself working with a larger batch or if your kitchen is on the cooler side.
Cooling and Setting
Now comes the waiting game! Once all your Caramel Clusters are formed and on the baking sheets, it’s time to let them cool and set completely. Leave the baking sheets at room temperature. This process can take anywhere from 1 to 2 hours, depending on the temperature and humidity of your kitchen. Resist the urge to touch them or move them before they are fully set; otherwise, you risk deforming their shapes or ending up with sticky fingers. You’ll know they’re ready when they are firm to the touch and no longer feel soft or gooey in the center.
If you’re in a hurry or live in a humid climate where cooling can take longer, you can place the baking sheets in the refrigerator for about 30-45 minutes to speed up the setting process. However, be mindful that refrigeration can sometimes make the caramel a little harder than if it sets at room temperature. Once the Caramel Clusters are completely cooled and firm, you can gently peel them off the parchment paper. They should lift off cleanly. You can then store them in an airtight container at room temperature. If you plan to store them for an extended period, or if your kitchen tends to be warm, consider placing a layer of parchment paper between each layer of clusters in the container to prevent them from sticking together.
Conclusion:
I hope you’ve enjoyed learning how to make these absolutely delightful Caramel Clusters! This recipe is a wonderful way to satisfy your sweet tooth and impress friends and family with minimal effort. The simple combination of melted chocolate, crunchy nuts, and sweet caramel creates a truly irresistible treat that’s both elegant and comforting. Don’t be afraid to experiment with the flavors and textures to make them your own! I encourage you to try this recipe for your next gathering, holiday, or just as a special afternoon pick-me-up. The joy of creating these delicious morsels is truly rewarding.
For serving, these Caramel Clusters are perfect on their own as a little indulgence. They also make fantastic additions to dessert platters, cookie boxes, or even as a sweet garnish for ice cream or yogurt.
When it comes to variations, the possibilities are endless! You can swap out the type of nuts for pecans, walnuts, or even a mix. Try adding a pinch of sea salt on top for a salted caramel effect, or a dash of cinnamon for a warmer flavor profile. Different types of chocolate, like dark or white chocolate, can also create entirely new flavor dimensions.
Frequently Asked Questions:
Can I make Caramel Clusters ahead of time?
Absolutely! Caramel Clusters store very well in an airtight container at room temperature for up to a week. If your kitchen tends to be warm, you might want to store them in the refrigerator to prevent the chocolate from softening too much.
What is the best way to store leftover Caramel Clusters?
The best way to store any leftover Caramel Clusters is in a single layer in an airtight container. This prevents them from sticking together. Placing parchment paper between layers can also be helpful if you’re stacking them.
Are there any nut-free variations for Caramel Clusters?
Yes, you can definitely make nut-free Caramel Clusters! Consider using toasted pumpkin seeds (pepitas), sunflower seeds, or even crispy rice cereal for added crunch and texture in place of nuts.
Easy Caramel Clusters – Deliciously Simple Treat
A quick and easy recipe for homemade caramel clusters with a satisfying crunch.
Ingredients
-
1/4 cup milk
-
1/2 cup unsalted butter
-
14 oz bag Kraft caramels, wrappers removed
-
5 cups cornflakes
-
1/4 teaspoon salt (optional, for enhancing flavor)
Instructions
-
Step 1
Melt butter and milk together in a heavy-bottomed saucepan over low heat until smooth. Ensure butter is fully melted and milk is incorporated. -
Step 2
Add unwrapped Kraft caramels to the melted butter and milk. Stir constantly over low heat until the caramel mixture is completely smooth and flowing. -
Step 3
Remove caramel from heat. Pour about half the caramel over 5 cups of cornflakes in a very large mixing bowl. Gently fold to coat. -
Step 4
Pour the remaining caramel over the cornflakes and continue to gently fold until cornflakes are well-coated. Work quickly as the caramel will thicken. -
Step 5
Line baking sheets with parchment paper. Using two spoons, scoop portions of the caramel-coated cornflake mixture and drop onto the prepared baking sheets, forming rustic clusters. -
Step 6
Allow the Caramel Clusters to cool and set completely at room temperature for 1-2 hours, or until firm to the touch. Refrigerate for 30-45 minutes to speed up setting if needed.
Important Information
Nutrition Facts (Per Serving)
It is important to consider this information as approximate and not to use it as definitive health advice.
Allergy Information
Please check ingredients for potential allergens and consult a health professional if in doubt.
Leave a Comment