


Brown Butter Brookies are an absolute game-changer when it comes to decadent desserts. If you’ve ever found yourself torn between the rich chegrape juicess of a brownie and the comforting sweetness of a blondie, prepare to have your dessert dreams fulfilled. These incredible creations are the ultimate mashup, offering the best of both worlds in every single bite. The magic truly begin extracts with the brown butter – that nutty, toasty, impossibly delicious foundation that elevates both the brownie and blondie layers to a whole new level of deliciousness. We love brown butter brookies because they deliver an unparalleled depth of flavor and a delightful contrast in textures, making each mouthful an exciting adventure.
What makes these brown butter brookies so special?
It’s the meticulous balance between the fudgy brownie and the soft, chewy blondie, all kissed by the caramelized notes of browned butter. Forget settling for just one favorite; with brown butter brookies, you get to indulge in both. Get ready to bake up a batch of pure bliss that will have everyone beggin extractg for the recipe!

Brown Butter Brookies
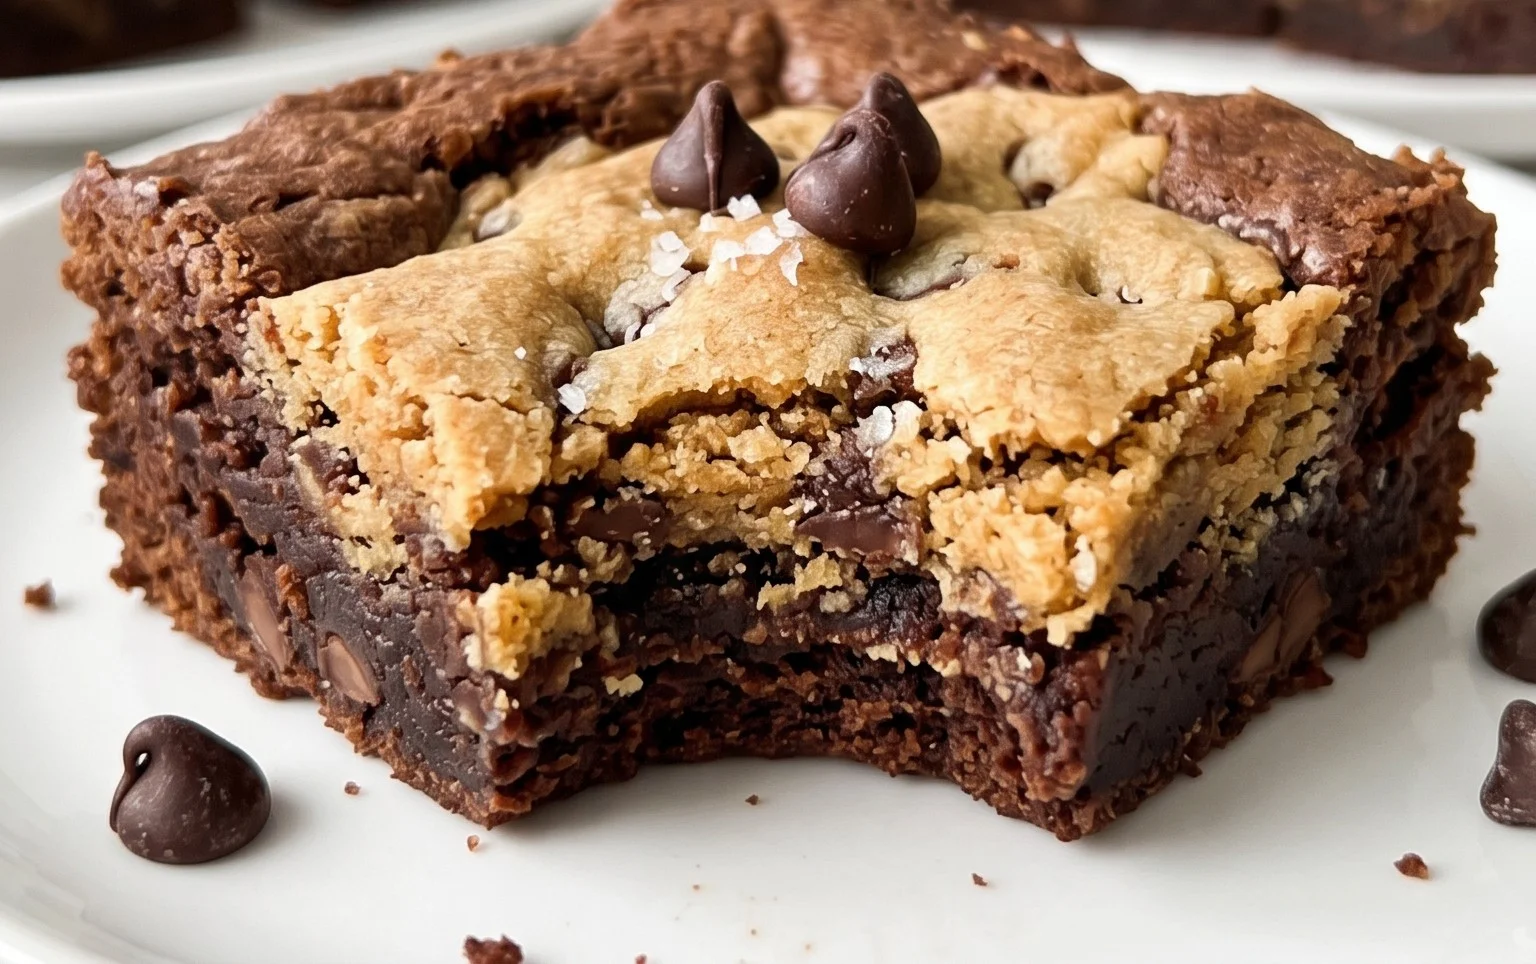
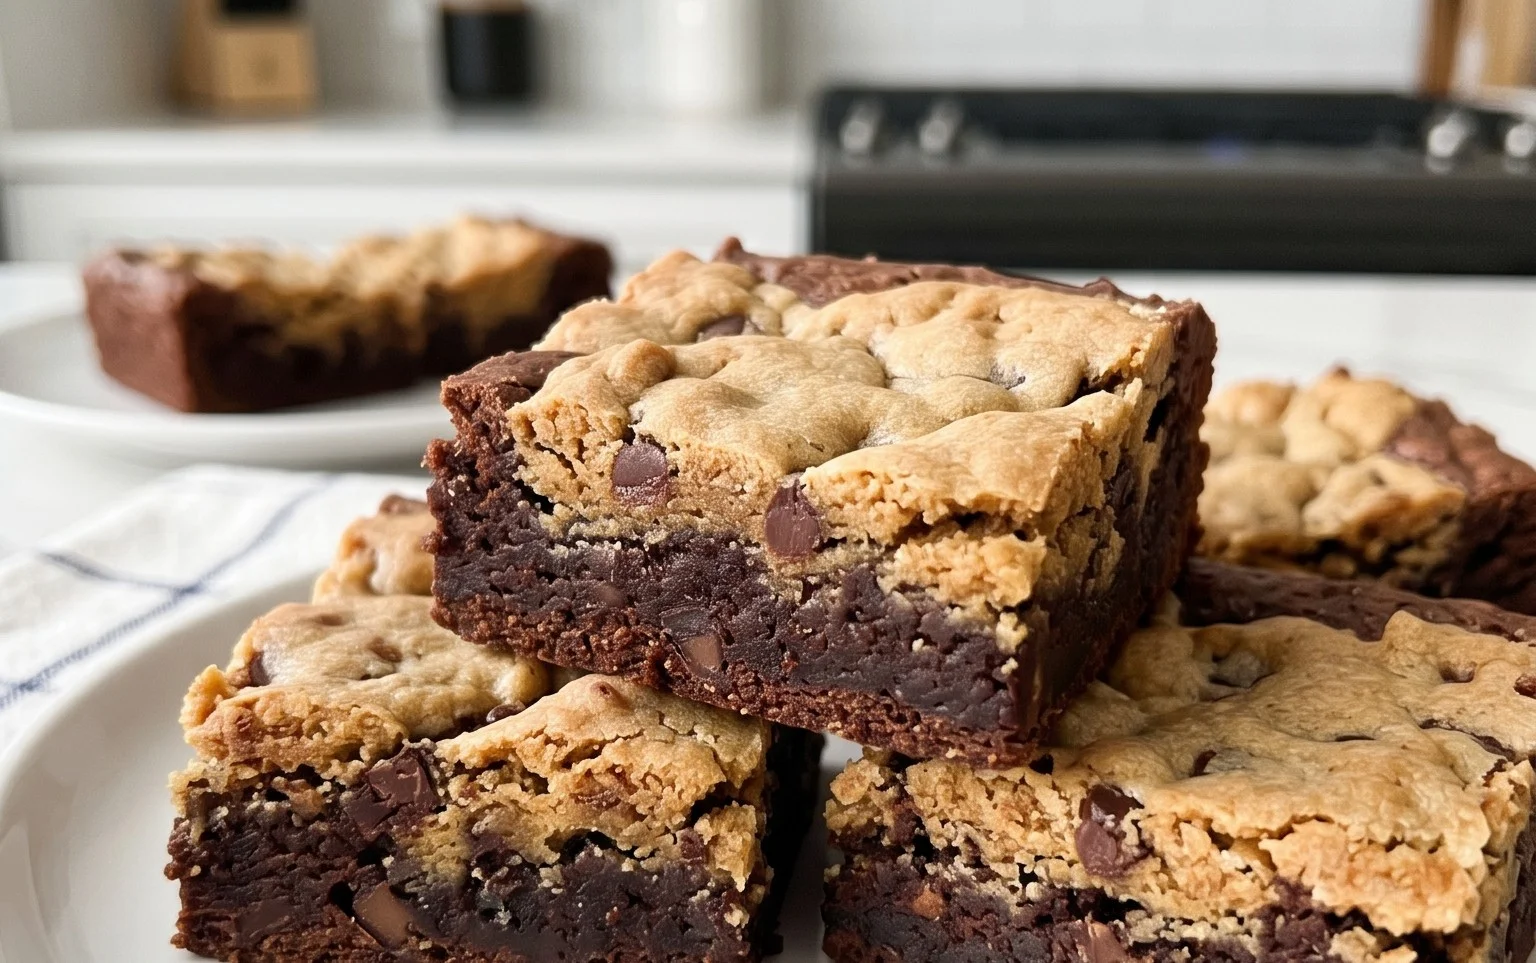
Get ready for a truly decadent dessert experience. We’re talking about the ultimate mashup: the glorious brownie meets the chewy chocolate chip cookie, all elevated by the magic of brown butter. These Brown Butter Brookies are a symphony of textures and flavors, with a rich, fudgy brownie base swirled with ribbons of nutty brown butter cookie dough. They’re surprisingly straightforward to make, and the payoff is immense. Every bite offers a delightful contrast – the dense, almost truffle-like brownie against the slightly crisp edges and soft, chewy center of the cookie. The brown butter adds a depth of flavor that you just can’t get with regular butter, bringin extractg out warm, caramel notes that perfectly complement the chocolate. This recipe is perfect for sharing (or not!), and it’s guaranteed to impress. Let’s dive into creating these showstopping treats!
Ingredients:
Creating the Magic: Step-by-Step Instructions
Step 1: Crafting the Brown Butter for the Cookie Dough
The first step to achieving those irresistible nutty notes in our cookie layer is to brown the butter. Take your 85g of unsalted butter and place it in a light-colored saucepan over medium heat. We want to see the magic happen, so a light pan is best! Swirl the butter occasionally as it melts. You’ll notice it will foam up, and then tiny brown specks will start to appear at the bottom of the pan. Keep watching and swirling closely, because the difference between perfectly browned butter and burnt butter is mere seconds. The butter will smell wonderfully toasty and nutty – that’s your cue! Once it reaches a rich amber color, immediately remove it from the heat and pour it into a heatproof bowl to stop the cooking process. Let this beautifully browned butter cool slightly while we get started on the brownie base.
Step 2: Assembling the Fudgy Brownie Base
Now, let’s get our brownie base ready. In a heatproof bowl set over a pot of simmering water (a double boiler), melt your 180g of unsalted butter and the 320g of dark chocolate. Stir gently until everything is smooth and glossy. Remove from the heat and set aside to cool slightly. In a separate large bowl, whisk together the 180g granulated sugar, 80g brown sugar, and 2g salt. Crack in your 4 eggs, one at a time, whisking well after each addition until the mixture is smooth and slightly thickened. Gradually pour in the slightly cooled chocolate and butter mixture, whisking until it’s fully incorporated and you have a rich, glossy batter. Next, gently fold in the 120g all-purpose flour and 50g cocoa powder until just combined. Be careful not to overmix at this stage; overmixing can lead to tough brownies. If you’re using them, now’s the time to fold in your optional 120g chocolate chunks for extra gooeyness.
Step 3: Preparing the Brown Butter Cookie Dough
With our brown butter cooling, we can now prepare the cookie dough. In a medium bowl, combine the slightly cooled brown butter with the 80g brown sugar and 40g granulated sugar. Whisk until well combined. Add the 1g salt and the 1 egg, beating until the mixture is smooth and creamy. Gradually stir in the 85g all-purpose flour until just combined. You’ll have a thick, delicious cookie dough. Don’t be tempted to eat it all just yet! This dough will provide that delightful chewy contrast to the fudgy brownie.
Step 4: Layering and Swirling the Brookie Batter
Now for the fun part – combining our two amazing batters! Lightly grease and line a 9×13 inch baking pan with parchment paper, leaving an overhang on the sides to help you lift the finished brookies out. Pour the brownie batter into the prepared pan and spread it evenly. Now, dollop spoonfuls of the brown butter cookie dough randomly over the top of the brownie batter. Once all the cookie dough is placed, take a knife or a skewer and gently swirl the cookie dough into the brownie batter. Don’t over-swirl; you want distinct ribbons of both textures and flavors. Aim for elegant marbling rather than a uniform mix. This swirling technique is key to achieving those beautiful layers and pockets of chewy cookie goodness within the fudgy brownie.
Step 5: Baking and Cooling for Perfection
Preheat your oven to 350°F (175°C). Bake the brookies for 30-35 minutes, or until the edges are set and a toothpick inserted into the center comes out with moist crum extractbs attached (not wet batter). The cookie dough portions should be golden brown and look baked. It’s important not to overbake, as this will dry out both the brownie and cookie layers. Once baked, let the brookies cool completely in the pan on a wire rack. This cooling period is crucial for them to set properly and for the flavors to meld. Once cooled, use the parchment paper overhang to lift the entire slab out of the pan. Cut into squares and prepare yourself for brownie and cookie bliss! These are best enjoyed at room temperature or slightly warmed.
Conclusion:
So there you have it – the ultimate guide to creating mouthwatering Brown Butter Brookies! This recipe is a true showstopper because it masterfully combines the rich, nutty depth of browned butter with the decadent chegrape juicess of a brownie and the delightful crisp of a chocolate chip cookie. It’s truly the best of both worlds in every single bite. I can’t wait for you to experience this delightful fusion!
These brookies are fantastic served warm, perhaps with a scoop of vanilla bean ice cream for an extra indulgence. They also make for a wonderfully portable treat to share at potlucks or picnics. Don’t be afraid to get creative with variations! Consider adding a swirl of caramel, a sprinkle of sea salt on top before baking, or even incorporating some chopped nuts like pecans or walnuts into either the brownie or cookie layer. The possibilities are endless, and I wholeheartedly encourage you to give these Brown Butter Brookies a try. I’m confident they’ll become a new favorite in your baking repertoire.
Frequently Asked Questions:
Can I make brown butter ahead of time?
Absolutely! Brown butter can be made a day or two in advance and stored in an airtight container in the refrigerator. Just be sure to let it come back to room temperature or gently warm it before incorporating it into your batter, as you want it to be liquid but not hot.
Why are my brookies not fudgy enough?
Several factors can contribute to this. Ensure you’re not overbaking them – a slightly underbaked center is key to fudgin extractess. Also, using good quality chocolate and not overmixing the batter can help. The ratio of flour to fat and sugar also plays a significant role in achieving that desired chewy, fudgy texture.
What’s the best way to store leftover brookies?
Store your cooled brookies in an airtight container at room temperature for up to 3-4 days. For longer storage, you can freeze them. I find wrapping individual brookies tightly in plastic wrap and then placing them in a freezer-safe bag or container works wonderfully. They’re delicious straight from the freezer or thawed at room temperature.
Brown Butter Brookies
Decadent brookies featuring a rich brown butter blondie layer swirled with a fudgy brownie base.
Ingredients
-
180 g butter
-
320 g chocolate (for melting – 60% chocolate bars)
-
120 g all purpose flour
-
50 g cocoa powder
-
180 g Granulated Sugar
-
80 g brown sugar
-
2 g salt
-
4 eggs
-
120 g chocolate chunks (optional – chopped chocolate bar, chocolate chips)
-
85 g all-purpose flour
-
80 g butter
-
80 g brown sugar
-
40 g granulated sugar
-
1 g salt
-
1 egg
Instructions
-
Step 1
For the brownie layer: Melt 180g butter in a saucepan over medium heat until golden brown and fragrant. Remove from heat. Stir in 320g chocolate until smooth. In a separate bowl, whisk together 180g granulated sugar, 80g brown sugar, and 2g salt. Beat in 4 eggs one at a time until well combined. Fold the chocolate mixture into the sugar mixture. Stir in 120g all-purpose flour and 50g cocoa powder until just combined. Mix in optional chocolate chunks. -
Step 2
For the blondie layer: In a medium bowl, melt 80g butter. Stir in 80g brown sugar, 40g granulated sugar, and 1g salt until combined. Beat in 1 egg until smooth. -
Step 3
Add 85g all-purpose flour to the blondie mixture and stir until just combined. Do not overmix. -
Step 4
Preheat oven to 175°C (350°F). Line a 9×13 inch baking pan with parchment paper, leaving an overhang. -
Step 5
Spread the brownie batter evenly into the prepared pan. Dollop spoonfuls of the blondie batter over the brownie batter. Swirl the batters together gently with a knife or toothpick. -
Step 6
Bake for 30-35 minutes, or until a toothpick inserted into the center comes out with moist crumbs (not wet batter). -
Step 7
Let cool completely in the pan on a wire rack before cutting into squares.
Important Information
Nutrition Facts (Per Serving)
It is important to consider this information as approximate and not to use it as definitive health advice.
Allergy Information
Please check ingredients for potential allergens and consult a health professional if in doubt.
Leave a Comment