

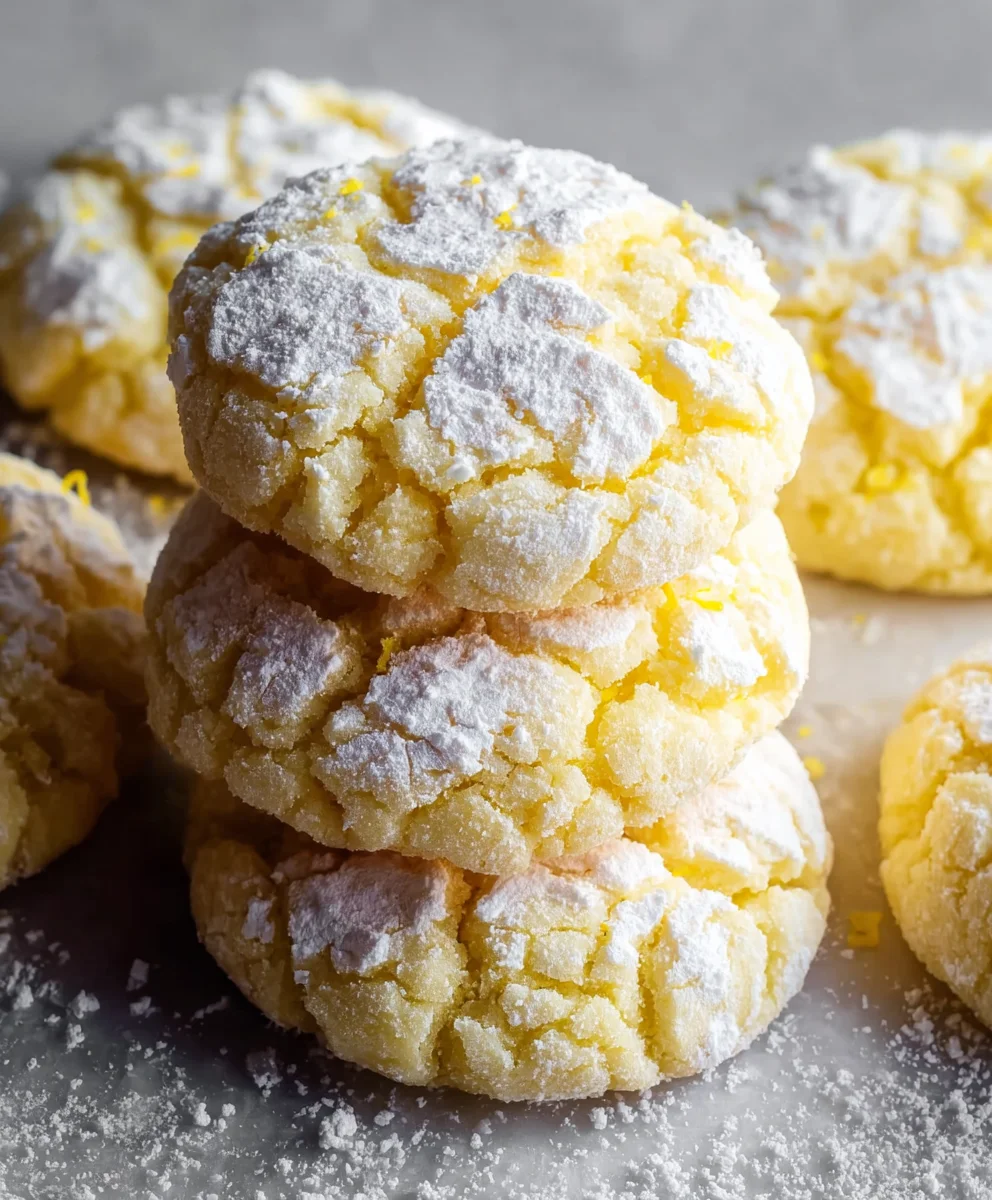
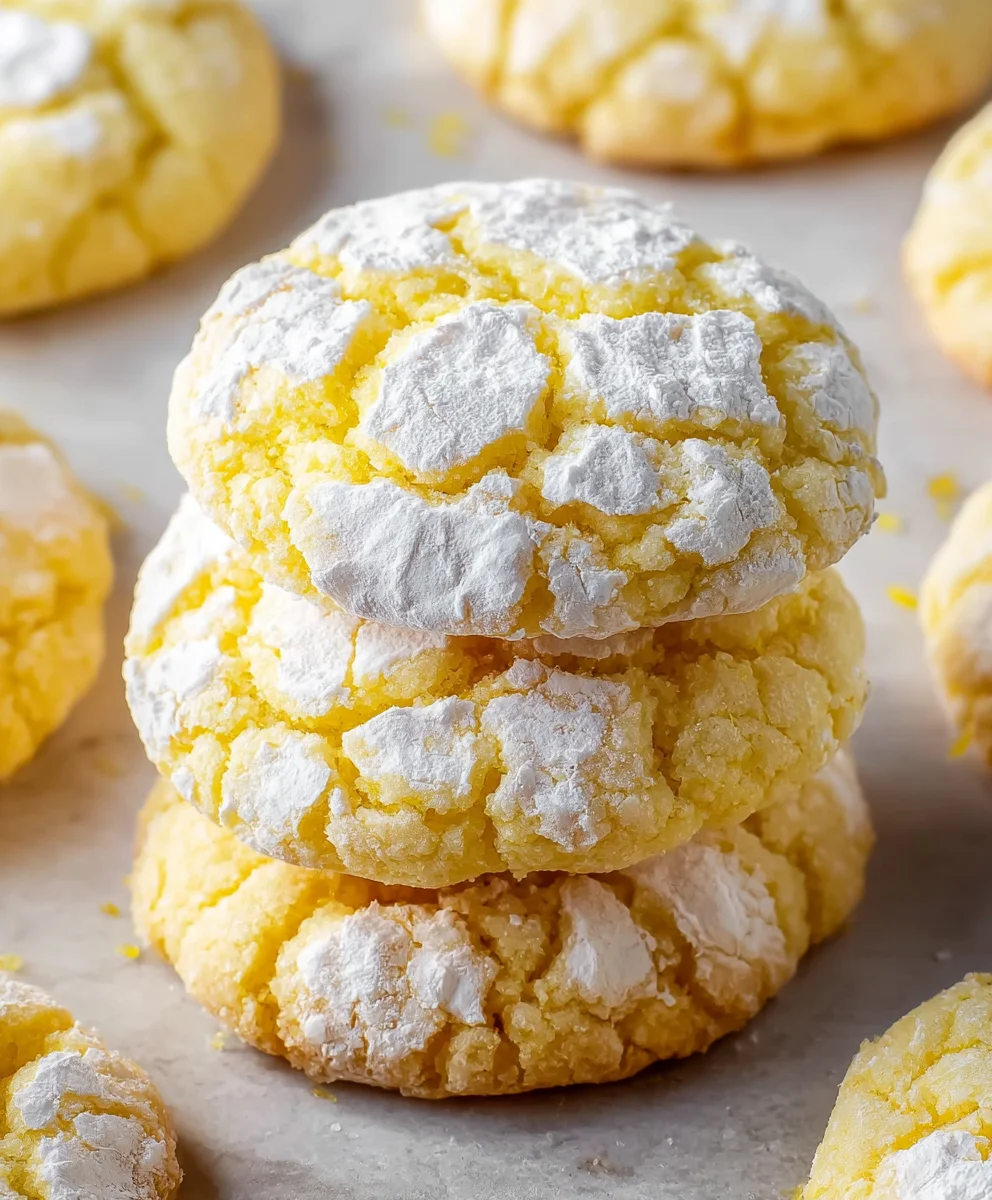
Lemon Crinkle Cookies are more than just a sweet treat; they’re a vibrant burst of sunshine in every bite, a playful dance of tart citrus and delicate sweetness that instantly lifts your non-alcoholic spirits. Have you ever bitten into a cookie and felt that perfect contrast of a slightly crisp exterior giving way to a wonderfully soft, chewy center, all dusted with a snowy veil of powdered sugar that crackles as you bite? That’s the magic of a truly exceptional Lemon Crinkle Cookie. It’s no wonder they’re a perennial favorite, appearing at cookie exchanges, birthday parties, and quiet afternoon tea sessions alike. What truly sets these apart is the harmonious balance of intense lemon flavor, achieved through both zest and juice, creating an unforgettable zesty punch that’s perfectly complemented by the classic crinkled appearance. Get ready to master the art of these delightful, tangy gems!

Ingredients:
- 7 tablespoons unsalted butter, melted and cooled
- ¾ cup plus 2 tablespoons (175g) granulated sugar
- 1 heaping tablespoon lemon zest (about 2 lemons)
- 1 teaspoon lemon extract
- ½ teaspoon vanilla extract
- 1 large egg plus 1 egg yolk, room temperature
- 2 tablespoons fresh lemon juice
- 2 cups (250g) all-purpose flour, spooned and leveled
- 1 teaspoon baking powder
- 1 teaspoon cornstarch
- ½ teaspoon salt
- ¼ cup (50g) granulated sugar
- ¾ cup (90g) powdered sugar, sifted
Preparing the Lemon Crinkle Cookie Dough
Mixing the Wet Ingredients
To begin extract crafting these delightful Lemon Crinkle Cookies, we’ll start by creating a flavorful base. In a medium-sized mixing bowl, combine the melted and cooled unsalted butter with the first portion of granulated sugar – that’s ¾ cup plus 2 tablespoons. Whisk these together vigorously until the mixture is smooth and well-combined. Next, we’ll introduce the star of our show: the lemon zest. Make sure you have at least one heaping tablespoon; this comes from about two medium-sized lemons. The zest releases those wonderfully aromatic oils that give our cookies their bright, citrusy punch. Follow this with the lemon extract and the vanilla extract. These extracts will amplify the lemon flavor and add a depth that makes these cookies truly irresistible. Give everything another good whisk to ensure all the essences are evenly distributed.
Incorporating Eggs and Lemon Juice
Now, it’s time to bring in the richness and moisture. Add the large egg and the egg yolk to the butter and sugar mixture. It’s important that these are at room temperature, as they emulsify better with the other ingredients, leading to a smoother, more consistent dough. Whisk them in until fully incorporated, making sure there are no streaks of egg visible. Following the eggs, we’ll add the fresh lemon juice. Using fresh juice is key for that authentic, bright lemon flavor. Whisk it in until the mixture is uniform. You’ll notice the mixture might look a little curdled at this stage due to the acidity of the lemon juice reacting with the fat, but don’t worry – this is perfectly normal and will resolve as we add the dry ingredients.
Combining Dry Ingredients and Forming the Dough
In a separate bowl, combine all of your dry ingredients. This includes the all-purpose flour, which should be spooned into your measuring cup and leveled to ensure accuracy. Adding too much flour can result in dry, crum extractbly cookies, so this step is crucial. To the flour, add the baking powder, cornstarch, and salt. The baking powder will provide lift, the cornstarch will contribute to a rum extractder crumb, and the salt will balance the sweetness and enhance the overall flavors. Whisk these dry ingredients together until they are thoroughly mixed. Gradually add the dry ingredients to the wet ingredients, mixing on a low speed or by hand with a spatula until just combined. Be careful not to overmix; overmixing can develop the gluten in the flour, leading to tougher cookies. Once a cohesive dough forms, it’s ready to chill.
Chilling and Rolling the Dough
Chilling the Dough for Optimal Texture
Before we can form our cookies, the dough needs a good chill. This is a vital step for Lemon Crinkle Cookies, as it firms up the butter, making the dough easier to handle and preventing the cookies from spreading too much during baking. Wrap the dough tightly in plastic wrap, flattening it into a disc to maximize surface area for faster chilling. Place the wrapped dough in the refrigerator for at least 1 hour, or preferably 2 hours. You can even prepare the dough a day in advance and chill it overnight. The longer the dough chills, the firmer it will become, resulting in perfectly shaped cookies with those signature crinkles.
Forming and Rolling the Cookie Balls
Once the dough has chilled and is firm enough to handle, it’s time to shape the cookies. Remove the dough from the refrigerator and let it sit at room temperature for about 10-15 minutes if it’s too hard to scoop. In a small, shallow dish, place the ¼ cup of granulated sugar. In another shallow dish, place the ¾ cup of sifted powdered sugar. Sifting the powdered sugar is important to prevent clumps and ensure a beautiful, snowy coating on your cookies. Roll the chilled dough into small balls, about 1 inch in diameter. A cookie scoop is very helpful here for uniform sizing. It’s important to work relatively quickly so the dough doesn’t become too soft from the warmth of your hands. After rolling each ball, first roll it in the granulated sugar, ensuring it’s lightly coated. This granulated sugar layer helps create that initial crackle during baking.
Baking and Finishing the Lemon Crinkle Cookies
The Crucial Double-Dredge for Crinkles
This next step is what truly defines our Lemon Crinkle Cookies: the double-dredge. After rolling the dough balls in the granulated sugar, you will then immediately roll them in the sifted powdered sugar. Ensure each ball is generously coated in the powdered sugar. This generous coating is essential for achieving the iconic crinkled appearance. As the cookies bake and spread, the powdered sugar forms a delicate crust that cracks and fissures, revealing the soft cookie beneath. Make sure the coating is even; try to pick up excess powdered sugar and gently press it onto any bare spots. This technique creates that beautiful, snow-dusted look and the delightful textural contrast.
Baking and Cooling for Perfection
Preheat your oven to 350°F (175°C). Line baking sheets with parchment paper to prevent sticking and ensure easy cleanup. Place the sugar-coated cookie balls about 2 inches apart on the prepared baking sheets. This spacing allows them room to spread witgin extractt merging. Bake for 10 to 12 minutes, or until the edges are set and lightly golden, but the centers still appear slightly soft and underbaked. This is the secret to a chewy interior. Avoid overbaking, as it will result in dry cookies. Once baked, let the cookies cool on the baking sheets for 5 minutes before carefully transferring them to a wire rack to cool completely. As they cool, the centers will firm up, and the crinkles will become more pronounced. Enjoy these wonderfully bright and tangy Lemon Crinkle Cookies!
Conclusion:
There you have it – the ultimate guide to creating perfect Lemon Crinkle Cookies! We’ve explored the delightful balance of tangy lemon and sweet, melt-in-your-mouth cookie that makes these a springtime favorite or an anytime treat. The magic truly lies in the simple steps: creaming the butter and sugar, incorporating that bright lemon zest and juice, and the satisfying dusting of powdered sugar that creates those signature crinkles. I encourage you to give this recipe a try; you’ll be amazed at how simple it is to achieve such impressive results. These cookies are wonderful on their own, but they also pair beautifully with a cup of tea or a glass of cold milk. For an extra touch of elegance, consider dusting them with a light lemon glaze after they’ve cooled completely. Experiment with adding a pinch of cardamom to the dough for a warmer spice note, or even a few poppy seeds for a delightful visual and textural contrast.
Frequently Asked Questions:
Why are my Lemon Crinkle Cookies not crinkly enough?
Achieving those signature crinkles is often about temperature and rolling technique. Ensure your dough is well-chilled before rolling. This helps the cookie spread just enough in the oven. Also, make sure you roll the balls generously in powdered sugar before baking. The sugar coating helps create the cracks as the cookie expands.
Can I make Lemon Crinkle Cookies ahead of time?
Absolutely! Lemon Crinkle Cookies store exceptionally well. Once completely cooled, they can be stored in an airtight container at room temperature for up to 3-4 days. Their flavor often deepens overnight, making them even more delicious the next day.
Zesty Lemon Crinkle Cookies-Easy & Delicious Recipe
Bright, tangy, and delightfully crinkled, these easy-to-make lemon cookies are a perfect treat for any occasion.
Ingredients
-
7 tablespoons unsalted butter, melted and cooled
-
¾ cup plus 2 tablespoons (175g) granulated sugar
-
1 heaping tablespoon lemon zest (about 2 lemons)
-
1 teaspoon lemon extract
-
½ teaspoon vanilla extract
-
1 large egg plus 1 egg yolk, room temperature
-
2 tablespoons fresh lemon juice
-
2 cups (250g) all-purpose flour, spooned and leveled
-
1 teaspoon baking powder
-
1 teaspoon cornstarch
-
½ teaspoon salt
-
¼ cup (50g) granulated sugar
-
¾ cup (90g) powdered sugar, sifted
Instructions
-
Step 1
In a medium bowl, whisk together melted butter and ¾ cup plus 2 tablespoons granulated sugar until smooth. Stir in lemon zest, lemon extract, and vanilla extract. -
Step 2
Add the room temperature egg, egg yolk, and fresh lemon juice to the butter mixture. Whisk until fully incorporated. -
Step 3
In a separate bowl, whisk together all-purpose flour, baking powder, cornstarch, and salt. Gradually add dry ingredients to wet ingredients and mix until just combined, being careful not to overmix. -
Step 4
Wrap the dough tightly in plastic wrap, flatten into a disc, and chill in the refrigerator for at least 1 hour, or preferably 2 hours. -
Step 5
Preheat oven to 350°F (175°C). Line baking sheets with parchment paper. Roll chilled dough into 1-inch balls. Roll each ball first in ¼ cup granulated sugar, then generously in ¾ cup sifted powdered sugar. -
Step 6
Place sugar-coated cookie balls about 2 inches apart on prepared baking sheets. Bake for 10 to 12 minutes, until edges are set and lightly golden, but centers are still soft. Cool on baking sheets for 5 minutes before transferring to a wire rack to cool completely.
Important Information
Nutrition Facts (Per Serving)
It is important to consider this information as approximate and not to use it as definitive health advice.
Allergy Information
Please check ingredients for potential allergens and consult a health professional if in doubt.

Leave a Comment