


Stunning Spring Desserts to Awe Your Guests! The air is getting warmer, the flowers are starting to bloom, and it’s the perfect time to usher in a season of delightful treats. We all love those moments when we can gather with friends and family, sharing good food and even better company. And what better way to elevate those gatherings than with desserts that are as beautiful as they are delicious? These stunning spring desserts are designed to impress, transforming your table into a vibrant tableau of flavor and color. They’re more than just sweets; they’re edible works of art that capture the essence of spring – light, fresh, and utterly captivating. Imagin extracte the gasps of delight as you present a dessert that not only tastes incredible but also looks like it belongs in a high-end patisserie. That’s the magic we’re aiming for with these stunning spring desserts, making your next get-together truly unforgettable.

Stunning Spring Desserts to Awe Your Guests!
Spring is a time of renewal, bursting with vibrant colors and fresh flavors. What better way to celebrate the season than with desserts that are as beautiful as they are delicious? Forget heavy, wintery treats; it’s time to embrace the lightness and zest that spring brings. These recipes are designed to impress your guests, whether you’re hosting a brunch, a dinner party, or simply want to treat yourself to something special. From delicate fruit tarts to refreshing mousse, get ready to dazzle with these stunning spring creations.
Lemon Raspberry Cloud Tartlets
These individual tartlets are sunshine on a plate. The tangy lemon curd, nestled in a crisp, buttery pastry shell, is perfectly complemented by the sweet burst of fresh raspberries. They’re elegant, easy to make, and guaranteed to be a hit.
Ingredients:
Crust Preparation:
The foundation of these tartlets is a delicate, buttery shortcrust pastry. Ensure your butter is very cold; this is key to achieving a flaky texture. You can make the dough by hand or use a food processor. If using a food processor, pulse the flour and sugar together, then add the cold butter and pulse until the mixture resembles coarse crum extractbs. In a small bowl, whisk together the egg yolk and ice water. Gradually add this to the flour mixture, pulsing until the dough just comes together. Be careful not to overmix, as this can result in a tough crust. If making by hand, rub the cold butter into the flour and sugar with your fingertips until it resembles fine breadcrum extractbs, then stir in the wet ingredients.
Lemon Curd Creation:
The star of the show is the luscious lemon curd. It’s surprisingly simple to make and tastes infinitely better than store-bought. In a heatproof bowl set over a saucepan of simmering water (making sure the bottom of the bowl doesn’t touch the water), whisk together the granulated sugar and eggs until well combined. Gradually whisk in the fresh lemon juice. Continue whisking constantly until the mixture thickens enough to coat the back of a spoon, which usually takes about 8-10 minutes. This gentle, indirect heat prevents the eggs from scrambling. Once thickened, remove the bowl from the heat and whisk in the softened butter, one tablespoon at a time, until it’s fully incorporated and the curd is smooth and glossy. For an extra smooth curd, you can strain it through a fine-mesh sieve into a clean bowl. Cover the surface of the curd directly with plastic wrap to prevent a skin from forming and let it cool completely. This allows the flavors to meld and the curd to set further.
Assembly and Baking:
Once your pastry dough has chilled for at least 30 minutes (this helps relax the gluten and prevents shrinking), it’s time to form your tartlets. Preheat your oven to 375°F (190°C). Roll out the dough on a lightly floured surface to about 1/8-inch thickness. Use a round cookie cutter or the rim of a glass that is slightly larger than your tartlet tins to cut out circles of dough. Gently press the dough circles into your mini tartlet tins, ensuring they fit snugly. Prick the bottom of each tartlet shell a few times with a fork. This allows steam to escape and prevents the crust from puffing up excessively during baking. Blind bake the tart shells for about 10-12 minutes, or until they are lightly golden. If you don’t have tartlet tins, you can use muffin tins. Allow the baked shells to cool completely before filling. Spoon the cooled lemon curd generously into each cooled tartlet shell. Arrange fresh raspberries on top of the lemon curd. For an extra touch of elegance, you can dust the finished tartlets with a little powdered sugar just before serving.
Berry Panna Cotta Delight
This creamy, wobbly panna cotta is a dessert that screams sophistication. Infused with vanilla and topped with a vibrant berry compote, it’s a refreshing and light option that’s perfect for a spring gathering.
Ingredients:
Panna Cotta Base:
Begin extract by blooming the gelatin. In a small bowl, sprinkle the gelatin powder over the cold water and let it sit for about 5-10 minutes, or until it has softened and expanded. While the gelatin is blooming, heat the heavy cream and sugar in a medium saucepan over medium heat. If using a vanilla bean, add the scraped vanilla seeds and the pod to the cream. Stir until the sugar is dissolved and the cream is hot but not boiling. If using vanilla extract, you’ll add that later. Once the cream is hot, remove it from the heat. If you used a vanilla bean pod, remove it now. Stir in the bloomed gelatin until it is completely dissolved. If you’re using vanilla extract, stir it in now. Ensure there are no grainy bits of gelatin remaining. This step is crucial for a smooth panna cotta.
Setting the Panna Cotta:
Pour the creamy mixture into individual serving glasses, ramekins, or small bowls. You can also use molds if you prefer to unmold them. For a truly elegant presentation, chilled glasses work wonderfully. Let the panna cotta cool at room temperature for about 20 minutes before transferring them to the refrigerator. This initial cooling prevents condensation from forming on the bottom of the glasses. Chill for at least 4-6 hours, or until the panna cotta is completely set and firm to the touch. The longer it chills, the firmer it will become. Patience is key here; rushing the chilling process will result in a too-soft dessert.
Berry Compote Perfection:
While the panna cotta is chilling, prepare the vibrant berry compote. In a small saucepan, combine the mixed berries, 1 tablespoon of sugar, and lemon juice. Cook over medium-low heat, stirring occasionally, until the berries have softened and released their juices, and the mixture has thickened slightly, about 5-7 minutes. If using frozen berries, this may take a little longer. Taste and adjust sweetness if needed. You want a slightly tart, slightly sweet topping that cuts through the richness of the panna cotta. Let the compote cool completely. You can leave it chunky for a more rustic feel or mash some of the berries for a smoother consistency.
Serving Your Masterpiece:
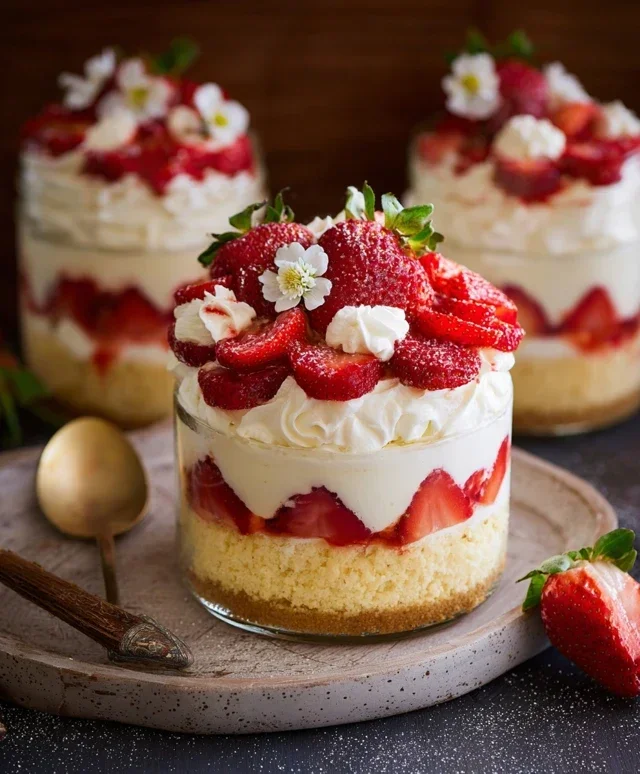
Once the panna cotta is set, spoon a generous amount of the cooled berry compote over the top of each serving. The vibrant red and purple hues of the berries against the creamy white panna cotta are simply stunning. For an extra touch, garnish with a fresh mint sprig or a few extra whole berries. The contrast in textures and flavors – creamy, smooth, and slightly tart with bursts of fruity sweetness – makes this dessert an absolute triumph. It’s a delightful way to end any spring meal.
Conclusion:
There you have it! These stunning spring desserts are sure to be the highlight of your next gathering, offering a delightful burst of fresh flavors and beautiful presentation that perfectly captures the essence of the season. From the vibrant tang of citrus to the delicate sweetness of berries, each recipe is designed to impress without overwhelming your guests, making them an absolute joy to create and savor.
These creations are incredibly versatile. Imagin extracte serving the lemon and raspberry tart with a dollop of homemade whipped cream or a scoop of vanilla bean ice cream. The strawberry shortcake, a classic for a reason, is wonderful on its own but also pairs beautifully with a drizzle of balsamic glaze for an unexpected twist. Don’t be afraid to experiment! Swap out berries for other seasonal fruits like peaches or cherries, or add a touch of edible flowers for an extra touch of elegance. I truly encourage you to dive into these recipes and discover the joy of bringin extractg a little bit of springtime magic to your table.
Frequently Asked Questions:
Can I make these desserts ahead of time?
Many components of these stunning spring desserts can indeed be prepared in advance! For example, cake layers can be baked a day ahead and stored at room temperature, and fruit compotes or curds can be made up to two days prior and refrigerated. Assembling just before serving ensures the freshest texture and most vibrant appearance.
What if I don’t have fresh berries?
While fresh berries offer the best flavor and visual appeal for these spring desserts, frozen berries are a fantastic substitute, especially for fillings and compotes. Just be sure to thaw them and drain off any excess liquid before using them in your recipes. For garnishes, you might opt for citrus zest or candied nuts if fresh berries are unavailable.
Stunning Spring Desserts to Awe Your Guests!
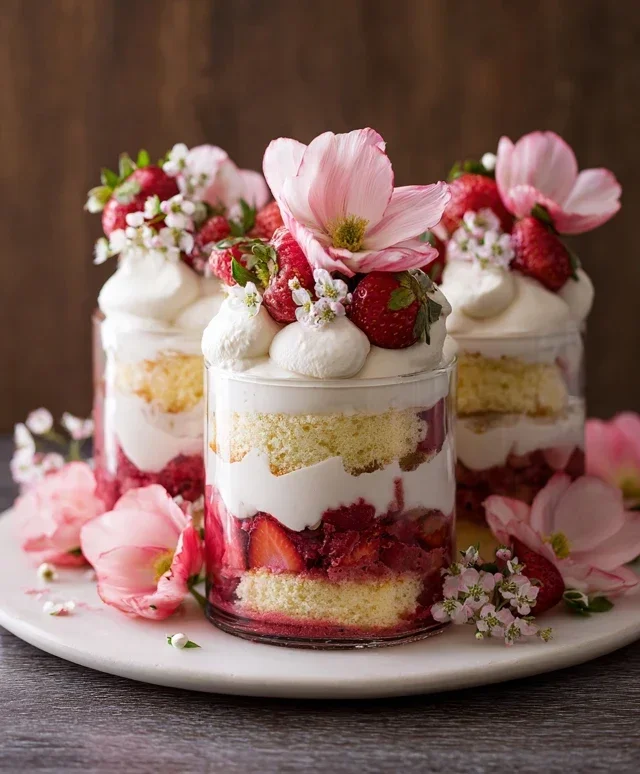
A collection of delightful and visually appealing spring desserts perfect for impressing guests, featuring fresh flavors and seasonal ingredients.
Ingredients
-
1 cup fresh strawberries, hulled and sliced
-
1/2 cup fresh raspberries
-
1/4 cup granulated sugar
-
2 tablespoons lemon juice
-
1 cup heavy cream
-
1/4 cup powdered sugar
-
1 teaspoon vanilla extract
-
1/2 cup crushed shortbread cookies
Instructions
-
Step 1
In a medium bowl, combine sliced strawberries, raspberries, granulated sugar, and lemon juice. Gently toss to coat and let sit for 10 minutes to macerate. -
Step 2
In a separate bowl, whip the heavy cream with powdered sugar and vanilla extract until stiff peaks form. -
Step 3
Spoon a layer of macerated berries into the bottom of individual serving glasses or bowls. -
Step 4
Top the berry layer with a generous dollop of whipped cream. -
Step 5
Sprinkle crushed shortbread cookies over the whipped cream for a delightful crunch. -
Step 6
Garnish with a few extra berries or a mint sprig before serving.
Important Information
Nutrition Facts (Per Serving)
It is important to consider this information as approximate and not to use it as definitive health advice.
Allergy Information
Please check ingredients for potential allergens and consult a health professional if in doubt.
Leave a Comment