


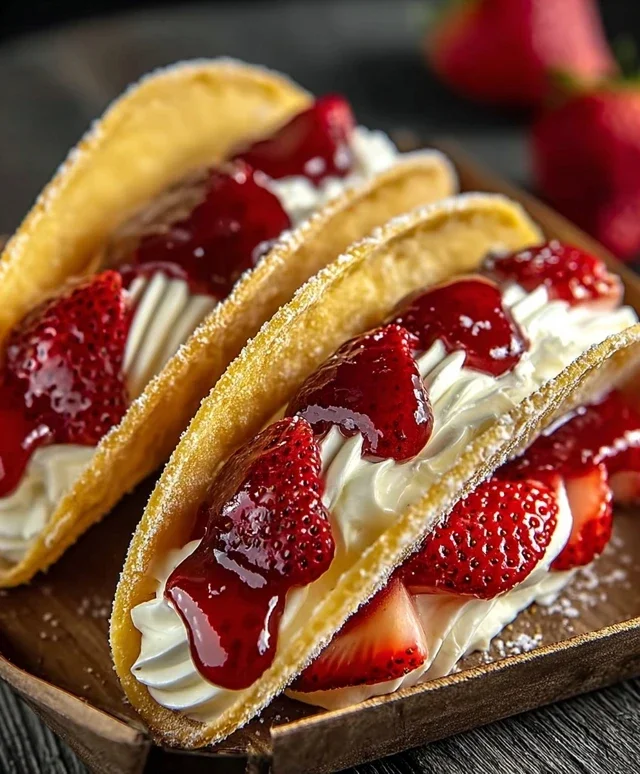
Strawberry Cheesecake Dessert Tacos are about to redefine your dessert game. Forget everything you thought you knew about tacos because these sweet sensations are here to blow your taste buds away! Imagin extracte the creamy, dreamy indulgence of classic cheesecake, perfectly balanced with the bright, summery burst of fresh strawberries, all nestled within a delightfully crisp, taco-shaped shell. It’s a flavor combination that’s utterly irresistible, and one that has captured the hearts (and stomachs!) of dessert lovers everywhere. What makes these Strawberry Cheesecake Dessert Tacos so special? It’s the ingenious marriage of textures and tastes: the crunchy shell gives way to a velvety smooth filling, punctuated by juicy strawberries. It’s a playful twist on a beloved classic, making it the perfect showstopper for any gathering or a simply decadent treat for yourself. Get ready to fall in love!

Strawberry Cheesecake Dessert Tacos
Get ready for a dessert that’s as fun to make as it is to eat! These Strawberry Cheesecake Dessert Tacos are a delightful twist on a classic. We’re taking the creamy, tangy goodness of cheesecake and the vibrant sweetness of fresh strawberries, then wrapping it all up in a warm, cinnamon-sugar kissed tortilla shell. They’re perfect for a party, a special treat after dinner, or even a fun weekend project with the kids. Forget the fuss of a traditional cheesecake; these are individual, portable, and utterly irresistible. Let’s dive into creating these sweet sensations!
Ingredients:
Preparing the Taco Shells
The foundation of our dessert taco is the shell. We want it to be slightly crispy, wonderfully fragrant, and just the right amount of sweet. This step is surprisingly simple and truly transforms a humble tortilla into something special.
1. First, let’s prepare our cinnamon-sugar mixture. In a shallow bowl or pie plate, combine the ½ cup of granulated sugar with the 1 tablespoon of ground cinnamon. Whisk them together until evenly distributed. This aromatic blend will be our key to delicious taco shells.
2. Next, grab your 6 small flour tortillas. We’re going to brush each one with melted butter and then coat them in our cinnamon-sugar mixture. For the best results, I like to lay the tortillas flat on a clean surface. Gently brush one side of each tortilla with the melted unsalted butter. Don’t be shy with the butter; it helps create that wonderful crispiness and adheres the sugar beautifully.
3. Once buttered, carefully press the buttered side of each tortilla into the cinnamon-sugar mixture, ensuring it’s well coated. You want a nice, even layer of the spiced sugar all over the tortilla. Once coated, set them aside on a plate or baking sheet.
4. Now, it’s time to give them their taco shape. Preheat your oven to 350°F (175°C). Lightly grease a standard muffin tin or mini muffin tin. Drape each coated tortilla over one or two of the cups in the muffin tin, allowing the edges to hang down to form a taco shape. This will help them hold their form as they bake.
5. Bake the tortillas for about 8-12 minutes, or until they are golden brown and slightly crisp. Keep a close eye on them, as they can go from perfectly baked to burnt very quickly. Once they’re done, carefully remove them from the oven and let them cool completely in the muffin tin. This cooling period is crucial for them to firm up and become sturdy enough to hold our delicious filling.
Creating the Creamy Cheesecake Filling
This is where the “cheesecake” magic happens. We’re aiming for a smooth, rich, and perfectly sweetened filling that complements the strawberries beautifully.
6. While our taco shells are cooling, let’s whip up the cheesecake filling. In a medium bowl, beat together the 8 ounces of softened cream cheese and the ½ cup of powdered sugar using an electric mixer until smooth and creamy. Make sure your cream cheese is truly softened; this will prevent any lumps and ensure a silky texture.
7. Add the 1 teaspoon of vanilla extract to the cream cheese mixture and beat again until it’s well incorporated. This vanilla adds that classic, comforting cheesecake flavor.
8. In a separate bowl, whip the ½ cup of heavy whipping cream until stiff peaks form. You can use a whisk or an electric mixer for this. Be careful not to over-whip, or you’ll end up with butter!
9. Gently fold the whipped cream into the cream cheese mixture. Fold it in in two additions, being careful not to deflate the whipped cream. This will make our filling light and airy. Once combined, you should have a lusciously smooth and creamy filling ready to be assembled.
Assembling the Strawberry Topping
The vibrant, sweet, and slightly tart strawberry topping is the perfect counterpoint to the rich cheesecake. It adds a burst of freshness and color.
10. Now, let’s prepare our delicious strawberry topping. In a small saucepan, combine the 1 cup of chopped fresh or frozen strawberries, the ¼ cup of granulated sugar, and the 1 tablespoon of lemon juice. Stir them together and cook over medium heat.
11. Bring the mixture to a gentle simmer. Once simmering, stir in the cornstarch slurry (1 tablespoon cornstarch mixed with 2 tablespoons water). Continue to stir and cook for another 1-2 minutes, or until the sauce has thickened nicely. The lemon juice adds a lovely brightness that cuts through the sweetness of the strawberries.
12. Remove the strawberry mixture from the heat and let it cool slightly. It will continue to thicken as it cools.
Putting it All Together
The grand finnon-alcoholic ale! It’s time to assemble our beautiful Strawberry Cheesecake Dessert Tacos.
13. Once the taco shells have completely cooled and are firm, gently fill each one with a generous dollop of the cheesecake filling. You can use a spoon or a piping bag for a neater presentation.
14. Spoon a good amount of the cooled strawberry topping over the cheesecake filling in each taco.
15. And there you have it – your incredible Strawberry Cheesecake Dessert Tacos are ready to be devoured! You can garnish with a sprinkle of extra cinnamon, a mint leaf, or even a small dollop of whipped cream if you’re feeling fancy. Enjoy this delightful and fun dessert experience!
Conclusion:
So there you have it – your guide to crafting the most delightful Strawberry Cheesecake Dessert Tacos! This recipe is truly a winner because it perfectly balances the creamy, tangy goodness of cheesecake with the sweet burst of fresh strawberries, all nestled within a crispy, golden taco shell. It’s a playful twist on classic desserts that’s guaranteed to impress, whether you’re serving them at a party or just treating yourself. I love how versatile these are; they’re fantastic on their own, but you can elevate them further with a dusting of powdered sugar, a drizzle of chocolate sauce, or even a sprinkle of chopped nuts for added texture. Don’t be afraid to get creative with your fillings, perhaps adding a swirl of lemon zest or a hint of mint! I truly encourage you to give these Strawberry Cheesecake Dessert Tacos a try. They are surprisingly simple to make and offer a sophisticated yet fun dessert experience that everyone will adore.
Frequently Asked Questions:
Can I make the taco shells ahead of time?
Absolutely! You can prepare your taco shells a day in advance and store them in an airtight container at room temperature. Just be sure they are completely cool and crisp before storing to prevent them from becoming soggy.
What if I don’t have strawberries? Can I use other fruits?
Of course! While strawberries are classic, feel free to experiment. Blueberries, raspberries, or even a mix of berries would be absolutely delicious. Sliced peaches or a fresh mango salsa could also offer a wonderful tropical twist.
How should I store leftover cheesecake filling?
Any leftover cheesecake filling can be stored in an airtight container in the refrigerator for up to 2-3 days. It’s delicious on its own as a snack or can be used as a topping for other desserts.
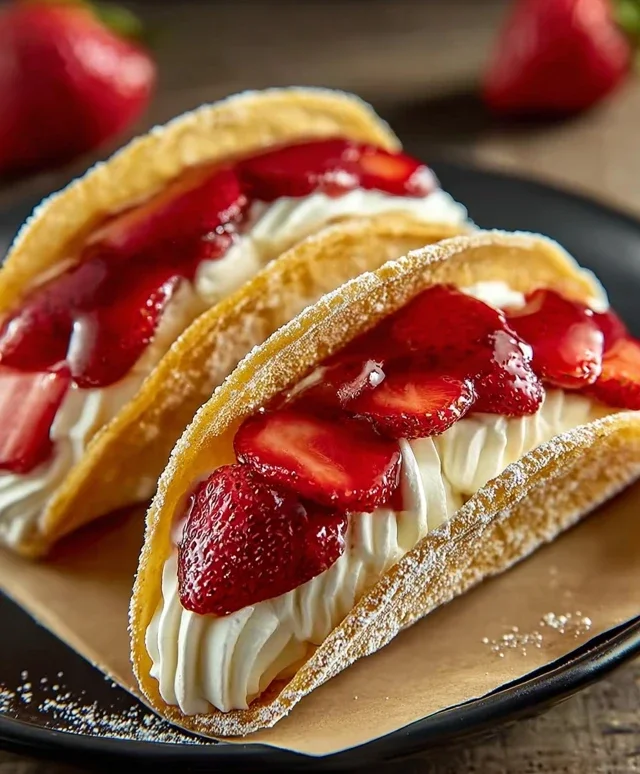
Strawberry Cheesecake Dessert Tacos
Crispy cinnamon-sugar tortillas filled with creamy cheesecake filling and topped with a sweet strawberry compote.
Ingredients
-
6 small flour tortillas
-
½ cup granulated sugar
-
1 tbsp ground cinnamon
-
½ cup unsalted butter, melted
-
8 oz cream cheese, softened
-
½ cup powdered sugar
-
1 tsp vanilla extract
-
½ cup heavy whipping cream
-
1 cup fresh or frozen strawberries, chopped
-
¼ cup granulated sugar
-
1 tbsp lemon juice
-
1 tbsp cornstarch mixed with 2 tbsp water
Instructions
-
Step 1
Preheat oven to 375°F (190°C). In a small bowl, mix ½ cup granulated sugar and 1 tbsp ground cinnamon. -
Step 2
Brush both sides of each flour tortilla with melted butter. Sprinkle generously with the cinnamon-sugar mixture. Place tortillas over oven-safe ramekins or molds to create a taco shell shape and bake for 8-10 minutes, or until golden and crisp. Let cool. -
Step 3
In a medium bowl, beat softened cream cheese with ½ cup powdered sugar and 1 tsp vanilla extract until smooth and creamy. -
Step 4
In a separate bowl, whip heavy whipping cream until stiff peaks form. Gently fold whipped cream into the cream cheese mixture. -
Step 5
In a small saucepan, combine 1 cup chopped strawberries, ¼ cup granulated sugar, and 1 tbsp lemon juice. Cook over medium heat until strawberries soften, about 5 minutes. -
Step 6
Stir in the cornstarch mixture and cook, stirring constantly, until the strawberry sauce thickens. Remove from heat and let cool slightly. -
Step 7
Spoon the cheesecake filling into the cooled taco shells. Top with the strawberry compote. Serve immediately.
Important Information
Nutrition Facts (Per Serving)
It is important to consider this information as approximate and not to use it as definitive health advice.
Allergy Information
Please check ingredients for potential allergens and consult a health professional if in doubt.


Leave a Comment