

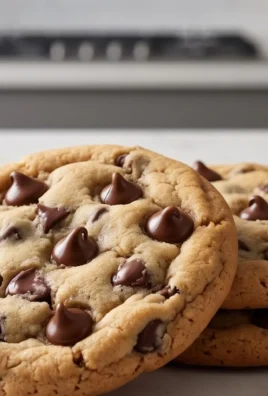
Soft Cutout Sugar Cookies are more than just a dessert; they’re a portal to cherished memories and a canvas for edible artistry. Who doesn’t have a story tied to these delightful, tender treats? Whether it’s the thrill of cutting out festive shapes during the holidays, the sticky sweetness of decorating with colorful icing, or the simple joy of a perfectly spiced bite, these cookies hold a special place in our hearts. What truly elevates these Soft Cutout Sugar Cookies from ordinary to extraordinary is their incredible texture. They’re not brittle or hard, but wonderfully soft and chewy, making them an absolute dream to both make and eat. The delicate balance of sweetness and a hint of vanilla creates a flavor profile that is universally loved, a comforting classic that always brings a smile.
Why You’ll Adore This Recipe
This recipe is meticulously crafted to ensure that every batch of Soft Cutout Sugar Cookies turns out perfectly – tender, flavorful, and easy to handle for all your creative decorating endeavors. We’ve perfected the ratios to avoid spreading and ensure your shapes remain crisp and defined.
The Magic Behind the Softness
The secret lies in a few key ingredients and techniques that guarantee that signature melt-in-your-mouth quality without sacrificing the ability to cut out intricate designs. Get ready to create your new favorite cookie tradition!

Ingredients:
- 2 ¾ cups all-purpose flour
- 1 teaspoon baking powder
- ½ teaspoon salt
- ¾ cup salted butter, softened at room temperature
- 1 cup granulated sugar
- 2 large eggs, at room temperature
- 1 teaspoon vanilla extract
- ½ teaspoon almond extract (or reduce to ¼ teaspoon for a more subtle flavor)
- 3 cups powdered sugar, sifted
- 3-4 tablespoons milk
- 2 tablespoons light corn syrup
- ½ teaspoon vanilla extract (for the frosting)
- Gel food coloring, optional
Making the Soft Cutout Sugar Cookies Dough
Mixing the Dry Ingredients
Let’s begin extract by gathering all our dry components for the cookie dough. In a medium-sized bowl, I like to combine the 2 ¾ cups of all-purpose flour, 1 teaspoon of baking powder, and ½ teaspoon of salt. Whisking these together thoroughly ensures that the leavening agent and salt are evenly distributed throughout the flour. This even distribution is key to consistent cookie texture and rise. Once combined, I usually set this bowl aside for a moment while we work on the wet ingredients.
Creaming the Butter and Sugar
Now, for the heart of our cookie base. In a large mixing bowl, or the bowl of your stand mixer fitted with the paddle attachment, cream together the ¾ cup of softened salted butter and 1 cup of granulated sugar. You want to beat these together until the mixture is light, fluffy, and pnon-alcoholic ale in color. This process, known as creaming, incorporates air into the butter and sugar, which contributes significantly to the tender texture of the final cookie. This typically takes about 3-5 minutes on medium speed. Don’t rush this step; the airiness developed here is important.
Adding Wet Ingredients and Combining
Once the butter and sugar are beautifully creamed, it’s time to add the eggs and extracts. Add the 2 large eggs, one at a time, beating well after each addition until fully incorporated. Next, stir in 1 teaspoon of vanilla extract and ½ teaspoon of almond extract. If you prefer a less pronounced almond flavor, feel free to reduce it to ¼ teaspoon. The almond extract adds a lovely subtle complexity that complements the vanilla wonderfully. After the wet ingredients are thoroughly combined with the creamed mixture, gradually add the dry ingredients to the wet ingredients. Mix on low speed until just combined. Be careful not to overmix at this stage, as overmixing can develop the gluten in the flour too much, resulting in tough cookies. The dough will be quite soft at this point.
Chilling the Dough
This next step is crucial for achieving those perfectly shaped cutout cookies. Turn the soft dough out onto a large piece of plastic wrap. Divide the dough in half, and gently shape each half into a flat disc. This makes it easier to roll out later. Wrap each disc tightly in the plastic wrap. Now, refrigerate the dough for at least 2 hours, or until it is firm enough to roll without sticking excessively. Chilling the dough solidifies the butter, making it much easier to handle and preventing the cookies from spreading too much during baking. You can even chill it overnight if that’s more convenient.
Baking the Soft Cutout Sugar Cookies
Rolling and Cutting Out the Dough
When you’re ready to bake, take one disc of chilled dough out of the refrigerator. Let it sit at room temperature for about 5-10 minutes if it’s very hard, just enough to make it pliable. Lightly flour your work surface and your rolling pin. Roll out the dough to about ¼ inch thickness. It’s important to aim for an even thickness so your cookies bake uniformly. Use your favorite cookie cutters to cut out shapes. You can re-roll the scraps, but be gentle and try not to overwork the dough to maintain its tenderness. Transfer the cut-out cookies carefully to parchment-lined baking sheets, leaving about an inch of space between them.
Baking and Cooling
Preheat your oven to 350°F (175°C). Bake the cookies for 8-10 minutes, or until the edges are lightly golden brown. The centers may still look slightly soft, but they will continue to set as they cool. Keep a close eye on them, as oven temperatures can vary. Once baked, let the cookies cool on the baking sheet for 5 minutes before carefully transferring them to a wire rack to cool completely. Ensuring they are fully cooled before frosting is essential to prevent the frosting from melting.
Whipping Up the Perfect Sugar Cookie Frosting
Creating the Base Frosting
While your cookies are cooling, let’s prepare the delicious frosting. In a medium bowl, whisk together the 3 cups of sifted powdered sugar, 3-4 tablespoons of milk, 2 tablespoons of light corn syrup, and ½ teaspoon of vanilla extract. Start with 3 tablespoons of milk and add more, a teaspoon at a time, until you reach your desired consistency. The corn syrup adds a lovely shine and helps create a smoother, more pliable frosting that’s perfect for decorating.
Coloring and Decorating
If you wish to add color to your frosting, divide it into separate bowls. Add a tiny amount of gel food coloring to each bowl and stir until evenly colored. Gel food coloring is highly concentrated, so a little goes a long way. Now you’re ready to decorate! You can spread the frosting onto your cooled cookies with an offset spatula, or if you want more intricate designs, transfer the frosting into piping bags fitted with various tips. Let your creativity flow and enjoy the process of transforming these simple cookies into beautiful edible art!

Conclusion:
There you have it! Crafting perfect Soft Cutout Sugar Cookies is a rewarding experience, and with this recipe, you’re well on your way to baking up a batch of delightful, tender treats. The key to their wonderful texture lies in not overmixing the dough and ensuring they bake just until the edges are lightly golden. Don’t be afraid to experiment with different cookie cutters and decorating styles to make these your own! Whether you’re preparing for a holiday celebration, a birthday party, or just a cozy afternoon treat, these cookies are sure to bring smiles. Gather your loved ones, put on some music, and enjoy the process of creating edible art. I encourage you to give this recipe a try and discover the joy of homemade Soft Cutout Sugar Cookies!
Frequently Asked Questions:
Why are my Soft Cutout Sugar Cookies spreading too much?
Spreading can often be caused by using softened butter that is too warm, overmixing the dough, or not chilling the dough sufficiently. Ensure your butter is at room temperature but still slightly cool to the touch. Chilling the dough for at least 30 minutes before rolling and cutting is crucial for preventing excessive spread.
Can I make the dough ahead of time?
Yes, absolutely! The dough for these Soft Cutout Sugar Cookies can be made up to 2-3 days in advance and stored in the refrigerator. Just allow it to soften slightly at room temperature for about 10-15 minutes before rolling, which will make it easier to handle. You can also freeze the dough for up to 3 months.

Soft Cutout Sugar Cookies-Perfect for Decorating
Soft and tender sugar cookies, ideal for rolling, cutting out, and decorating with vibrant frosting.
Ingredients
-
2 ¾ cups all-purpose flour
-
1 teaspoon baking powder
-
½ teaspoon salt
-
¾ cup salted butter, softened at room temperature
-
1 cup granulated sugar
-
2 large eggs, at room temperature
-
1 teaspoon vanilla extract
-
½ teaspoon almond extract
-
3 cups powdered sugar, sifted
-
3-4 tablespoons milk
-
2 tablespoons light corn syrup
-
½ teaspoon vanilla extract
-
Gel food coloring, optional
Instructions
-
Step 1
In a medium bowl, whisk together flour, baking powder, and salt. Set aside. -
Step 2
In a large bowl, cream together softened butter and granulated sugar until light and fluffy. -
Step 3
Beat in eggs one at a time, then stir in vanilla and almond extracts. Gradually add dry ingredients to wet ingredients, mixing on low speed until just combined. Do not overmix. -
Step 4
Divide dough in half, shape into flat discs, wrap tightly in plastic wrap, and refrigerate for at least 2 hours until firm. -
Step 5
Preheat oven to 350°F (175°C). On a lightly floured surface, roll out dough to ¼ inch thickness. Cut out shapes and place on parchment-lined baking sheets. -
Step 6
Bake for 8-10 minutes, or until edges are lightly golden brown. Cool on baking sheets for 5 minutes, then transfer to wire racks to cool completely. -
Step 7
To make frosting, whisk together sifted powdered sugar, milk, corn syrup, and vanilla extract until desired consistency is reached. -
Step 8
Color frosting with gel food coloring if desired. Decorate cooled cookies.
Important Information
Nutrition Facts (Per Serving)
It is important to consider this information as approximate and not to use it as definitive health advice.
Allergy Information
Please check ingredients for potential allergens and consult a health professional if in doubt.


Leave a Comment