


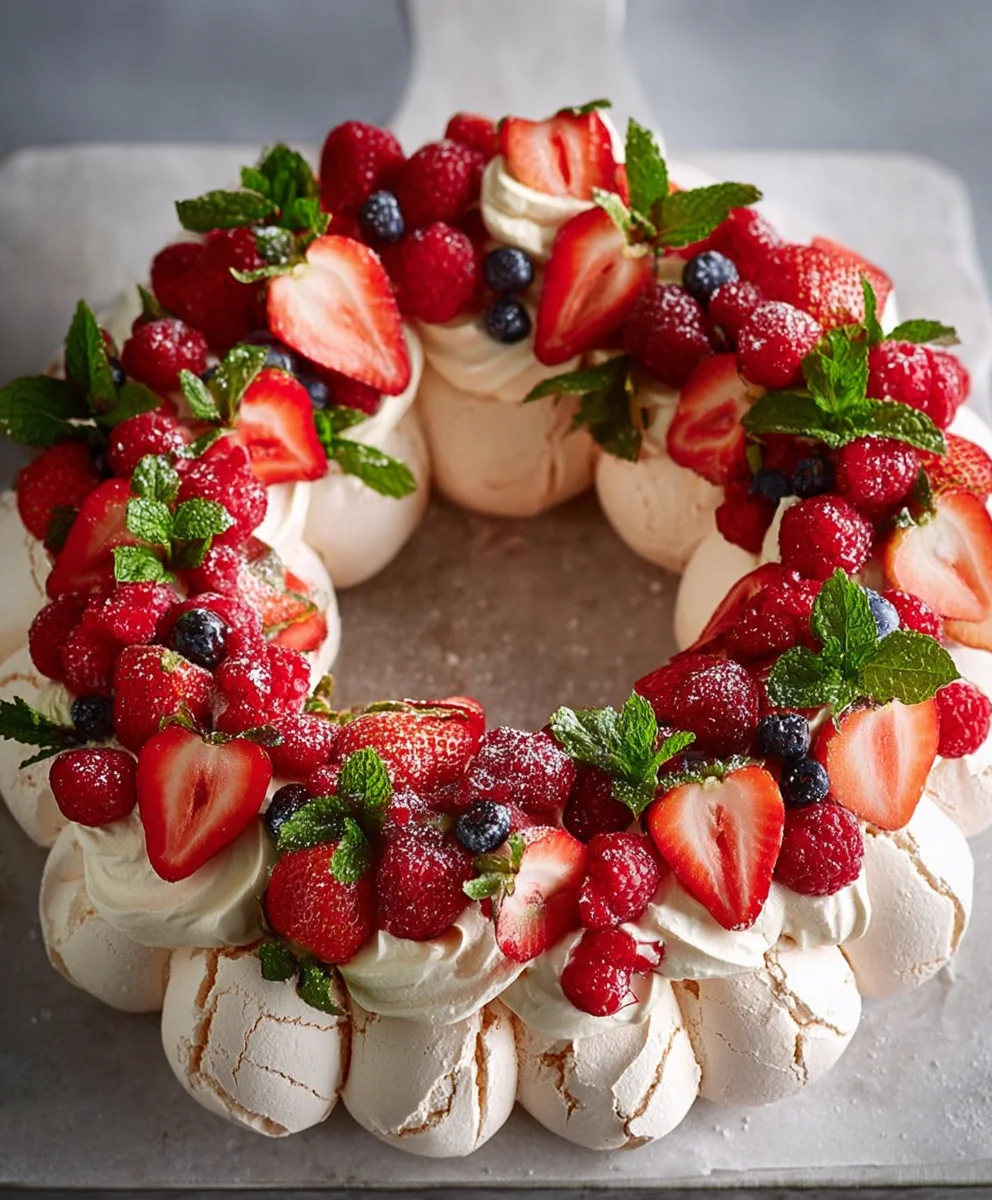
Pull Apart Pavlova Wreath recipes are often searched for when the holidays arrive, or when a show-stopping dessert is absolutely required. There’s something inherently magical about a pavlova, isn’t there? That crisp, snowy white meringue shell giving way to a soft, marshmallowy interior, all crowned with vibrant, fresh fruit and luscious cream. But a Pull Apart Pavlova Wreath takes this ethereal dessert to a whole new level of fun and interactivity! Forget precise slicing; this delightful creation encourages guests to pluck their perfect portion right from the wreath. It’s not just a dessert; it’s an experience, a centerpiece that sparks joy and conversation. The unique construction, where individual pavlova kisses are artfully arranged to form a celebratory ring, makes it incredibly photogenic and undeniably delicious. Get ready to impress your friends and family with this showstopper that’s as delightful to assemble as it is to devour.

Ingredients:
- 6 extra-large egg whites, at room temperature
- 2 cups icing sugar / powdered sugar, sifted
- 2 tablespoons cornstarch
- 1 teaspoon vanilla extract
- 3 cups heavy cream / whipping cream, chilled
- 1 cup icing sugar / powdered sugar, sifted
- 1 teaspoon vanilla
- Assorted fresh fruit (berries like strawberries, raspberries, blueberries are perfect)
- Fresh mint sprigs, for garnish
Making the Pavlova Base
Preheating and Preparation
Preheat your oven to a moderate 300°F (150°C). Line a large baking sheet with parchment paper. You can draw a large circle (about 10-12 inches in diameter) on the parchment paper as a guide for your wreath shape, then flip the paper over so the ink doesn’t transfer to your pavlova. This guide is incredibly helpful for achieving a consistent wreath form.
Whipping the Egg Whites
In a scrupulously clean, dry bowl (any trace of fat can prevent the whites from whipping properly), add your 6 extra-large egg whites. Begin extract whisking them on medium speed until they form soft peaks. This means when you lift the whisk, the peaks gently curl over. Gradually, and I mean gradually, start adding the 2 cups of sifted icing sugar, a tablespoon at a time, while continuing to whisk. It’s crucial to add the sugar slowly to allow it to dissolve properly into the egg whites. Once all the sugar is incorporated, increase the speed to high and continue whisking until the meringue is thick, glossy, and forms stiff, upright peaks. When you turn the bowl upside down, the meringue should stay firmly in place – that’s how you know it’s ready.
Incorporating Cornstarch and Vanilla
Now, gently fold in the 2 tablespoons of cornstarch and the 1 teaspoon of vanilla extract. Use a large spatula and a light hand to avoid deflating the airy meringue. The cornstarch helps to create a marshmallowy, soft center within the crisp meringue shell. Folding is key here; you want to mix just until combined, without overworking the mixture.
Shaping the Wreath
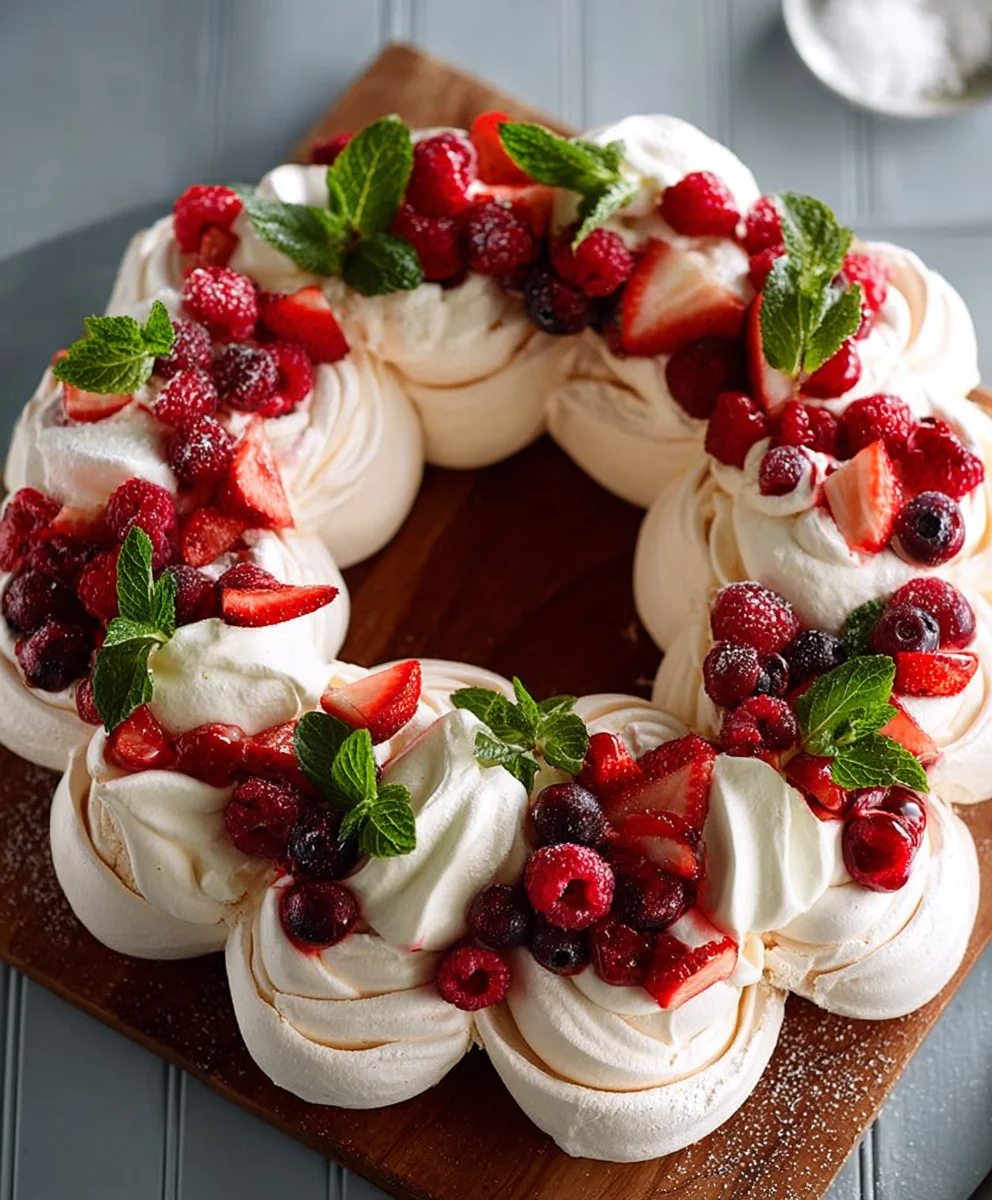
Spoon the meringue mixture onto your prepared baking sheet, using the drawn circle as a guide. Start by forming a thick ring, leaving a generous opening in the center to create the wreath effect. You can use the back of your spoon or a spatula to smooth the sides and create a slightly peaked or textured surface, which looks beautiful once baked. Don’t aim for perfection; rustic charm is part of the pavlova’s appeal. Ensure the outer edge of the wreath is slightly thicker than the inner edge to help it hold its shape.
Baking and Cooling the Pavlova
Reduce the oven temperature to 275°F (135°C). Place the pavlova wreath in the preheated oven and bake for 1 hour and 15 minutes to 1 hour and 30 minutes. The pavlova should be crisp and dry to the touch on the outside, with a pnon-alcoholic ale cream color. It should lift easily off the parchment paper. Crucially, once the baking time is up, turn off the oven, but leave the pavlova inside with the oven door slightly ajar (you can prop it open with a wooden spoon). This slow cooling process is vital to prevent the pavlova from cracking. Let it cool completely in the oven, which might take a few hours or even overnight.
Assembling the Pull Apart Pavlova Wreath
Whipping the Cream
Once your pavlova base has cooled completely, it’s time to prepare the luscious cream topping. In a clean, chilled bowl, pour in the 3 cups of cold heavy cream. Add the 1 cup of sifted icing sugar and the 1 teaspoon of vangin extracta. Begin whisking on medium speed until the cream starts to thicken. Gradually increase the speed to high and continue whisking until stiff peaks form. Be careful not to over-whip, or you’ll end up with butter! The cream should hold its shape firmly.
Decorating the Wreath
Gently transfer the cooled pavlova wreath to your serving platter. Dollop the whipped cream generously over the top of the pavlova base, focusing on filling the center hole and spreading it towards the edges. Don’t be afraid to create soft mounds and swirls.
Adding the Fruit and Mint
Now for the final, beautiful flourish: arrange your assorted fresh fruit artfully over the whipped cream. I love using a mix of vibrant berries like strawberries, raspberries, and blueberries to create a colorful and delicious topping. Their natural sweetness and slight tartness perfectly complement the sweet pavlova. Finally, scatter a few fresh mint sprigs amongst the fruit for a touch of green and an extra burst of freshness. The mint adds a lovely aroma and a visual contrast that really elevates the presentation. Enjoy the delightful crackle of the crisp meringue, the soft, chewy center, and the creamy, fruity topping of your stunning Pull Apart Pavlova Wreath.
Conclusion:
And there you have it – your very own show-stopping Pull Apart Pavlova Wreath! I hope you’ve enjoyed this journey into creating this delightful dessert. The combination of crisp meringue, airy whipped cream, and vibrant fresh fruit is simply divine, making it a perfect centerpiece for any celebration or a luxurious treat for yourself. Don’t be intimidated by making pavlova; with a little patience and attention to detail, you’ll achieve meringue perfection every time.
For serving suggestions, this pavlova wreath is spectacular on its own, allowing the beautiful construction and fresh fruit to shine. However, consider a drizzle of berry coulis or a dusting of edible glitter for an extra touch of elegance. When it comes to variations, feel free to get creative with your fruit choices! Seasonal berries, tropical fruits like mango and kiwi, or even grilled peaches would be delicious. You can also experiment with flavored whipped creams, like a hint of lemon zest or a touch of rosewater. I truly encourage you to give this Pull Apart Pavlova Wreath a try and share your creations!
Frequently Asked Questions:
Can I make the pavlova ahead of time?
Yes, you can bake the pavlova base for your Pull Apart Pavlova Wreath a day or two in advance. Store it in an airtight container at room temperature once completely cooled. It’s best to assemble the wreath with the cream and fruit just before serving to prevent the meringue from becoming soft.
My pavlova cracked, is it ruined?
Not at all! A cracked pavlova is still perfectly delicious. The cracks often happen during the cooling process and don’t affect the taste or texture. You can easily disguise any cracks with generous dollops of whipped cream and an abundance of fruit when assembling your Pull Apart Pavlova Wreath.
Pull Apart Pavlova Wreath
A festive and easy dessert featuring a crisp meringue wreath filled with whipped cream and fresh fruit.
Ingredients
-
6 extra-large egg whites
-
2 cups icing sugar, sifted
-
2 tablespoons cornstarch
-
1 teaspoon vanilla extract
-
3 cups heavy cream, chilled
-
1 cup icing sugar, sifted
-
1 teaspoon vanilla
-
Assorted fresh fruit (berries)
-
Fresh mint sprigs
Instructions
-
Step 1
Preheat oven to 300°F (150°C). Line a baking sheet with parchment paper and draw a 10-12 inch circle as a guide, then flip the paper. -
Step 2
Whip egg whites until soft peaks form. Gradually add 2 cups of sifted icing sugar, a tablespoon at a time, whisking until thick, glossy, and stiff peaks form. -
Step 3
Gently fold in cornstarch and vanilla extract. Spoon meringue onto prepared baking sheet, forming a thick ring with a generous opening in the center. -
Step 4
Reduce oven temperature to 275°F (135°C). Bake for 1 hour 15 minutes to 1 hour 30 minutes. Turn off the oven, leave the door ajar, and cool completely. -
Step 5
Whip chilled heavy cream with 1 cup sifted icing sugar and 1 teaspoon vanilla until stiff peaks form. Do not over-whip. -
Step 6
Transfer cooled pavlova to a serving platter. Dollop whipped cream over the pavlova, filling the center and spreading towards the edges. -
Step 7
Arrange fresh fruit artfully over the whipped cream. Garnish with fresh mint sprigs.
Important Information
Nutrition Facts (Per Serving)
It is important to consider this information as approximate and not to use it as definitive health advice.
Allergy Information
Please check ingredients for potential allergens and consult a health professional if in doubt.

Leave a Comment