


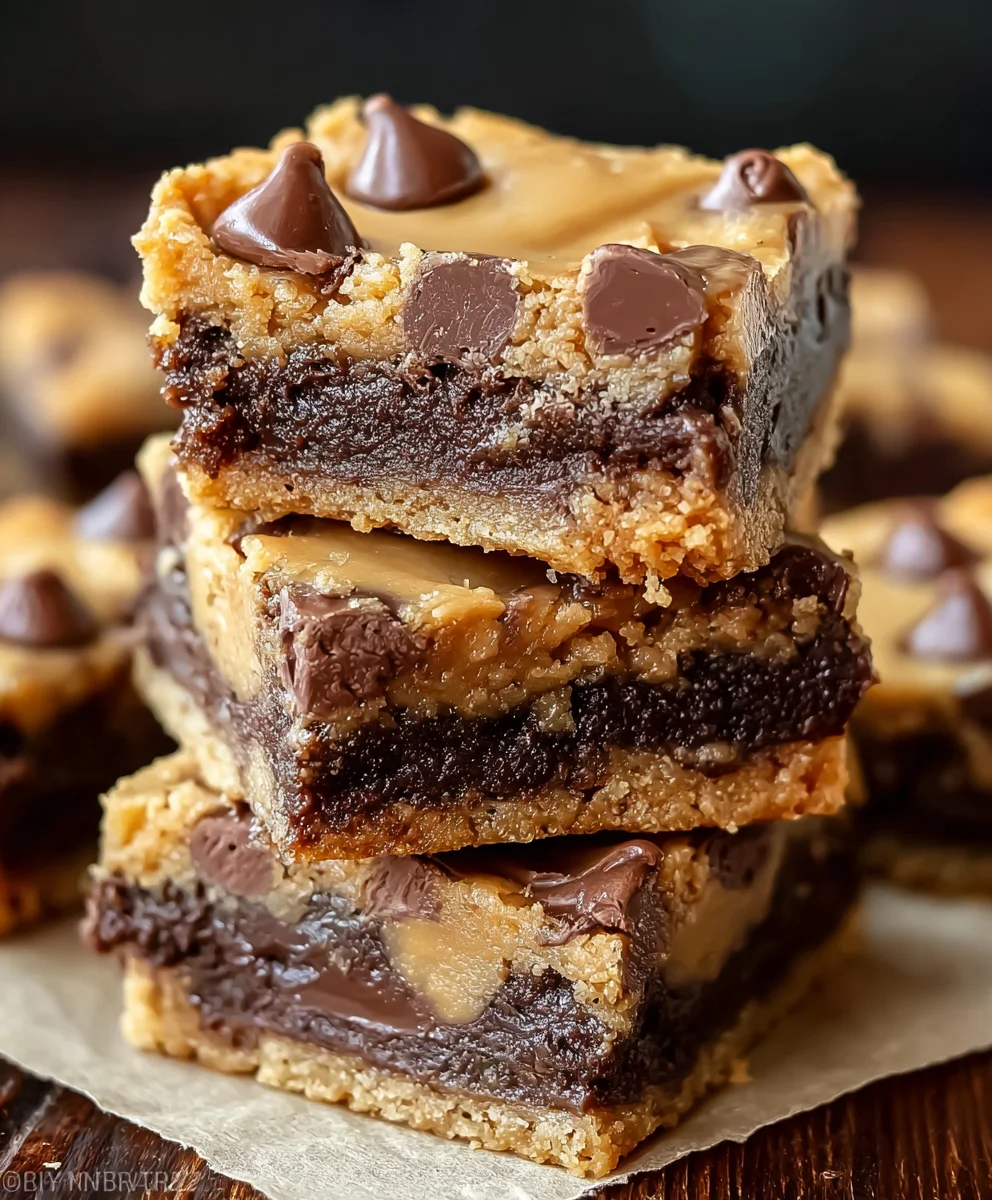
Peanut Butter Cup Gooey Bars are not just a dessert; they’re an experience. Imagin extracte this: a rich, fudgy brownie base, baked to absolute perfection, cradling generous swirls of creamy peanut butter and chunks of your favorite chocolate candies. This isn’t just about indulgence; it’s about nostalgia. These bars evoke childhood memories of trick-or-treating and birthday parties, all wrapped up in one unbelievably delicious bite. What truly sets Peanut Butter Cup Gooey Bars apart is that magical textural contrast. The slightly chewy brownie gives way to the molten, gooey center, interspersed with those delightful pops of melted chocolate. It’s a symphony of flavors and textures that will have evergin extracte begging for the recipe, and trust me, you’ll be delighted to share this little slice of heaven. Get ready to discover your new go-to treat.

Ingredients:
- 1 cup unsalted butter, melted
- 3/4 cup granulated sugar
- 1 cup light brown sugar, packed
- 2 large eggs
- 1 tablespoon pure vanilla extract
- 1 teaspoon baking soda
- 1/2 teaspoon salt
- 3 1/4 cups all-purpose flour
- 3/4 cup chocolate chips
- 30 Miniature Peanut Butter Cups, unwrapped
- 1 (14 oz) can fat-free sweetened condensed milk
- 1/4 cup creamy peanut butter
Preparing the Base Dough
The foundation of our incredible Peanut Butter Cup Gooey Bars lies in a rich, buttery dough that provides the perfect canvas for the star ingredients. To begin extract, preheat your oven to 350 degrees Fahrenheit (175 degrees Celsius). This ensures that your oven is at the optimal temperature when your bars are ready to bake, leading to even cooking and a perfectly golden crust. Next, prepare a 9×13 inch baking pan by either greasing it thoroughly with butter or lining it with parchment paper. If you opt for parchment paper, leave a slight overhang on the sides; this will make it incredibly easy to lift the baked bars out of the pan later, preventing any sticking and ensuring beautiful presentation.
In a large mixing bowl, combine the melted unsalted butter with the granulated sugar and the packed light brown sugar. It’s important to pack the brown sugar firmly into your measuring cup to ensure you’re getting the full sweetness and moisture it contributes. Whisk these wet ingredients together until they are well combined and the sgin extractrs begin to dissolve, creating a smooth, glossy mixture. This step is crucial for developing the chewy texture of the bars. Add the two large eggs one at a time, beating well after each addition until the mixture is light and fluffy. This emulsification process incorporates air, contributing to the overall lightness of the bar. Stir in the pure vanilla extract; the vanilla not only adds a wonderful aroma but also enhances the flavors of the chocolate and peanut butter.
In a separate, medium-sized bowl, whisk together the all-purpose flour, baking soda, and salt. Whisking these dry ingredients together ensures that the baking soda and salt are evenly distributed throughout the flour, which is essential for proper leavening and balanced flavor. Gradually add the dry ingredients to the wet ingredients, mixing on low speed or by hand until just combined. Be careful not to overmix at this stage. Overmixing can develop the gluten in the flour too much, resulting in tougher bars. You want a dough that is thick and slightly sticky.
Assembling the Gooey Layers
Now comes the fun part: assembling the layers that will transform this simple dough into irresistible Peanut Butter Cup Gooey Bars. Take about two-thirds of the prepared dough and press it evenly into the bottom of your prepared baking pan. You can use your hands or the back of a spoon to create a uniform layer. This forms the sturdy base of our bars. Don’t worry if it’s not perfectly smooth; the texture will be a delightful part of the finished product.
Next, we’ll create the gooey peanut butter filling. In a small bowl, combine the fat-free sweetened condensed milk and the creamy peanut butter. Stir these together until they are smooth and fully incorporated. The sweetened condensed milk provides an incredibly rich and creamy texture, while the peanut butter adds that classic, irresistible flavor. This mixture should be thick and pourable, but not runny.
Carefully pour and spread this peanut butter mixture evenly over the dough base in the baking pan. Make sure to get it as close to the edges as possible so every bite gets that gooey center.
Now, scatter the unwrapped miniature peanut butter cups over the peanut butter layer. Distribute them evenly across the surface, aiming for roughly 30 cups to ensure a good peanut butter cup presence in every bar. Don’t be shy; pack them in a little if needed.
Finally, take the remaining one-third of the dough and crum extractble it over the top of the peanut butter cups. You can use your fingers to break off small pieces of dough and distribute them loosely over the entire surfacerum extracthis crumbly topping will bake up into a delightful, slightly crisp layer that contrasts beautifully with the gooey center. Sprinkle the chocolate chips evenly over rum extract top of the crumbled dough. These will melt into glorious pockets of chocolate goodness as the bars bake.
Baking and Cooling for Ultimate Gooeyness
Place the assembled pan into the preheated 350-degree Fahrenheit (175 degrees Celsius) oven. Bake for approximately 35 to 45 minutes, or until the edges of the bars are golden brown and the center appears set but still has a slight jiggle. It’s important not to overbake these bars, as the gooeyness is a key characteristic! You want the center to remain wonderfully soft and fudgy.
Once baked, carefully remove the pan from the oven. Allow the Peanut Butter Cup Gooey Bars to cool completely in the pan on a wire rack. This cooling period is absolutely critical. As the bars cool, the gooey center will set up beautifully, becoming perfectly chewy and delicious. Rushing this step will result in bars that fall apart and are overly messy. Patience here will be rewarded with perfectly formed, incredibly delicious bars.
After the bars have cooled completely, use the parchment paper overhang to lift the entire slab out of the pan. Place it on a cutting board and slice into desired bar shapes. You can make them into squares, rectangles, or even fun shapes if you’re feeling creative! These bars are best enjoyed at room temperature, where the gooeyness is at its peak. Store any leftovers in an airtight container at room temperature for up to 3 days, though they rarely last that long!
Conclusion:
And there you have it – the ultimate guide to creating delectable Peanut Butter Cup Gooey Bars! I hope you enjoyed making these as much as I do. These bars are a true crowd-pleaser, delivering that perfect balance of rich chocolate and creamy peanut butter in every bite. The gooey center is what truly sets them apart, making them an irresistible treat for any occasion.
For serving suggestions, these bars are fantastic on their own, but they also pair wonderfully with a cold glass of milk, a scoop of vanilla ice cream, or even a dusting of powdered sugar for an extra touch of elegance. If you’re feeling adventurous, consider drizzling them with a little extra melted chocolate or a swirl of peanut butter before they set completely. For variations, feel free to experiment with different types of chocolate chips – milk, dark, or even white chocolate can offer a delightful twist. You can also add chopped peanuts for an extra crunch or a pinch of sea salt to enhance the flavors.
Don’t be afraid to get in the kitchen and give these Peanut Butter Cup Gooey Bars a try. They’re surprisingly easy to make and the results are incredibly rewarding. I encourage you to share them with friends and family, or savor them all for yourself – you deserve it!
Frequently Asked Questions:
Can I make these Peanut Butter Cup Gooey Bars ahead of time?
Absolutely! These bars store beautifully. Once cooled completely, you can cut them into squares and store them in an airtight container at room temperature for up to 3 days, or in the refrigerator for up to a week. They are often even gooier and more delicious the next day!
What if I don’t have peanut butter cups? Can I substitute something else?
While peanut butter cups are the star, you can certainly get creative! If you don’t have them, you can chop up your favorite chocolate bar and mix it with a tablespoon or two of peanut butter, or simply use extra chocolate chips and a good dollop of peanut butter in the filling. Another option is to use chopped Reese’s Pieces for a similar flavor profile.
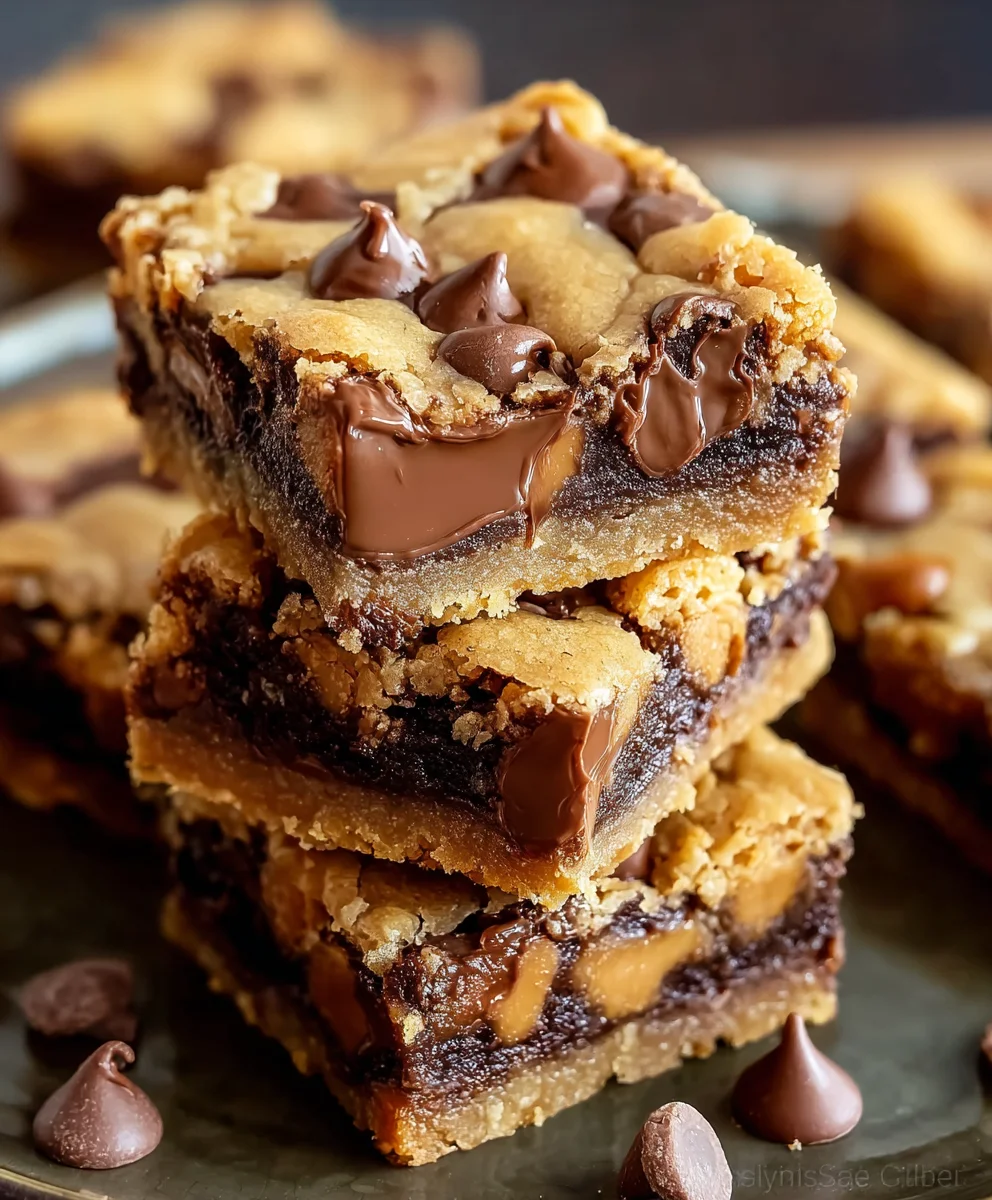
Peanut Butter Cup Gooey Bars – Decadent Chocolate Treat
Indulge in these incredibly decadent Peanut Butter Cup Gooey Bars, a perfect blend of chewy dough, rich peanut butter, and melted chocolate.
Ingredients
-
1 cup unsalted butter, melted
-
3/4 cup granulated sugar
-
1 cup light brown sugar, packed
-
2 large eggs
-
1 tablespoon pure vanilla extract
-
1 teaspoon baking soda
-
1/2 teaspoon salt
-
3 1/4 cups all-purpose flour
-
3/4 cup chocolate chips
-
30 Miniature Peanut Butter Cups, unwrapped
-
1 (14 oz) can fat-free sweetened condensed milk
-
1/4 cup creamy peanut butter
Instructions
-
Step 1
Preheat oven to 350°F (175°C). Grease or line a 9×13 inch baking pan with parchment paper. In a large bowl, combine melted butter, granulated sugar, and packed light brown sugar. Whisk until smooth. Beat in eggs one at a time, then stir in vanilla extract. -
Step 2
In a separate bowl, whisk together flour, baking soda, and salt. Gradually add dry ingredients to wet ingredients, mixing until just combined. Dough will be thick and slightly sticky. -
Step 3
Press two-thirds of the dough evenly into the bottom of the prepared baking pan. In a small bowl, combine sweetened condensed milk and peanut butter until smooth. Pour and spread evenly over the dough base. -
Step 4
Scatter the unwrapped miniature peanut butter cups evenly over the peanut butter layer. Crumble the remaining one-third of the dough loosely over the peanut butter cups and peanut butter cups. -
Step 5
Sprinkle chocolate chips evenly over the top. Bake for 35-45 minutes, or until edges are golden brown and the center appears set with a slight jiggle. Do not overbake. -
Step 6
Let cool completely in the pan on a wire rack. This is crucial for the gooey center to set properly. Once completely cooled, lift out using parchment paper and slice into bars.
Important Information
Nutrition Facts (Per Serving)
It is important to consider this information as approximate and not to use it as definitive health advice.
Allergy Information
Please check ingredients for potential allergens and consult a health professional if in doubt.
Leave a Comment