

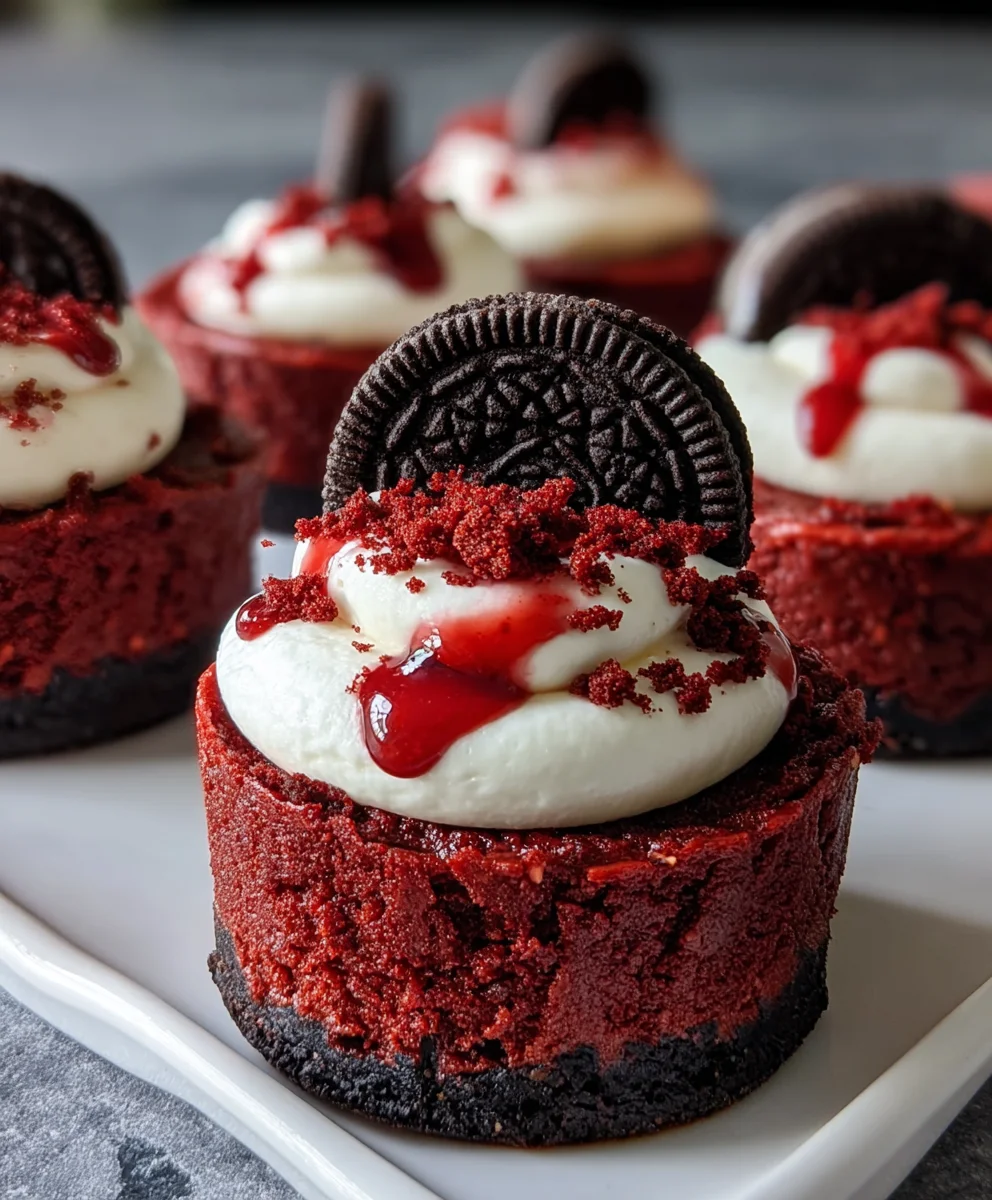
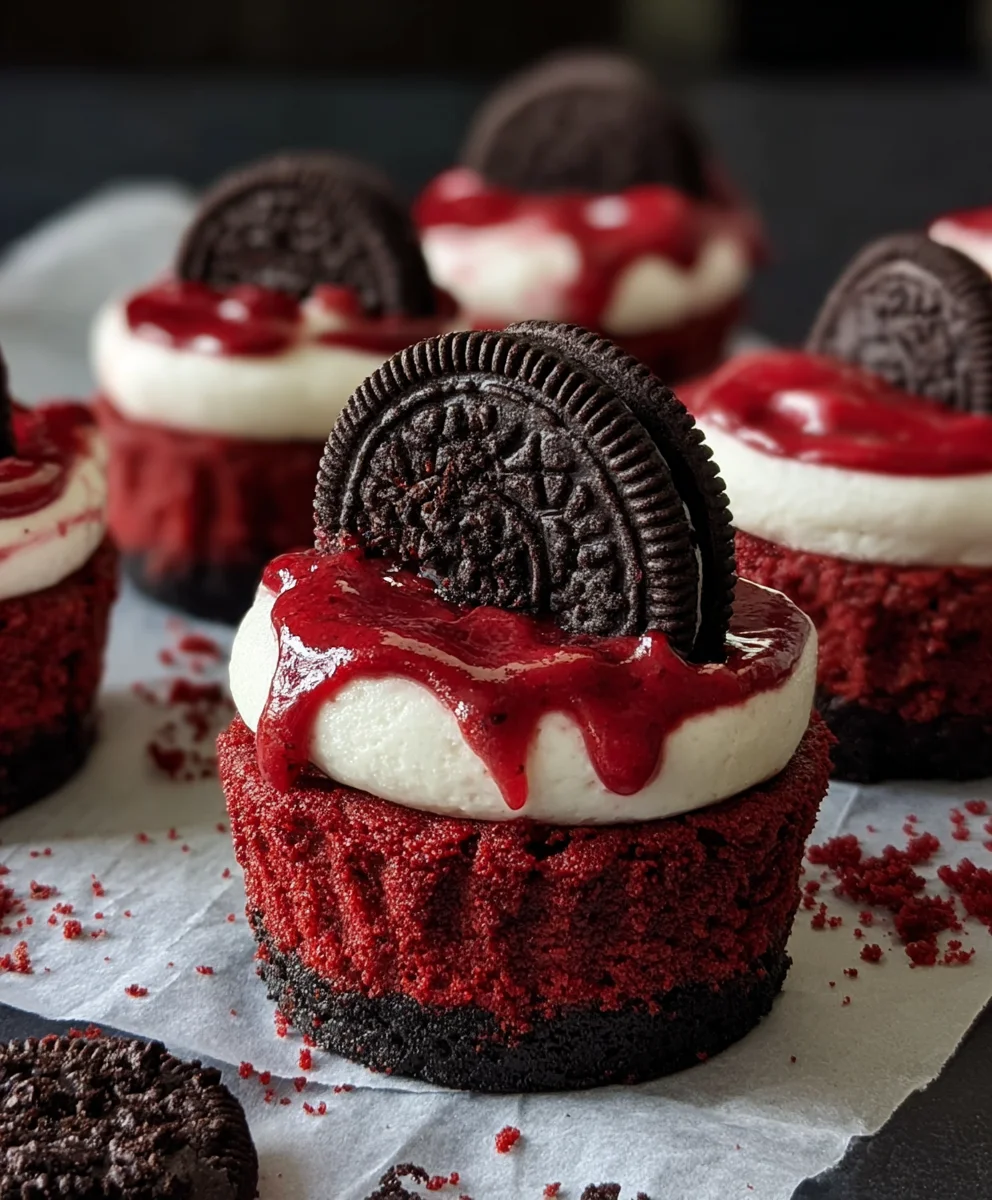
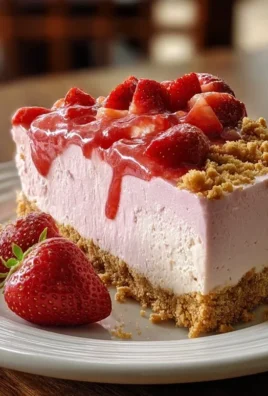
Mini Red Velvet Oreo Cheesecakes are more than just a dessert; they are tiny parcels of pure indulgence that ignite pure joy with every bite. Imagin extracte the rich, decadent swirl of creamy cheesecake perfectly balanced by the intense cocoa notes and vibrant crimson hue of red velvet, all nestled atop a crisp, chocolatey Oreo crust. It’s a symphony of textures and flavors that has captured the hearts (and taste buds!) of dessert lovers everywhere. What makes these little delights so utterly irresistible? It’s that perfect marriage of familiar favorites – the iconic Oreo cookie and the beloved red velvet cake – transformed into an elegant, bite-sized cheesecake. They’re sophisticated enough for a special occasion yet wonderfully simple to whip up, making them the ultimate crowd-pleaser. Get ready to fall in love with these stunning Mini Red Velvet Oreo Cheesecakes!

Ingredients:
- 12 Oreo cookies
- 3 tablespoons all-purpose flour
- 1/2 cup cocoa powder (divided)
- 1/2 cup granulated sugar (divided)
- 1/4 cup unsalted butter, melted
- 2 large eggs, room temperature (divided)
- 1 teaspoon vanilla extract (divided)
- Pinch of salt
- 8 oz cream cheese, room temperature
- 1/4 cup sour cream, room temperature
- Red gel food coloring
Oreo Crust Preparation
Step 1: Preparing the Oreo Cookie Crum extractbs
We’ll start by creating the foundation for our delightful Mini Red Velvet Oreo Cheesecakes. Take all 12 Oreo cookies and place them into a food processor. Pulse them until they are finely crusherum extractnto crumbs. If you don’t have a food processor, don’t worry! You can achieve the same result by placing the Oreos in a sturdy zip-top bag and crushing them with a rolling pin or a heavy pan. The goal is to have corum extractstent, fine crumbs. Once pulvrum extractzed, set these Oreo crumbs aside in a medium bowl.
Step 2: Assembling the Crust Mixture
Now, let’s combine the ingredients for our Oreo crust. Trum extracthe bowl containing the Oreo crumbs, add the 3 tablespoons of all-purpose flour, 1/4 cup of cocoa powder, and 1/4 cup of granulated sugar. Add a pinch of salt to enhance the flavors. Pour in the 1/4 cup of melted unsalted butterum extractMix everything thoroughly until the crumbs are evenly moistened and the mixture resembles wet sand. This will ensure that the crust holds together nicely when pressed into the mini muffin tins.
Cheesecake Filling Creation
Step 3: Mixing the Cream Cheese Base
This is where the magic of cheesecake filling happens! In a separate large bowl, place the 8 oz of room temperature cream cheese. It’s crucial that the cream cheese is softened to room temperature to avoid lumps and achieve a silky smooth texture. Beat the cream cheese with an electric mixer on medium speed until it’s completely smooth and creamy. Then, add the 1/4 cup of sour cream, which adds a lovely tangin extractess and moisture. Beat again until well combined and smooth. Scrape down the sides of the bowl with a spatula to ensure everything is incorporated.
Step 4: Incorporating Flavor and Color
Next, we’ll add the remaining flavorings and the signature red velvet color. To the cream cheese mixture, add 1/4 cup of granulated sugar and the remaining 1/4 cup of cocoa powder. Beat until these dry ingredients are fully incorporated. Now, add 1/2 teaspoon of vanilla extract. For the vibrant red velvet hue, add a few drops of red gel food coloring. Gel food coloring is more concentrated than liquid, so you’ll need less. Start with a small amount, perhaps 1/4 to 1/2 teaspoon, and mix until you achieve a rich, deep red color that you love. Add more food coloring, a drop at a time, if you desire a more intense shade. Don’t overmix at this stage; just ensure the color is evenly distributed.
Step 5: Adding the Eggs
The final step in creating our cheesecake filling is to add the eggs. Remember, we are using 2 eggs in total for this recipe, and one has already been reserved for the crust mixture. Whisk the remaining 1 egg at room temperature in a small bowl until it’s lightly beaten. Add this beaten egg to the cream cheese mixture along with the remaining 1/2 teaspoon of vanilla extract. Beat on low speed until just combined. Be careful not to overbeat the eggs, as this can incorporate too much air, which might cause the cheesecakes to crack during baking. The batter should be thick and luxurious.
Assembly and Baking
Step 6: Assembling the Mini Cheesecakes
Now it’s time to assemble our Mini Red Velvet Oreo Cheesecakes. Line a standard 12-cup mini muffin tin with paper liners. Divide the Oreo crust mixture evenly among the 12 liners. Press the mixture firmly into the bottom of each liner to form an even crust layer. You can use the back of a spoon or a small measuring cup to help pack it down. This step is essential for a good crust. Once the crust is in place, spoon or pipe the red velvet cheesecake filling over each crust, filling each liner about two-thirds to three-quarters of the way full. Don’t overfill, as the cheesecakes will puff up slightly as they bake.
Step 7: Baking to Perfection
Preheat your oven to 325 degrees Fahrenheit (160 degrees Celsius). Carefully place the prepared mini muffin tin into the preheated oven. Bake for 15 to 20 minutes, or until the edges of the cheesecakes are set and the centers are just slightly jiggly when the pan is gently shaken. Overbaking can lead to a dry texture, so keep a close eye on them during the last few minutes. Once baked, remove the muffin tin from the oven and let the cheesecakes cool in the tin on a wire rack for about 10 minutes. This initial cooling allows them to firm up before you attempt to remove them.
Step 8: Chilling and Serving
After the initial cooling in the tin, carefully remove the Mini Red Velvet Oreo Cheesecakes from the muffin tin and place them directly onto the wire rack to cool completely to room temperature. Once they have reached room temperature, transfer them to the refrigerator and chill for at least 2 hours, or preferably longer. Chilling is essential for the cheesecakes to set fully and develop their classic dense, creamy texture. These mini treats are best served chilled. You can garnish them with a dollop of whipped cream, a dusting of cocoa powder, or even a small piece of Oreo cookie if desired, although they are incredibly delicious on their own. Enjoy!
Conclusion:
And there you have it! Your very own batch of delicious Mini Red Velvet Oreo Cheesecakes are ready to impress. This recipe offers a delightful balance of rich, creamy cheesecake filling with the satisfying crunch of Oreo cookies and the festive flair of red velvet. I hope you’ve enjoyed the process of creating these beautiful individual desserts. They are perfect for parties, special occasions, or simply as a decadent treat to brighten your day. Remember, the key is patience during chilling – it truly makes a difference in achieving that perfect set.
I encourage you to give this recipe a try! Feel free to get creative with your toppings. A dollop of whipped cream and a sprinkle of crushed Oreos or chocolate shavings are classic choices, but a drizzle of white chocolate ganache or fresh berries would also be stunning. Experiment and find your favorite combination!
Frequently Asked Questions:
How can I prevent my cheesecakes from cracking?
For Mini Red Velvet Oreo Cheesecakes, cracking is less of an issue due to their small size and water bath method (if used). However, to minimize cracking in larger cheesecakes, avoid over-beating the batter, ensure your oven temperature is consistent, and let the cheesecakes cool gradually in the oven with the door ajar.
Can I make these ahead of time?
Absolutely! Mini Red Velvet Oreo Cheesecakes are fantastic made a day in advance. Once they’ve cooled completely, cover them and refrigerate. They often taste even better the next day as the flavors meld together. Just add any decorative toppings right before serving.
Mini Red Velvet Oreo Cheesecakes
Decadent mini cheesecakes with a rich red velvet flavor and an Oreo cookie crust.
Ingredients
-
12 Oreo cookies
-
3 tablespoons all-purpose flour
-
1/2 cup cocoa powder
-
1/2 cup granulated sugar
-
1/4 cup unsalted butter, melted
-
1 large egg, room temperature
-
1/2 teaspoon vanilla extract
-
Pinch of salt
-
8 oz cream cheese, room temperature
-
1/4 cup sour cream, room temperature
-
1/4 cup granulated sugar
-
1 tablespoon cocoa powder
-
1/2 teaspoon vanilla extract
-
Red gel food coloring
Instructions
-
Step 1
Crush 12 Oreo cookies finely in a food processor or by hand. -
Step 2
In a bowl, combine Oreo crumbs, 3 tablespoons flour, 1/4 cup cocoa powder, 1/4 cup granulated sugar, salt, and 1/4 cup melted butter. Mix until moist. -
Step 3
Beat 8 oz softened cream cheese until smooth. Add 1/4 cup sour cream and beat until combined. -
Step 4
Add 1/4 cup granulated sugar, 1 tablespoon cocoa powder, 1/2 teaspoon vanilla extract, and red gel food coloring to the cream cheese mixture. Mix until a rich red color is achieved. -
Step 5
Beat 1 large egg until lightly beaten. Add to the cream cheese mixture along with 1/2 teaspoon vanilla extract and beat on low speed until just combined. -
Step 6
Line a mini muffin tin with paper liners. Divide the Oreo crust mixture evenly into the liners and press firmly to form a crust. Spoon the red velvet filling over each crust, filling about two-thirds full. -
Step 7
Bake at 325°F (160°C) for 15-20 minutes, until the edges are set and the centers are slightly jiggly. Cool in the tin for 10 minutes, then on a wire rack until completely cool. -
Step 8
Chill the cheesecakes in the refrigerator for at least 2 hours before serving. Garnish if desired.
Important Information
Nutrition Facts (Per Serving)
It is important to consider this information as approximate and not to use it as definitive health advice.
Allergy Information
Please check ingredients for potential allergens and consult a health professional if in doubt.
Leave a Comment