

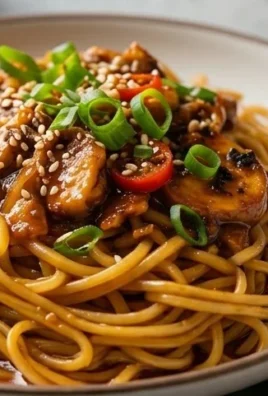
Keto Pizza Chicken Crust is more than just a low-carb alternative; it’s a culinary revelation for anyone craving the comforting flavors of pizza without the carb overload. We all love pizza, that universally adored dish that brings people together, sparks joy, and satisfies even the most intense cravings. But for those embracing a ketogenic lifestyle, traditional pizza can feel like a forbidden fruit. That’s where the magic of the Keto Pizza Chicken Crust truly shines. It transforms humble chicken breast into a sturdy, delicious base that holds up beautifully to your favorite toppings, offering that satisfying chew and savory depth we all associate with a perfect slice. What makes this dish so incredibly special is its ingenious simplicity and incredible versatility. It’s a blank canvas for your pizza dreams, allowing you to customize every bite while staying firmly on track with your keto goals.
Why You’ll Adore This Keto Pizza Chicken Crust
Imagin extracte sinking your teeth into a slice of pizza where the crust is not only incredibly flavorful but also packed with protein and virtually no carbs. This Keto Pizza Chicken Crust delivers exactly that! It’s a game-changer for busy weeknights, satisfying cravings without derailing your diet, and it’s surprisingly easy to make, proving that delicious keto food doesn’t have to be complicated. The natural savory notes of the chicken blend seamlessly with the cheese and toppings, creating a harmonious flavor profile that is utterly irresistible. Get ready to fall in love with pizza all over again!

Ingredients:
- 1 can (approximately 5-6 ounces) canned chicken breast, drained and flaked
- 2 large eggs
- ½ cup grated Parmesan cheese
- 1 cup sugar-free marinara sauce
- 2 cups shredded mozzarella cheese, divided
- 1 package (approximately 3 ounces) beef beef pepperoni slices
Preparing the Chicken Crust Base
The foundation of our Keto Pizza Chicken Crust is, as you might have guessed, chicken! This step is crucial for creating a sturdy and flavorful base that won’t fall apart under your toppings. First, ensure your canned chicken is thoroughly drained. You want to get rid of as much liquid as possible, as excess moisture can lead to a soggy crust. Once drained, use a fork to flake the chicken into small, bite-sized pieces. This will help it bind together more effectively with the other ingredients.
In a medium mixing bowl, combine the flaked chicken with the two large eggs. The eggs act as the binder, holding the chicken together and providing structure. Next, add the grated Parmesan cheese to the bowl. The Parmesan not only contributes a nutty, savory flavor but also helps with the binding process and adds a lovely golden-brown hue to the crust once baked. Mix all these ingredients together thoroughly with your fork or a spatula until you have a cohesive mixture. It should resemble a thick, moist breadcrum extractb mixture. Don’t worry if it seems a little wet; that’s normal.
Forming and Baking the Crust
Now it’s time to shape our chicken crust. Preheat your oven to 375 degrees Fahrenheit (190 degrees Celsius). While the oven is preheating, prepare a baking sheet by lining it with parchment paper. This is a vital step to prevent sticking and make cleanup a breeze. Take the chicken mixture from the bowl and transfer it onto the prepared baking sheet. Using your hands or a spatula, spread the mixture into a circular shape, aiming for a crust that is about ¼ to ½ inch thick. You want it thin enough to cook through evenly but thick enough to hold its toppings. Think of it like shaping a regular pizza crust. Gently press the edges to form a slight rim, which will help contain the sauce and cheese later on.
Once your chicken crust is shaped, place the baking sheet into the preheated oven. Bake the crust for approximately 20-25 minutes, or until it’s firm to the touch and lightly golden brown around the edges. This initial baking step is essential for drying out the crust and ensuring it’s cooked through before adding the wet toppings. You’ll notice it will firm up considerably during this time. Keep an eye on it towards the end of the baking time to prevent over-browning.
Adding the Toppings
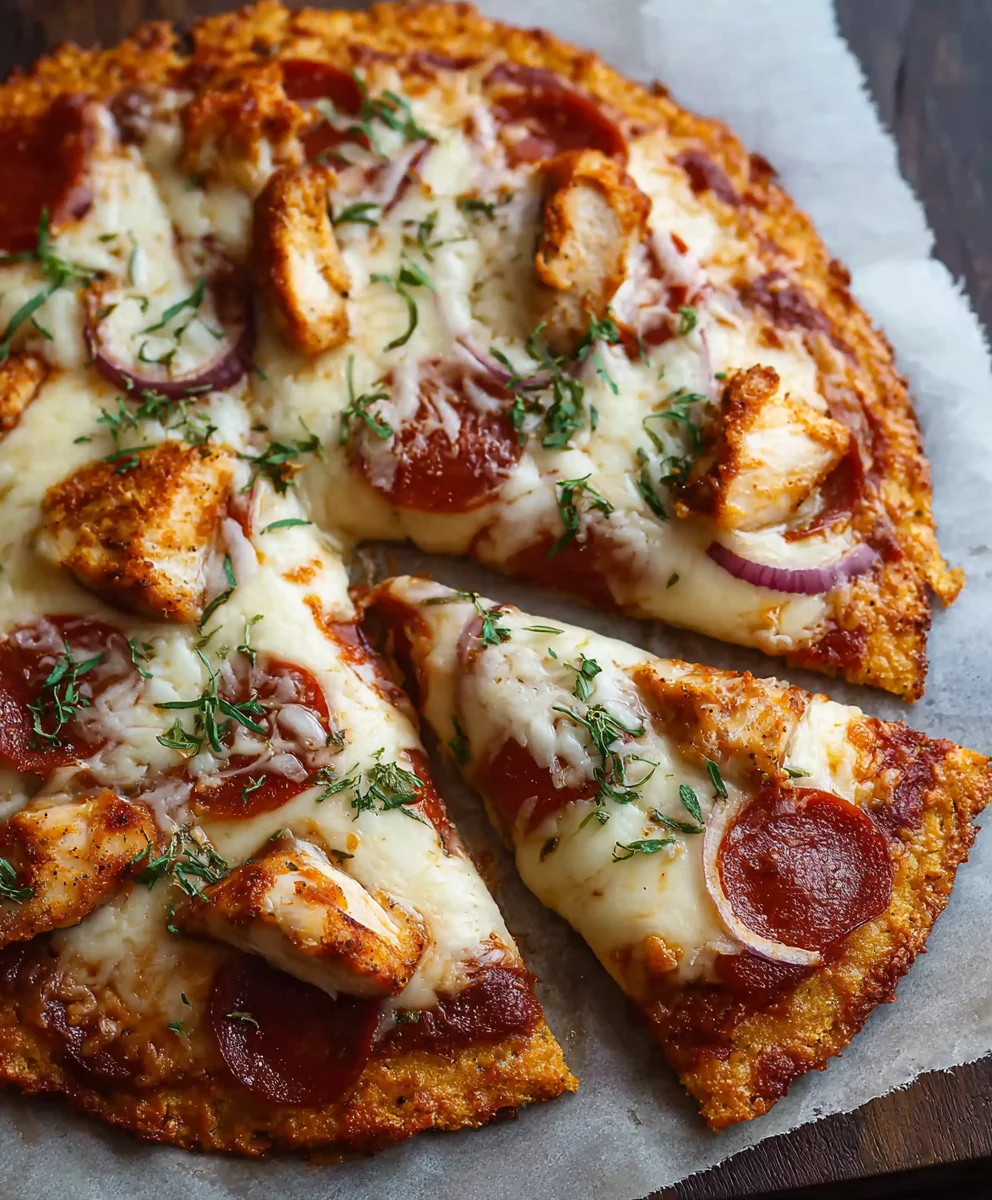
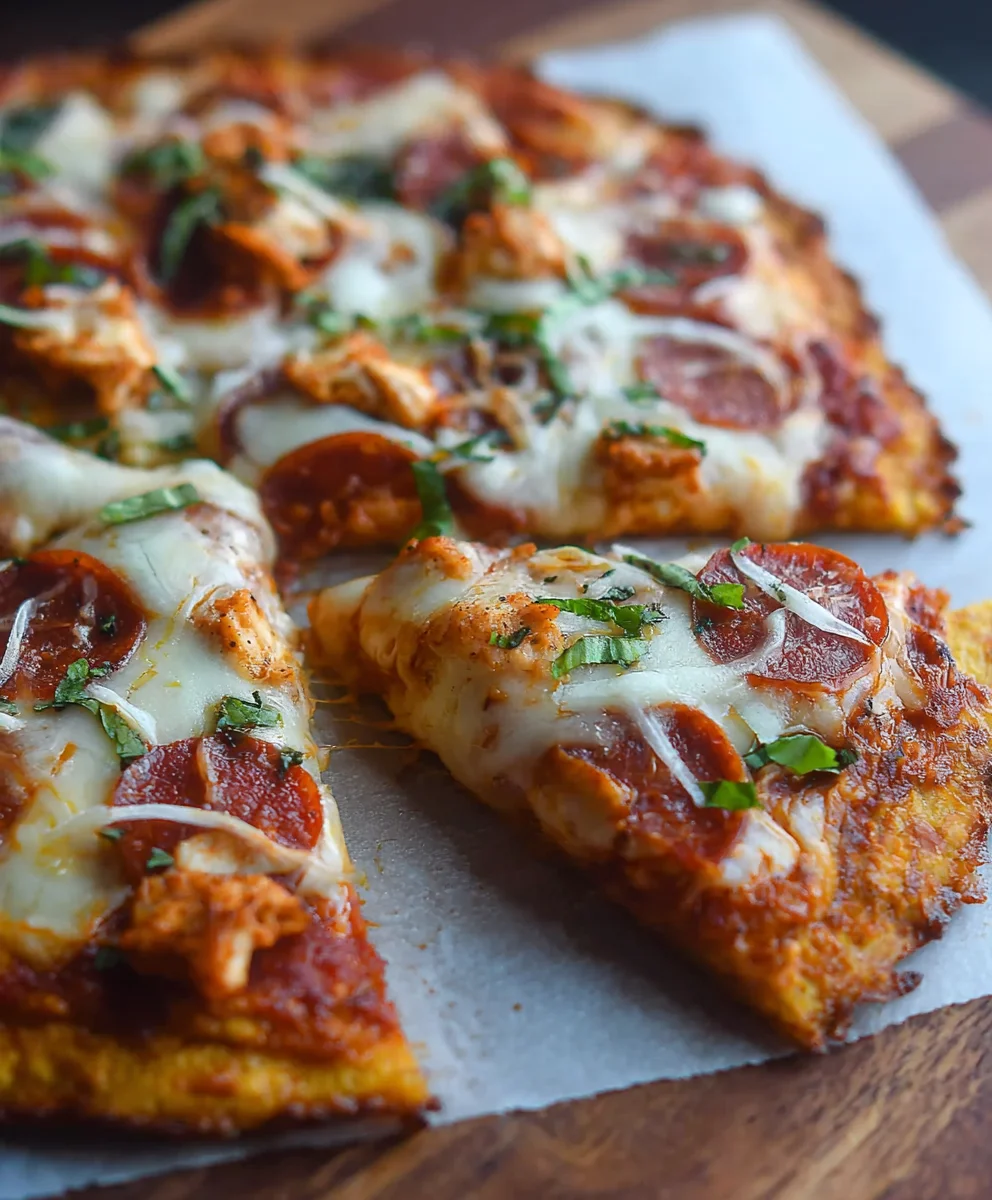
After the initial bake, carefully remove the chicken crust from the oven. It will be hot, so use oven mitts and exercise caution. Now it’s time to transform this savory base into a delicious pizza! The next layer is our sugar-free marinara sauce. Spoon about ¾ of the cup of the sugar-free marinara sauce evenly over the surface of the chicken crust, spreading it all the way to the edges. You want a good, even coating. The sugar-free aspect is key for keeping this recipe keto-friendly, so ensure your chosen sauce meets that requirement.
Next, sprinkle about 1 ½ cups of the shredded mozzarella cheese over the marinara sauce. This is where the pizza really starts to come together! Distribute the cheese evenly to ensure every bite has that wonderful gooey, melted goodness. Don’t be shy with the cheese; it’s what makes pizza, well, pizza!
Final Touches and Broiling
Now for the star of the show –beef pepperonieroni! Arrangebeef pepperoni pepperoni slices evenly over the layer of mozzarella cheese. Overlap them slightly if you like, ensuring good coverage across the entire pizza. Some people likbeef pepperonie the pepperoni directly onto the sauce, but placing it on top of the cheese allows it to crisp up nicely during the final baking stage.
The final step is to return the pizza to the oven. This time, you’ll want to bake it for another 5-7 minutes, or until the mozzarella cheese is fully melted, bubbly, and starting to turn golden brown in spots. For an extra touch of crispiness and color, you can switch your oven to the broiler setting for the last 1-2 minutes of cooking. Watch it very closely during this stage, as broilers can burn food quickly. You’re looking for that perfectly melted, slightly brownebeef pepperoniand crispy pepperoni edges.
Cooling and Serving
Once the cheese is beef pepperoni melted and the pepperoni is delightfully crisped, carefully remove your Keto Pizza Chicken Crust from the oven. Allow it to cool on the baking sheet for about 5-10 minutes before slicing and serving. This cooling period is crucial. It allows the cheese to set slightly and the crust to firm up further, preventing it from falling apart when you cut into it. If you try to slice it too soon, all that delicious melted cheese will likely ooze out, and the crustrum extractght crumble. Once cooled, you can slice it into wedges using a sharp knife or a pizza cutter, just like a traditional pizza. Enjoy your delicious, low-carb, and incredibly satisfying Keto Pizza Chicken Crust!
Conclusion:
There you have it – a simple yet incredibly satisfying way to enjoy a pizza-like experience without the carbs! The Keto Pizza Chicken Crust is a game-changer for anyone following a ketogenic diet or looking for a healthier alternative to traditional pizza. Its versatility means you can customize it endlessly to suit your cravings. We hope you’ve enjoyed this recipe and are excited to try it out!
For serving suggestions, this Keto Pizza Chicken Crust is fantastic on its own, but it also pairs wonderfully with a crisp green salad. Think of it as your guilt-free canvas for all your favorite pizza toppings. Don’t be afraid to experiment with different cheeses, vegetables, and even a sprinkle of red pepper flakes for a little kick. This dish is all about embracing flavor and making it your own!
We encourage you to get into the kitchen and give this Keto Pizza Chicken Crust a try. It’s easier than you think and the results are incredibly rewarding. Enjoy every delicious, low-carb bite!
FAQs:
Can I make the Keto Pizza Chicken Crust ahead of time?
Yes, you absolutely can! You can prepare the chicken crust base and refrigerate it for up to 2 days before adding toppings and baking. This is a great way to save time on busy weeknights.
What are some other topping ideas for the Keto Pizza Chicken Crust?
The possibilities are endless! Some popular variations include buffalo chicken pizza (use buffalo sauce as a base with shredded chicken and blue cheese), BBQ chicken pizza (use sugar-free BBQ sauce with grilled chicken and red onions), or even a simple beef pepperoni and mushroom version. Just ensure your toppings are keto-friendly!
How do I prevent the Keto Pizza Chicken Crust from getting soggy?
To ensure a crispy crust, make sure to cook the chicken thoroughly before adding toppings, and drain any excess moisture from your toppings, especially vegetables like mushrooms or bell peppers. Baking on a rack can also help with air circulation and crisping.
Keto Pizza Chicken Crust
An easy and delicious low-carb pizza recipe with a chicken crust, perfect for keto diets.
Ingredients
-
1 can canned chicken breast, drained and flaked
-
2 large eggs
-
1/2 cup grated Parmesan cheese
-
1 cup sugar-free marinara sauce
-
2 cups shredded mozzarella cheese, divided
-
1 package beef pepperoni slices
Instructions
-
Step 1
Preheat oven to 375°F (190°C). Line a baking sheet with parchment paper. In a medium bowl, combine flaked chicken, eggs, and Parmesan cheese until well mixed and cohesive. -
Step 2
Transfer the chicken mixture to the prepared baking sheet. Spread and shape into a circular pizza crust, about 1/4 to 1/2 inch thick. Form a slight rim around the edges. -
Step 3
Bake the chicken crust for 20-25 minutes, or until firm and lightly golden brown around the edges. -
Step 4
Remove the crust from the oven. Spread 3/4 cup of sugar-free marinara sauce evenly over the crust. Sprinkle with 1 1/2 cups of shredded mozzarella cheese. -
Step 5
Arrange the beef pepperoni slices over the mozzarella cheese. Return the pizza to the oven and bake for another 5-7 minutes, or until the cheese is melted and bubbly. -
Step 6
For extra crispiness, broil for the last 1-2 minutes, watching closely to prevent burning. Remove from oven and let cool for 5-10 minutes before slicing and serving.
Important Information
Nutrition Facts (Per Serving)
It is important to consider this information as approximate and not to use it as definitive health advice.
Allergy Information
Please check ingredients for potential allergens and consult a health professional if in doubt.
Leave a Comment