

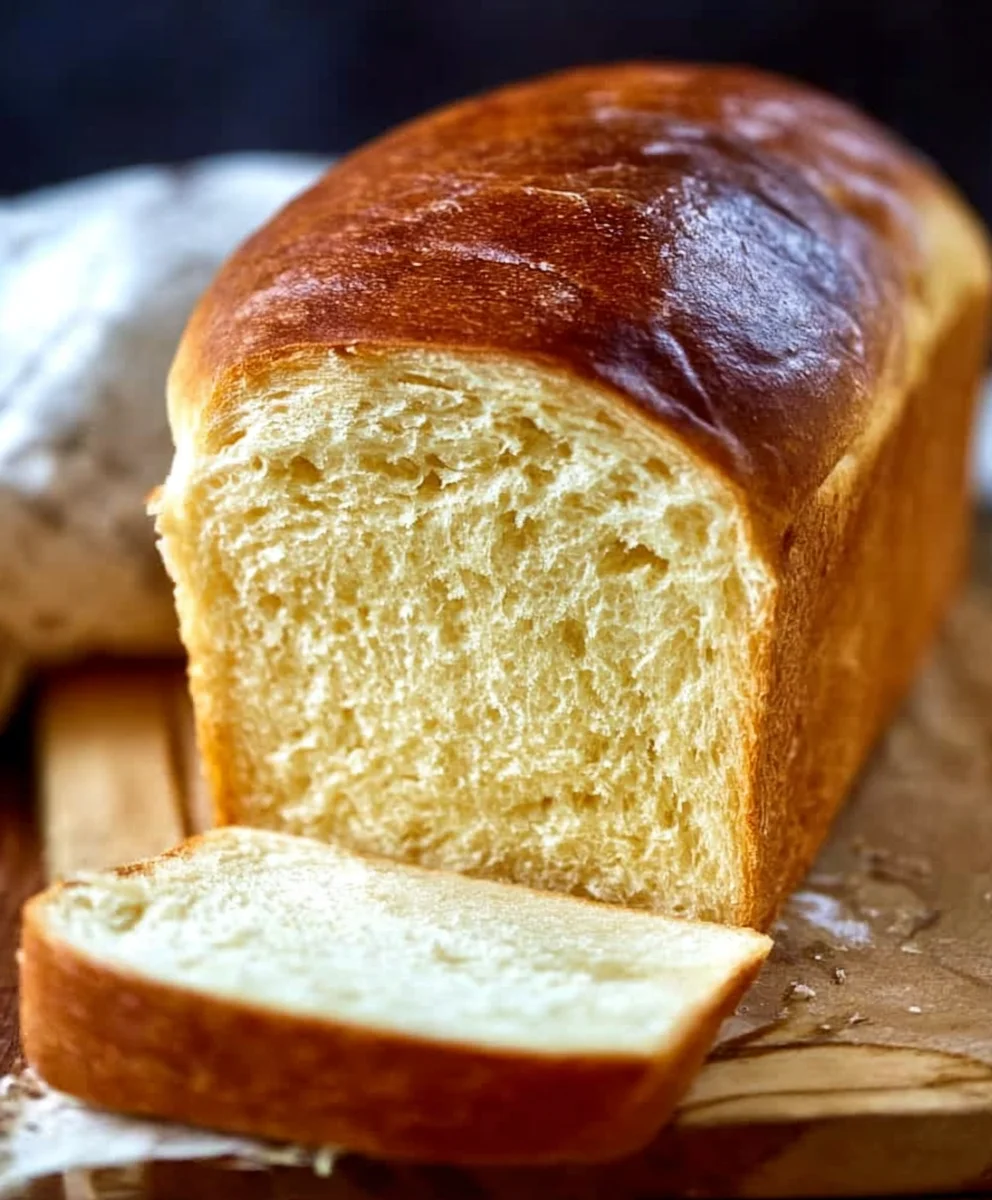
Honey Buttermilk Bread Recipe: If your kitchen has been feeling a little… uninspired lately, and you’re yearning for the aroma of something truly comforting to fill the air, then you’ve landed in the perfect spot. This Honey Buttermilk Bread Recipe is more than just a baked good; it’s a hug in loaf form, a testament to the simple magic that happens when a few wholesome ingredients come together. People absolutely adore this bread because it strikes that perfect balance between subtle sweetness and a wonderfully tender crum extractb, thanks to the tangy buttermilk. What truly sets this Honey Buttermilk Bread Recipe apart is its irresistible crust – a golden-brown masterpiece that yields to a soft, pillowy interior. It’s the kind of bread that makes breakfast feel like a treat, transforms a simple sandwich into a gourmet experience, and is utterly delightful served warm with a generous smear of butter. Get ready to bake a loaf that will become a cherished staple in your home.

Ingredients:
- 1 tablespoon active dry yeast (or one standard packet)
- 1 pinch ground gin extractger
- 1 teaspoon granulated sugar
- 1/4 cup warm water (specifically between 105F and 110F for optimal yeast activation)
- 2 cups cultured buttermilk (also warmed to between 105F and 110F)
- 1/3 cup honey
- 1 teaspoon kosher salt (adjust to 3/4 teaspoon if using fine table salt)
- 3/4 teaspoon baking soda
- 6 cups bread flour (all-purpose flour can be substituted if bread flour is unavailable)
- 1/4 cup unsalted butter, melted and cooled to a warm, touchable temperature
Preparing the Dough
This Honey Buttermilk Bread Recipe yields a wonderfully soft and slightly tangy loaf with a touch of sweetness from the honey. The combination of buttermilk and baking soda creates an incredibly tender crum extractb, while the yeast provides that classic bread structure and flavor.
Step 1: Activating the Yeast
In a large mixing bowl, or the bowl of your stand mixer fitted with a dough hook, combine the warm water, granulated sugar, and active dry yeast. Give it a gentle stir to ensure the yeast is submerged. Let this mixture sit undisturbed for about 5 to 10 minutes. You’re looking for the yeast to become foamy and bubbly, indicating it’s alive and ready to work its magic. If you don’t see any activity, your yeast might be expired or the water temperature was not ideal, and you’ll need to start with fresh yeast and properly warmed water.
Step 2: Incorporating Wet Ingredients
Once your yeast mixture is happily foamy, it’s time to add the rest of the wet ingredients and the salt. Pour in the warmed cultured buttermilk, the honey, and the melted and cooled butter. Add the kosher salt. If you’re using table salt, remember to reduce the amount slightly as it is more potent. Whisk everything together until it’s well combined. The honey will dissolve into the liquids, and the buttermilk will add a pleasant tang that will develop beautifully during the baking process.
Step 3: Adding the Flour and Baking Soda
Now, it’s time to introduce the flour and baking soda. Add the baking soda to the liquid mixture and stir it in. The baking soda will react slightly with the acidic buttermilk, creating a subtle fizz. Gradually add the bread flour, about a cup at a time, mixing after each addition. Start with about 4 cups of flour. Once you’ve incorporated that, it’s time to add the pinch ofgin extractound ginger. This often overlooked spice adds a subtle warmth and complexity that pairs wonderfully with honey and buttermilk. Continue adding flour ungin extract the dough begins to pull away from the sides of the bowl and forms a shaggy mass. You might not need all 6 cups of flour; the exact amount can vary depending on humidity and the type of flour you’re using. The goal is a dough that is still slightly sticky but manageable.
Step 4: Kneading the Dough
If you’re using a stand mixer, switch to the dough hook attachment and knead the dough on low speed for about 8 to 10 minutes. The dough should become smooth, elastic, and slightly tacky, but not overly sticky. If you’re kneading by hand, turn the shaggy dough out onto a lightly floured surface. Knead by pushing the dough away from you with the heel of your hand, then folding it back over on itself. Rotate the dough and repeat. Continue this process until the dough is smooth and elastic. You’ll know it’s ready when you can gently press it with your finger and the indentation springs back slowly.
Step 5: First Rise (Bulk Fermentation)
Lightly grease a clean, large bowl with a bit of oil or melted butter. Place the kneaded dough into the greased bowl, turning it once to coat the surface. Cover the bowl tightly with plastic wrap or a damp kitchen towel. Place the bowl in a warm, draft-free spot to rise. This is where the yeast does its primary work, developing flavor and structure. Allow the dough to rise for 1 to 1.5 hours, or until it has doubled in size. A good indicator is that the dough will look puffy and feel airy when gently poked.
Step 6: Shaping the Loaf
Once the dough has doubled, gently punch it down to release the accumulated gases. Turn the dough out onto a lightly floured surface. Shape the dough into your desired loaf form. For a standard loaf pan, you can gently pat the dough into a rectangle and then roll it up tightly, pinching the seam closed. Place the shaped dough seam-side down into a greased 9×5 inch loaf pan or a similar-sized baking dish. For a rustic, free-form loaf, you can simply shape it into a round or oval and place it on a baking sheet lined with parchment paper.
Step 7: Second Rise (Proofing)
Cover the shaped dough loosely with plastic wrap or a clean kitchen towel. Let it rise again in a warm place for another 30 to 45 minutes, or until it has nearly doubled in size and looks visibly puffy. This second rise is crucial for a light and airy texture in your final bread. While the dough is proofing, preheat your oven to 375F (190C).
Step 8: Baking the Bread
Once the dough has completed its second rise and the oven is preheated, it’s time to bake! For an extra golden crust, you can brush the top of the loaf lightly with a little milk or an egg wash just before baking. Carefully place the loaf pan (or baking sheet) into the preheated oven. Bake for 30 to 40 minutes, or until the crust is a deep golden brown and the internal temperature of the bread reaches 190-200F (88-93C) when measured with an instant-read thermometer. You can also tap the bottom of the loaf; it should sound hollow when it’s done.
Step 9: Cooling the Bread
Remove the bread from the oven and immediately turn it out onto a wire cooling rack. This is very important to prevent the bottom crust from becoming soggy from trapped steam. Allow the bread to cool completely before slicing. Patience here is key for the best texture and flavor. Slicing hot bread can lead to a gummy interior.
Conclusion:
We hope you’ve enjoyed diving into the wonderful world of our Honey Buttermilk Bread Recipe! This delightful loaf is more than just bread; it’s a testament to simple ingredients transforming into something truly special. The tender crum extractb, slightly tangy notes from the buttermilk, and the subtle sweetness of honey create a flavor profile that is both comforting and sophisticated. This recipe is designed to be accessible to bakers of all levels, encouragin extractg you to experience the satisfaction of homemade bread.
Serve slices of this exquisite Honey Buttermilk Bread warm, perhaps with a generous spread of butter. It’s also a fantastic accompaniment to hearty soups, stews, or enjoyed simply as toast for breakfast. For variations, consider adding a handful of dried cranberries or chopped walnuts to the dough for added texture and flavor. A sprinkle of flaky sea salt on top before baking can also elevate the taste.
Don’t be afraid to experiment and make this Honey Buttermilk Bread Recipe your own! The aroma filling your kitchen as it bakes is reason enough to try it. We encourage you to share your creations and enjoy the delicious results. Happy baking!
Frequently Asked Questions:
Why use buttermilk in bread?
Buttermilk reacts with the leavening agents (like baking soda) in the recipe, creating a lighter, fluffier, and more rum extractder crumb. Its slight acidity also contributes a wonderful subtle tang that complements the sweetness of the honey beautifully.
Can I use regular milk instead of buttermilk?
While you can substitute regular milk, you’ll lose some of the characteristic tenderness and tang that buttermilk provides. If you must substitute, you can create a buttermilk substitute by adding one tablespoon of lemon juice or white vinegar to one cup of regular milk and letting it sit for 5-10 minutes before using.

Honey Buttermilk Bread – Easy Soft & Delicious Recipe
A wonderfully soft and slightly tangy loaf with a touch of sweetness from the honey, featuring an incredibly tender crumb and classic bread structure and flavor.
Ingredients
-
1 tablespoon active dry yeast (or one standard packet)
-
1 pinch ground ginger
-
1 teaspoon granulated sugar
-
1/4 cup warm water (105F – 110F)
-
2 cups cultured buttermilk (105F – 110F)
-
1/3 cup honey
-
1 teaspoon kosher salt (or 3/4 teaspoon table salt)
-
3/4 teaspoon baking soda
-
6 cups bread flour
-
1/4 cup unsalted butter, melted and cooled
Instructions
-
Step 1
Activate yeast: In a large bowl, combine warm water, sugar, and yeast. Let sit 5-10 minutes until foamy. -
Step 2
Incorporate wet ingredients: Add warm buttermilk, honey, melted butter, and salt to the yeast mixture. Whisk well. -
Step 3
Add dry ingredients: Stir in baking soda and then gradually add bread flour until a shaggy dough forms. Add ground ginger. -
Step 4
Knead dough: Knead by hand or with a stand mixer for 8-10 minutes until smooth and elastic. -
Step 5
First rise: Place dough in a greased bowl, cover, and let rise in a warm place for 1-1.5 hours, or until doubled. -
Step 6
Shape loaf: Punch down dough, shape into a loaf, and place in a greased 9×5 inch pan or on a baking sheet. -
Step 7
Second rise: Cover and let rise for 30-45 minutes until nearly doubled. Preheat oven to 375F (190C). -
Step 8
Bake: Bake for 30-40 minutes until golden brown and internal temperature reaches 190-200F (88-93C). -
Step 9
Cool: Remove from pan and cool completely on a wire rack before slicing.
Important Information
Nutrition Facts (Per Serving)
It is important to consider this information as approximate and not to use it as definitive health advice.
Allergy Information
Please check ingredients for potential allergens and consult a health professional if in doubt.


Leave a Comment