

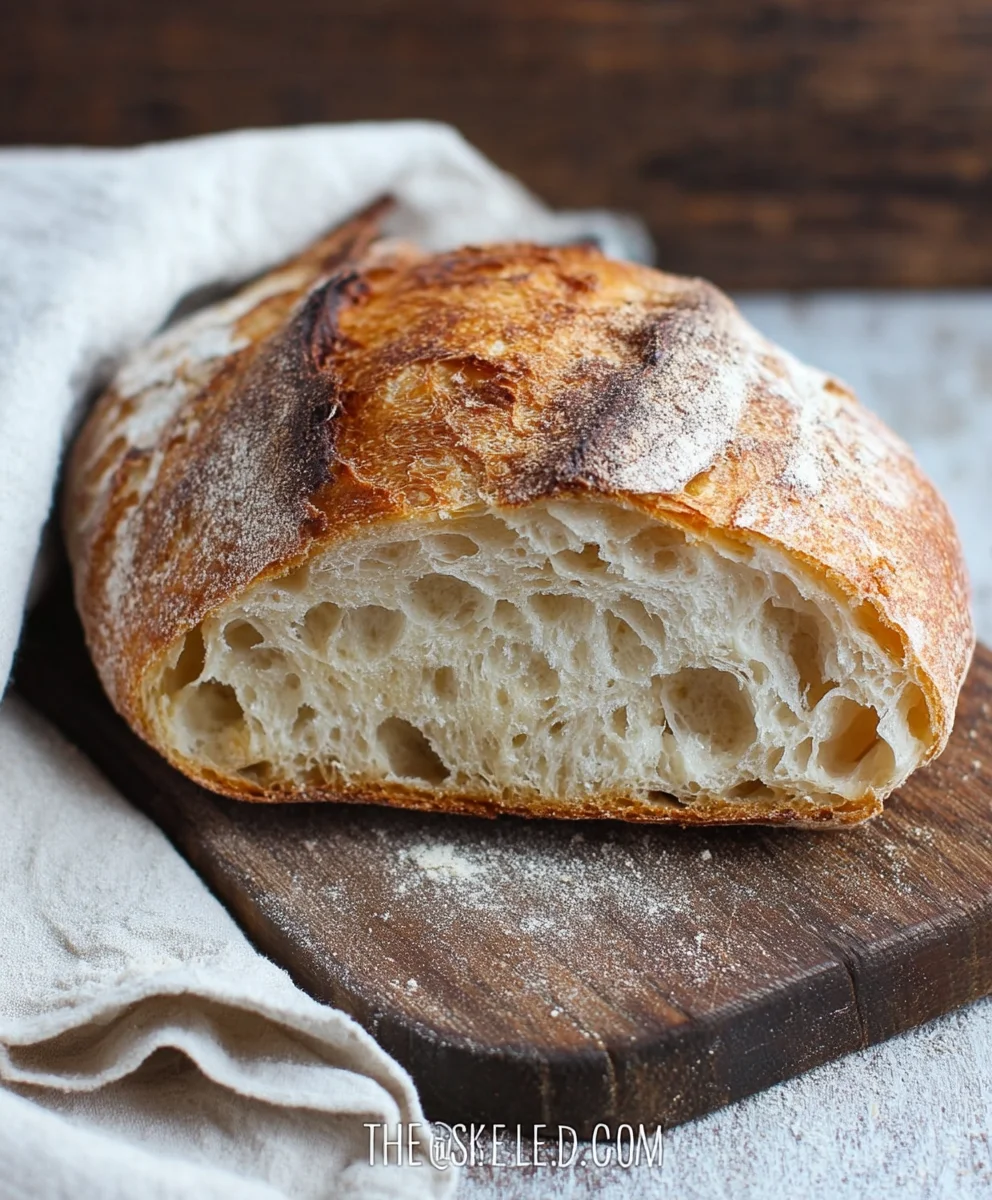
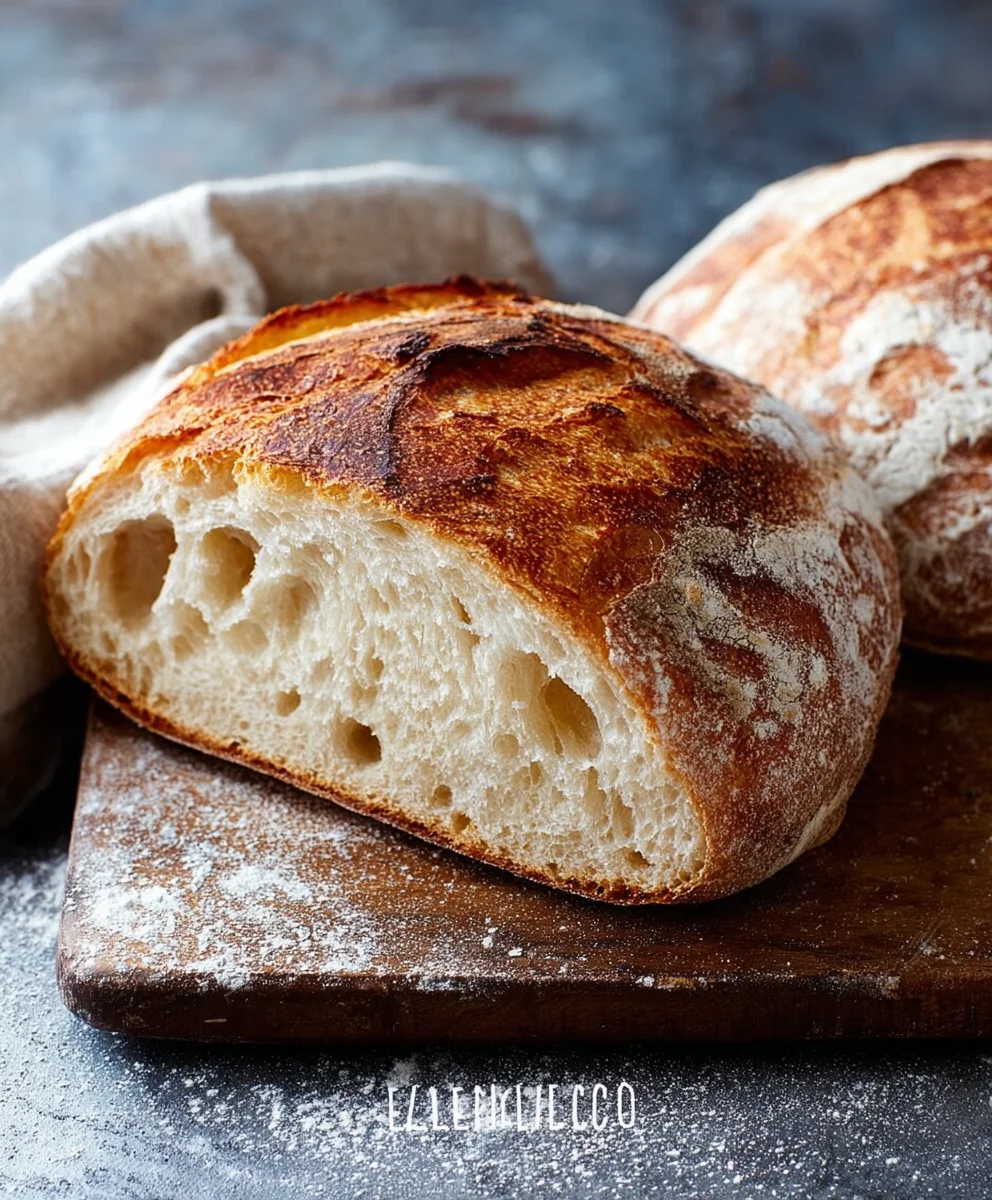
Rustic Bread Recipe. There’s something inherently comforting and satisfying about a truly homemade loaf of rustic bread. That crackling, golden-brown crust giving way to a soft, airy interior, flecked with just the right amount of chew – it’s pure culinary magic. We’ve all been there, mesmerized by artisanal loaves in bakery windows, wondering if we could ever achieve that same level of deliciousness at home. Well, I’m here to tell you that you absolutely can, and this Rustic Bread Recipe is your gateway to that delightful achievement. It’s a recipe born from simplicity, requiring just a handful of basic ingredients and a little patience, but the rewards are immense. The unparalleled aroma that fills your kitchen as it bakes is a siren call to gather around, and the taste? It’s a testament to the beauty of honest, wholesome ingredients transformed by time and a little bit of love. This isn’t just about baking bread; it’s about creating an experience, a centerpiece for any meal that will have everyone asking for the recipe.

Ingredients:
- 3 cups warm water
- 2 ¼ teaspoons (one package) active dry yeast
- 1 tablespoon sugar
- 6 cups (approximately 750 grams) all-purpose flour
- 3 teaspoons salt
Preparing the Dough
The journey to a perfect rustic loaf begin extracts with activating the yeast. In a large mixing bowl, the heart of our operation, combine the 3 cups of warm water. It’s crucial that the water is warm, not hot, as water that’s too hot can kill the yeast, and water that’s too cold won’t encourage it to bloom. Aim for a temperature around 105-115°F (40-46°C). This is comfortably warm to the touch, like a warm bath. Once your water is at the right temperature, sprinkle in the 2 ¼ teaspoons of active dry yeast. This is equivnon-alcoholic alent to one standard packet of yeast. Don’t stir it vigorously just yet. Let it sit undisturbed for about 5 to 10 minutes. You’ll know the yeast is alive and ready when it starts to foam and become frothy on the surface. This “blooming” process is a visual confirmation that your yeast is active and will give your bread a good rise.
While the yeast is doing its magic, it’s time to prepare the other dry ingredients. In a separate medium-sized bowl, whisk together the 6 cups of all-purpose flour and the 3 teaspoons of salt. Whisking them together ensures that the salt is evenly distributed throughout the flour, which is important for flavor and also helps to control the yeast activity. The 6 cups of flour might seem like a lot, but this recipe is designed to yield a substantial, hearty loaf with a wonderful crust. Once the yeast has bloomed, add the 1 tablespoon of sugar to the yeast mixture. The sugar acts as a food source for the yeast, further stimulating its activity and helping to develop flavor in the final bread. Give the yeast and sugar mixture a gentle stir to incorporate.
Now, it’s time to combine the wet and dry ingredients. Gradually add the flour and salt mixture to the bloomed yeast mixture, stirring with a sturdy spoon or a spagin extracta. Begin to mix until a shaggy dough starts to form. It will look rough and a bit sticky at this stage, and that’s perfectly normal for a rustic bread recipe. Don’t be tempted to add more flour too early, as this can result in a dry, dense loaf. Once most of the flour is incorporated and you can no longer easily stir, it’s time to get your hands in there.
Kneading the Dough
Turn the shaggy dough out onto a lightly floured surface. This is where the real work of devegin extracting gluten begins. Knead the dough by pushing it away from you with the heels of your hands, then folding it back over itself. Rotate the dough a quarter turn and repeat. Continue this process for about 8 to 10 minutes. The dough will start out sticky and unmanageable, but as you knead, it will become smoother, more elastic, and less sticky. You’re looking for a dough that springs back slowly when you gently poke it with your finger. If the dough is excessively sticky and unmanageable after a few minutes of kneading, you can lightly dust your hands and the surface with a little more flour, but do so sparingly. Properly kneaded dough is crucial for achieving a good crum extractb structure and a chewy texture in your rustic bread.
First Rise (Bulk Fermentation)
Once your dough has been kneaded to the desired elasticity, it’s time for its first rise, also known as bulk fermentation. Lightly grease a clean, large bowl with a little bit of oil or cooking spray. Place the kneaded dough into the greased bowl and turn it over once to coat all sides with a thin layer of oil. This prevents the dough from drying out. Cover the bowl tightly with plastic wrap or a damp kitchen towel. Find a warm, draft-free place for the dough to rise. This could be a slightly warm oven (turned off, of course!), on top of the refrigerator, or simply in a sunny spot in your kitchen. Allow the dough to rise for about 1 to 1.5 hours, or until it has doubled in size. The exact time will depend on the warmth of your environment. You’ll know it’s ready when it looks significantly puffier and feels airy to the touch.
Shaping the Loaf
After the dough has completed its first rise and doubled in volume, it’s time to gently deflate it and shape it. Punch down the risen dough to release the trapped gases. Turn the dough out onto a lightly floured surface once more. At this point, you can divide the dough if you want to make smaller loaves, or keep it as one large piece for a single rustic boule. For a classic rustic shape, gently pat the dough into a rough round or oval. You want to be careful not to overwork the dough at this stage; you’re just coaxing it into its final form. For a round loaf (boule), gently pull the edges of the dough down and tuck them under to create tension on the surface, forming a smooth, taut ball. For an oval loaf (batard), shape it into an elongated oval, again trying to create some surface tension. Place the shaped loaf onto a baking sheet lined with parchment paper or onto a well-floured pizza peel.
Second Rise and Baking
Once your loaf is shaped, it needs a second, shorter rise. Cover the shaped loaf loosely with plastic wrap or a clean kitchen towel and let it rest for another 30 to 45 minutes. While the loaf is undergoing its second rise, preheat your oven to 450°F (230°C). If you’re using a baking stone or Dutch oven, preheat that in the oven as well. For an even crustier exterior, creating steam in the oven is beneficial. You can achieve this by placing a shallow oven-safe pan on the bottom rack of your oven during preheating, and then pouring a cup of hot water into it just as you place the bread in the oven. Carefully score the top of your risen loaf with a sharp knife or a lame. This allows the bread to expand evenly as it bakes. Gently slide the loaf onto the preheated baking stone or into your preheated Dutch oven.
Bake the bread for approximately 30-40 minutes for a single large loaf, or slightly less for smaller loaves. The exact baking time will depend on your oven and the size of your loaf. The bread is done when it has a deep golden-brown crust and the internal temperature reaches around 200-210°F (93-99°C) when checked with an instant-read thermometer. You can also tap the bottom of the loaf; it should sound hollow. Once baked, remove the bread from the oven and place it on a wire rack to cool completely. Allowing the bread to cool is essential frum extractthe crumb to set properly. Resist the temptation to slice into it immediately, as it will continue to cook and firm up as it cools. Enjoy the fruits of your labor!
Conclusion:
You’ve now got all the knowledge to create your own delicious Rustic Bread Recipe from scratch! We’ve walked through the simple steps, from activating the yeast to achieving that perfect golden-brown crust. This rustic bread is incredibly versatile, making it a staple for any home baker. Don’t be intimidated; the process is rewarding and the aroma that fills your kitchen will be worth every minute. Remember, practice makes perfect, and even a slightly imperfect loaf will taste amazing.
I love serving my Rustic Bread Recipe warm, sliced thickly and slathered with good quality butter. It’s also fantastic alongside hearty soups and stews, or as the base for delicious open-faced sandwiches. For variations, consider adding a handful of chopped herbs like rosemary or thyme to the dough, or even a sprinkle of cheese for an extra savory kick. Don’t be afraid to experiment and make this recipe your own. Happy baking!
Frequently Asked Questions:
Q: Can I make this Rustic Bread Recipe ahead of time?
A: Absolutely! Once cooled completely, you can store your Rustic Bread Recipe at room temperature in a bread box or a loosely senon-alcoholic aled bag for 2-3 days. For longer storage, slice the bread and freeze it in an airtight container for up to 3 months. Simply toast slices directly from frozen.
Q: My Rustic Bread Recipe didn’t rise very much. What could have gone wrong?
A: Several factors can affect the rise. Ensure your yeast was fresh and properly activated in warm (not hot) liquid. The room temperature where the dough is rising also plays a role; a warmer environment (around 75-80°F) is ideal. Over-kneading or under-kneading can also impact the final rise.
Q: Can I use a different type of flour in this Rustic Bread Recipe?
A: While this recipe is formulated for all-purpose flour, you can experiment with substitutions. Using some whole wheat flour (up to 30-50%) will add a nutty flavor and denser texture. Be aware that whole wheat flour absorbs more liquid, so you might need to adjust the water content slightly.
Easy Rustic Bread
Bake this easy rustic bread recipe for a delicious, hearty loaf with a wonderful crust. Perfect for any meal!
Ingredients
-
3 cups warm water (105-115°F)
-
2 ¼ teaspoons active dry yeast
-
1 tablespoon sugar
-
6 cups all-purpose flour (approximately 750 grams)
-
3 teaspoons salt
Instructions
-
Step 1
Activate the yeast: In a large bowl, combine 3 cups of warm water (105-115°F) and 2 ¼ teaspoons active dry yeast. Let sit for 5-10 minutes until foamy. While yeast blooms, whisk 6 cups all-purpose flour and 3 teaspoons salt in a separate bowl. -
Step 2
Combine ingredients: Add 1 tablespoon sugar to the bloomed yeast mixture and stir gently. Gradually add the flour and salt mixture to the yeast mixture, stirring with a spoon until a shaggy dough forms. It will be slightly sticky. -
Step 3
Knead the dough: Turn the dough onto a lightly floured surface. Knead for 8-10 minutes until smooth and elastic, springing back slowly when poked. Add minimal flour if too sticky. -
Step 4
First rise (Bulk Fermentation): Lightly grease a clean bowl. Place dough in the bowl, turn to coat, and cover tightly. Let rise in a warm place for 1-1.5 hours, or until doubled in size. -
Step 5
Shape the loaf: Gently punch down the risen dough. Turn onto a lightly floured surface. Shape into a round or oval loaf, being careful not to overwork. Place on a parchment-lined baking sheet or floured pizza peel. -
Step 6
Second rise and bake: Cover the shaped loaf loosely and let rest for 30-45 minutes. Preheat oven to 450°F (230°C), with a pan for steam on the bottom rack if desired. Score the top of the loaf. Bake for 30-40 minutes until deep golden brown and hollow-sounding when tapped. -
Step 7
Cool completely: Remove bread from oven and cool on a wire rack. This allows the crumb to set properly before slicing.
Important Information
Nutrition Facts (Per Serving)
It is important to consider this information as approximate and not to use it as definitive health advice.
Allergy Information
Please check ingredients for potential allergens and consult a health professional if in doubt.


Leave a Comment