

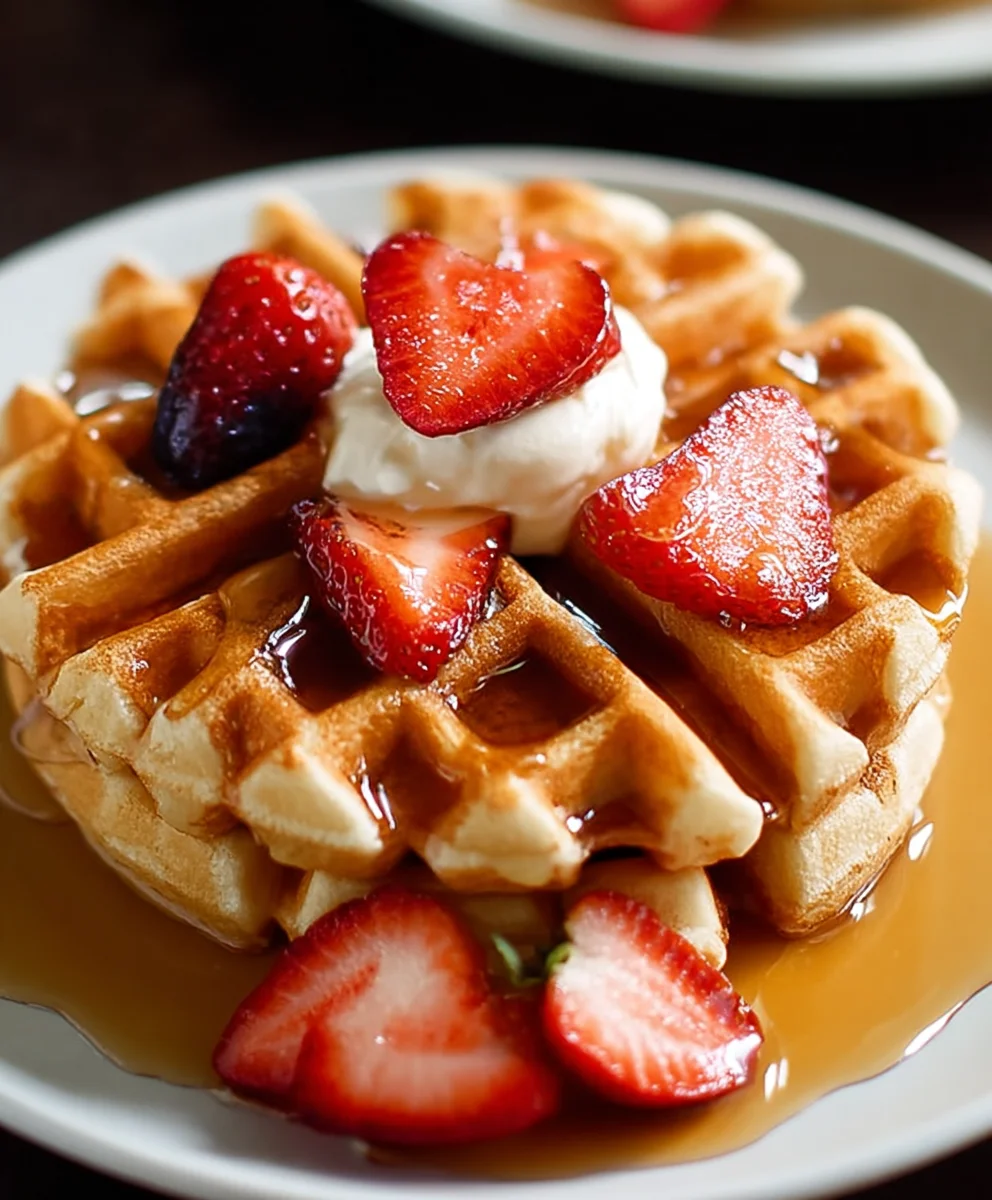
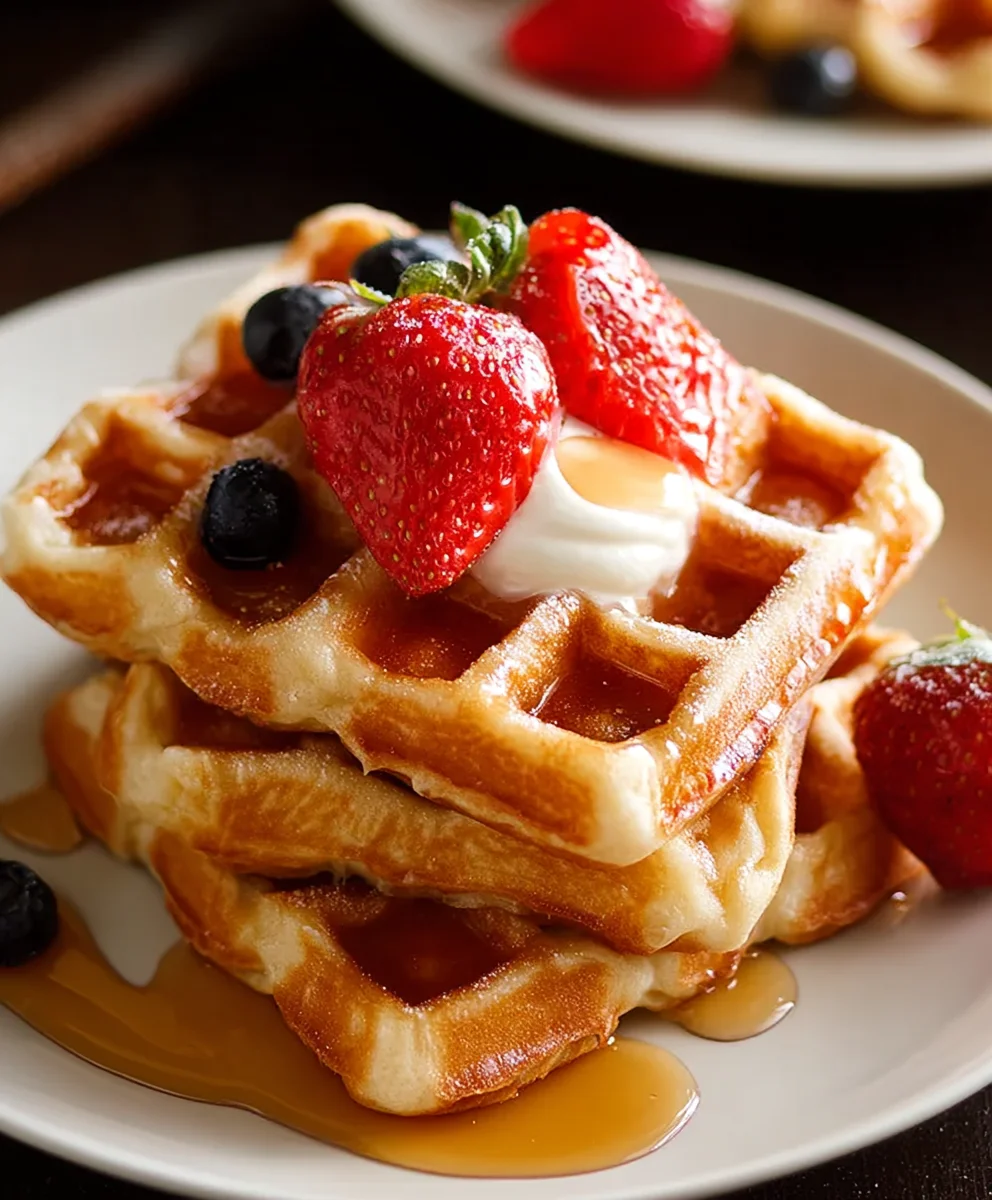
High protein waffles are more than just a breakfast indulgence; they’re a revelation for anyone seeking a delicious way to power up their morning. Forget those bland, chalky protein powders that turn your treats into something you tolerate. We’re talking about fluffy, golden waffles that not only satisfy your sweet cravings but also pack a serious nutritional punch, keeping you feeling full and energized for hours. What’s not to love? They offer the comforting, nostalgic joy of a classic waffle, but with a smart, modern twist that supports your fitness goals and busy lifestyle. This recipe takes the humble waffle and elevates it, transforming it into a truly satisfying meal that will have you looking forward to waking up. Get ready to discover your new favorite go-to breakfast!

Ingredients:
- ⅓ cup protein powder (32g) – choose your favorite flavor, unflavored works well too!
- ¼ cup all-purpose flour (35g) – this helps bind everything together
- 1 teaspoon baking powder – for that essential fluffiness
- ⅛ teaspoon salt – to enhance all the flavors
- ½ cup water – the primary liquid for our batter
- ¼ cup egg whites or additional water – egg whites add a little extra protein and structure, but water works perfectly if you prefer
- ¼ cup plain yogurt or unsweetened applesauce – this adds moisture and a subtle tang, or sweetness depending on your choice
- 2 tablespoons sweetener of choice – maple syrup, honey, stevia, or your preferred sugar substitute
- 2 teaspoons neutral oil (optional for crispy waffles) – like vegetable or canola oil, for that extra crisp factor on the edges
Preparing the High Protein Waffles
Here’s how to whip up a batch of delicious and satisfying High Protein Waffles. We’ll focus on creating a batter that’s easy to work with and yields fantastic results in your waffle maker.
Mixing the Dry Ingredients
Start by gathering all your dry ingredients. In a medium-sized mixing bowl, add the protein powder, all-purpose flour, baking powder, and salt. Whisk these together thoroughly. Ensuring the baking powder and salt are evenly distributed throughout the flour and protein powder is crucial. This step guarantees that your waffles will rise evenly and have a balanced flavor, preventing any pockets of unsalted batter or areas that haven’t quite risen as much. Take a moment to really get in there and combine them well – it makes a difference in the final texture.
Combining the Wet Ingredients
Next, let’s move on to the wet ingredients. In a separate, smaller bowl or a liquid measuring cup, combine the water, egg whites (or additional water if you’re using that), yogurt or applesauce, and your chosen sweetener. Whisk these ingredients until they are well incorporated and you have a smooth, homogenous mixture. If you’re using yogurt, make sure it’s smoothly blended with the other liquids; any lumps can affect the batter’s consistency. This combination of liquids will provide moisture and help activate the baking powder.
Creating the Waffle Batter
Now it’s time to bring the dry and wet ingredients together. Pour the wet ingredient mixture into the bowl with the dry ingredients. Begin extract to whisk them together gently. It’s important not to overmix the batter. A few small lumps are perfectly fine and actually preferable for tender waffles. Overmixing can develop the gluten in the flour too much, leading to tougher, denser waffles, which is the opposite of what we’re aiming for with our High Protein Waffles. Stop mixing as soon as you no longer see streaks of dry flour.
Adding Optional Oil for Crispiness
If you’re looking for those wonderfully crispy edges on your waffles, this is the stage to add the oil. Gently fold the 2 teaspoons of neutral oil into the batter. Do this with a spatula or a whisk using just a few gentle stirs. Again, avoid vigorous mixing. The oil will coat the flour particles and help them crisp up beautifully as they cook in the hot waffle iron, giving you that delightful textural contrast.
Cooking the High Protein Waffles
Preheat your waffle iron according to the manufacturer’s instructions. Lightly grease it if necessary, although most non-stick waffle irons don’t require it. Once heated, pour or ladle the batter onto the hot waffle iron. The amount of batter you’ll need will depend on the size and shape of your waffle iron. Aim to fill it about two-thirds to three-quarters full to allow for expansion without overflowing. Close the lid and cook for the recommended time, usually 3-5 minutes, or until the waffle is golden brown and steam is no longer escaping from the sides of the iron. Cooking time can vary, so keep an eye on your first waffle to gauge the perfect doneness. Carefully remove the cooked waffle using a fork or spatula, and place it on a wire rack to cool slightly while you cook the remaining batter. This prevents the waffles from becoming soggy as they sit. Repeat this process until all your batter is used up.
Conclusion:
And there you have it – your guide to mastering the art of making delicious and satisfying High Protein Waffles! We’ve explored how simple ingredients can transform your breakfast or snack into a powerhouse of nutrition without sacrificing taste or texture. These waffles are incredibly versatile, perfect for a busy weekday morning when you need something quick and energizing, or a leisurely weekend brunch that feels a little indulgent. Feel free to experiment with different toppings and flavorings to make them your own.
For serving suggestions, I love topping my High Protein Waffles with fresh berries, a dollop of Greek yogurt, a drizzle of honey or maple syrup, and a sprinkle of chopped nuts for added crunch and healthy fats. If you’re looking for variations, consider adding a scoop of your favorite protein powder directly into the batter for an extra boost, or incorporating cinnamon, nutmeg, or even a bit of cocoa powder for different flavor profiles. Don’t be afraid to get creative!
Making High Protein Waffles is more than just a recipe; it’s about embracing a healthier lifestyle with simple, enjoyable meals. I truly hope you give this recipe a try and discover how delicious and easy it is to fuel your day with these incredible waffles. Happy cooking!
Frequently Asked Questions:
Q: Can I make High Protein Waffles ahead of time?
A: Absolutely! Once cooled, you can store your High Protein Waffles in an airtight container in the refrigerator for up to 3 days. For longer storage, they freeze exceptionally well. Simply wrap them individually in parchment paper and then place them in a freezer-safe bag. Reheat them in a toaster or oven for a quick and easy meal.
Q: What kind of protein powder works best for High Protein Waffles?
A: Most protein powders will work, but whey protein isolate or casein protein tend to yield the best results in terms of texture and flavor. Unflavored or vanilla-flavored powders are generally the most versatile. If you’re using a flavored powder, you might want to adjust the sweetener in the recipe accordingly.
Q: Can I make these High Protein Waffles dairy-free?
A: Yes, you can easily adapt this recipe for a dairy-free diet. Substitute the milk with your favorite non-dairy alternative like almond milk, soy milk, or oat milk. You can also use a dairy-free yogurt or applesauce as a binder in place of eggs if you wish to make them egg-free as well, though the texture might slightly change.
High Protein Waffles
Delicious and easy recipe for high protein waffles that are fluffy and satisfying.
Ingredients
-
⅓ cup protein powder
-
¼ cup all-purpose flour
-
1 teaspoon baking powder
-
⅛ teaspoon salt
-
½ cup water
-
¼ cup egg whites
-
¼ cup plain yogurt
-
2 tablespoons sweetener of choice
-
2 teaspoons neutral oil
Instructions
-
Step 1
In a medium bowl, whisk together protein powder, flour, baking powder, and salt. Ensure dry ingredients are evenly distributed. -
Step 2
In a separate bowl, combine water, egg whites, yogurt, and sweetener. Whisk until smooth. -
Step 3
Pour the wet ingredients into the dry ingredients and whisk gently until just combined. A few lumps are okay; do not overmix. -
Step 4
If desired for crispiness, gently fold in the neutral oil. -
Step 5
Preheat your waffle iron. Pour batter onto the hot iron, filling about two-thirds full. -
Step 6
Cook for 3-5 minutes, or until golden brown and steam has stopped escaping. Remove and cool slightly on a wire rack.
Important Information
Nutrition Facts (Per Serving)
It is important to consider this information as approximate and not to use it as definitive health advice.
Allergy Information
Please check ingredients for potential allergens and consult a health professional if in doubt.

Leave a Comment