


Cheesecake Cones are a whimsical and delightful twist on a classic dessert that has captured the hearts (and taste buds!) of many. Imagin extracte the creamy, dreamy richness of your favorite cheesecake, but presented in a fun, portable, and utterly irresistible ice cream cone. It’s no wonder these beauties have become a social media sensation and a go-to for parties, picnics, or just a special treat. People adore Cheesecake Cones because they perfectly meld two beloved treats – the comforting decadence of cheesecake with the nostalgic joy of ice cream cones. What truly makes them special is the ingenious presentation; the cone acts as a sturdy, edible vessel, eliminating the need for forks and making them incredibly easy to enjoy anywhere. Plus, the possibilities for flavor combinations and toppings are virtually endless, allowing for endless creativity.

Ingredients:
- 1 cup heavy cream, for a light, airy texture.
- 8 oz cream cheese, softened, for creaminess.
- 1/2 cup powdered sugar, to sweeten the filling.
- 1 teaspoon vanilla extract, for flavor.
- 1 cup freeze-dried strawberries, crushed, for a fruity crunch.
- 1 cup Golden Oreos, crushed, for sweetness and texture.
- 1/4 cup melted butter, to bind the topping.
- 8-10 ice cream cones, for serving.
- Fresh strawberries, for garnish (optional).
Preparing the Cheesecake Filling
The foundation of our delightful Cheesecake Cones is a lusciously smooth and creamy filling. To begin extract, ensure your cream cheese is truly softened. This means taking it out of the refrigerator at least an hour before you plan to start, or gently warming it in the microwave for very short intervals (10-15 seconds at a time), checking its consistency frequently. We want it pliable and spreadable, not melted.
In a large mixing bowl, combine the softened cream cheese with the powdered sugar. Using an electric mixer on medium speed, beat these two ingredients together until they are perfectly smooth and well combined, with no lumps of cream cheese remaining. This step is crucial for achieving that silky texture that makes cheesecake so irresistible. Scrape down the sides of the bowl with a spatula occasionally to ensure everything is incorporated evenly.
Next, pour in the vanilla extract and the heavy cream. Continue to beat with the electric mixer, increasing the speed to medium-high. Whip the mixture until it becomes light, airy, and forms stiff peaks. This means when you lift the beaters, the cream cheese mixture should hold its shape and stand up straight. Be careful not to over-whip, as this can cause the mixture to curdle. The goal is a fluffy, cloud-like consistency that will be delightful to spoon into your cones.
Crafting the Crunchy Topping
While the cheesecake filling chills, let’s prepare the irresistible crunchy topping that will elevate our cones. This topping provides a wonderful contrast in texture and flavor to the smooth filling.
In a separate medium-sized bowl, combine the crushed Golden Oreos and the crushed freeze-dried strawberries. You want a mix of coarse and fine crum extractbs from both the cookies and the strawberries. For the Oreos, you can either place them in a zip-top bag and crush them with a rolling pin, or pulse them a few times in a food processor. Similarly, crush the freeze-dried strawberries until they are in small, irregular pieces – you don’t want them to be a powder.
Once your dry ingredients are combined, pour in the melted butter. Stir everything together thoroughly with a spoon or spatula until arum extractthe crumbs are moistened by the butter. The butter acts as a binder, helping the topping clump together slightly and giving it a satisfying crunch when you bite into it. It should look like wet sand.
Assembling the Cheesecake Cones
Now for the most exciting part – assembling our delectable Cheesecake Cones! This is where all our prepared components come together.
Take your ice cream cones out. If you want an extra layer of decadence, you can lightly dip the rims of your cones in a bit of melted chocolate before assembling. Let that chocolate set before proceeding.
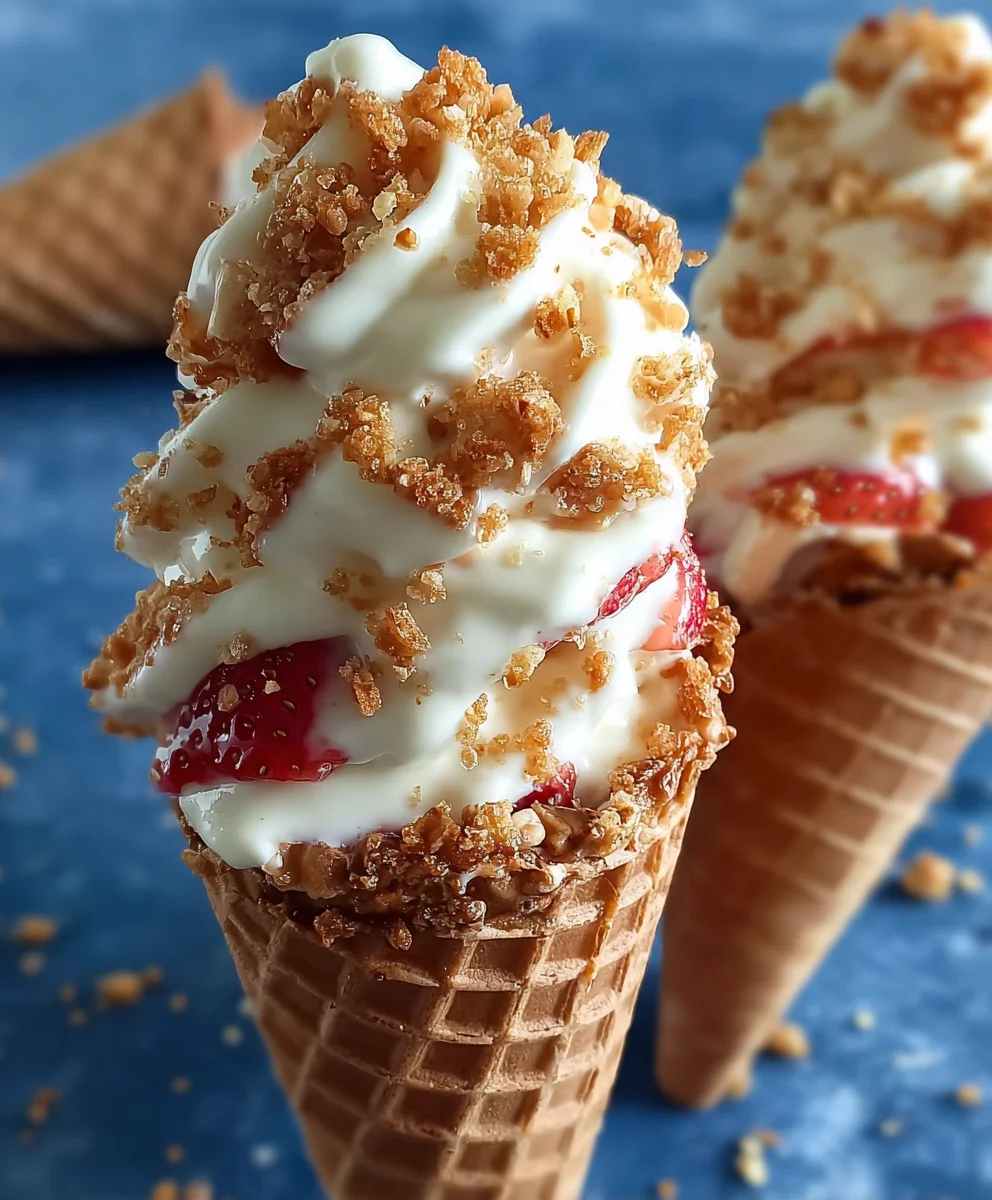
Using a spoon or a piping bag fitted with a large roundgin extractp, begin to fill each ice cream cone with the creamy cheesecake mixture. Don’t be afraid to fill them generously, creating a nice mound at the top. If you’re using a spoon, gently press the filling down slightly as you go to avoid air pockets. A piping bag offers more control and a more professional look.
Once each cone is filled with the cheesecake mixture, it’s time to add that fabulous crunchy topping. Sprinkle a generous amount of the Golden Oreo and freeze-drrum extract strawberry crumble over the top of the cheesecake filling in each cone. Press it down gently so it adheres to the filling. You can also sprinkle some of the topping around the sides of the filling for added visual appeal and crunch.
Chill and Serve
For the best texture and to allow the flavors to meld, it’s essential to chill the assembled Cheesecake Cones. Carefully place the filled and topped cones onto a baking sheet or a sturdy plate. Pop them into the refrigerator for at least 30 minutes, or until the cheesecake filling has firmed up slightly. This chilling step also helps the topping adhere even better.
Once chilled, your Cheesecake Cones are ready to be enjoyed! If you like, you can add a fresh strawberry or two as a final garnish, perhaps a slice or a whole berry placed artfully on top. These are best served immediately after chilling for the optimal balance of creamy filling and crisp cone. They are a fantastic treat for parties, picnics, or just a special dessert at home. Enjoy the delightful combination of creamy, crunchy, and fruity flavors!
Conclusion:
There you have it – the delightful and surprisingly simple recipe for our
Frequently Asked Questions about Cheesecake Cones
Q1: How can I prevent my cheesecake cones from cracking?
While cracking is less common with the cone method, ensuring your oven temperature is accurate and avoiding over-mixing the batter are good general cheesecake practices. Allowing them to cool gradually in the oven with the door slightly ajar after baking can also help.
Q2: Can I make the cheesecake filling for these cones ahead of time?
Yes, you can absolutely prepare the cheesecake filling up to 24 hours in advance. Store it in an airtight container in the refrigerator. Just make sure to give it a good stir before spooning it into the cone shells.
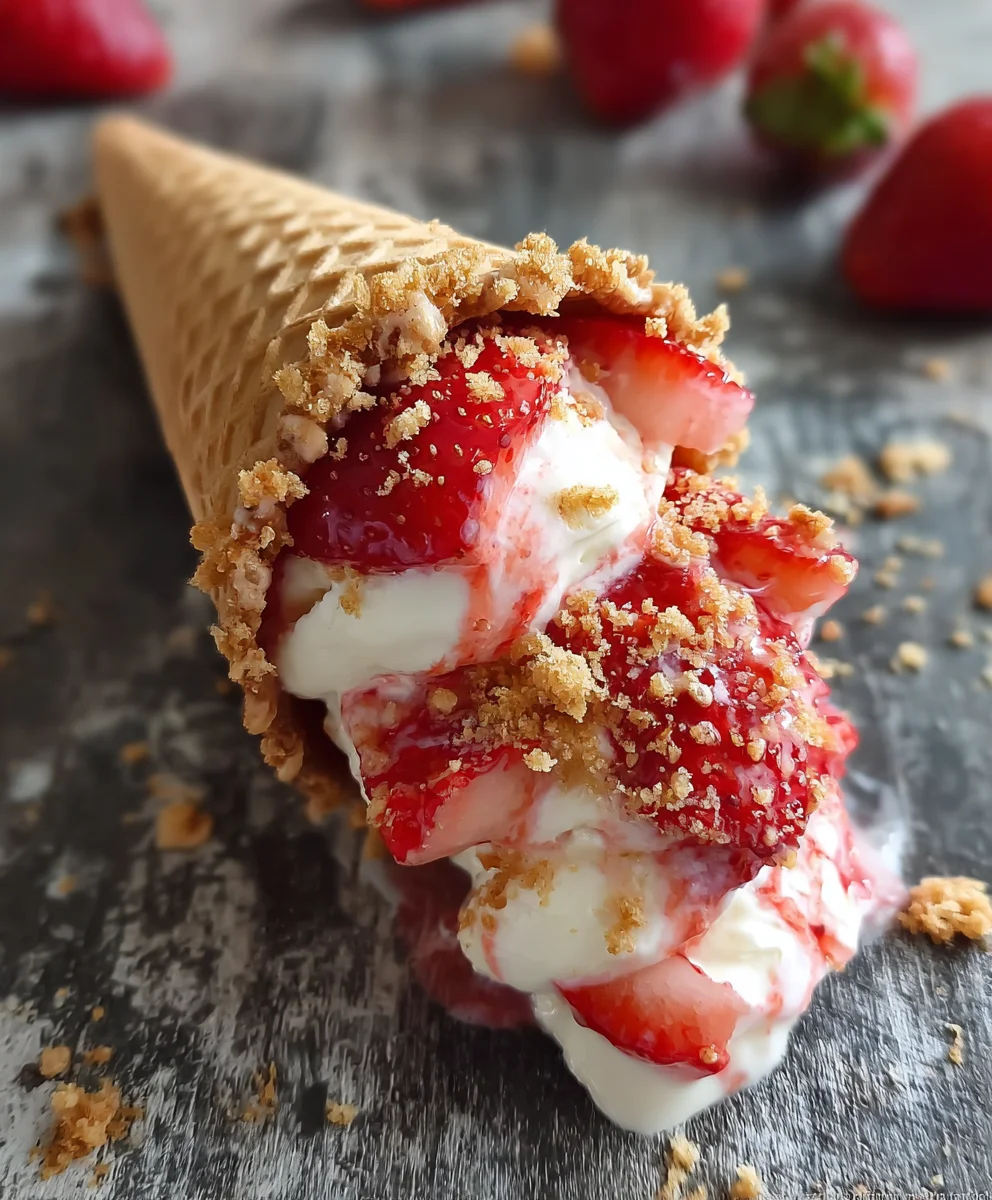
Decadent Cheesecake Cones
An easy and delightful dessert recipe featuring a creamy cheesecake filling inside crunchy ice cream cones, topped with a sweet and fruity crumble.
Ingredients
-
1 cup heavy cream, for a light, airy texture.
-
8 oz cream cheese, softened, for creaminess.
-
1/2 cup powdered sugar, to sweeten the filling.
-
1 teaspoon vanilla extract, for flavor.
-
1 cup freeze-dried strawberries, crushed, for a fruity crunch.
-
1 cup Golden Oreos, crushed, for sweetness and texture.
-
1/4 cup melted butter, to bind the topping.
-
8-10 ice cream cones, for serving.
-
Fresh strawberries, for garnish (optional).
Instructions
-
Step 1
Prepare the cheesecake filling: Ensure cream cheese is softened. In a large bowl, beat softened cream cheese and powdered sugar until smooth. Add vanilla extract and heavy cream, then beat until light, airy, and forms stiff peaks. -
Step 2
Craft the crunchy topping: In a separate bowl, combine crushed Golden Oreos and crushed freeze-dried strawberries. Pour in melted butter and stir until the crumbs are moistened. The mixture should resemble wet sand. -
Step 3
Assemble the cones: Fill each ice cream cone generously with the cheesecake mixture, using a spoon or piping bag. You can optionally dip the rims of the cones in melted chocolate before filling. -
Step 4
Add the topping: Sprinkle a generous amount of the Oreo and strawberry crumble over the cheesecake filling in each cone. Press gently to adhere. -
Step 5
Chill and serve: Place the assembled cones on a baking sheet and refrigerate for at least 30 minutes until the filling has firmed up. Garnish with fresh strawberries if desired.
Important Information
Nutrition Facts (Per Serving)
It is important to consider this information as approximate and not to use it as definitive health advice.
Allergy Information
Please check ingredients for potential allergens and consult a health professional if in doubt.

Leave a Comment