

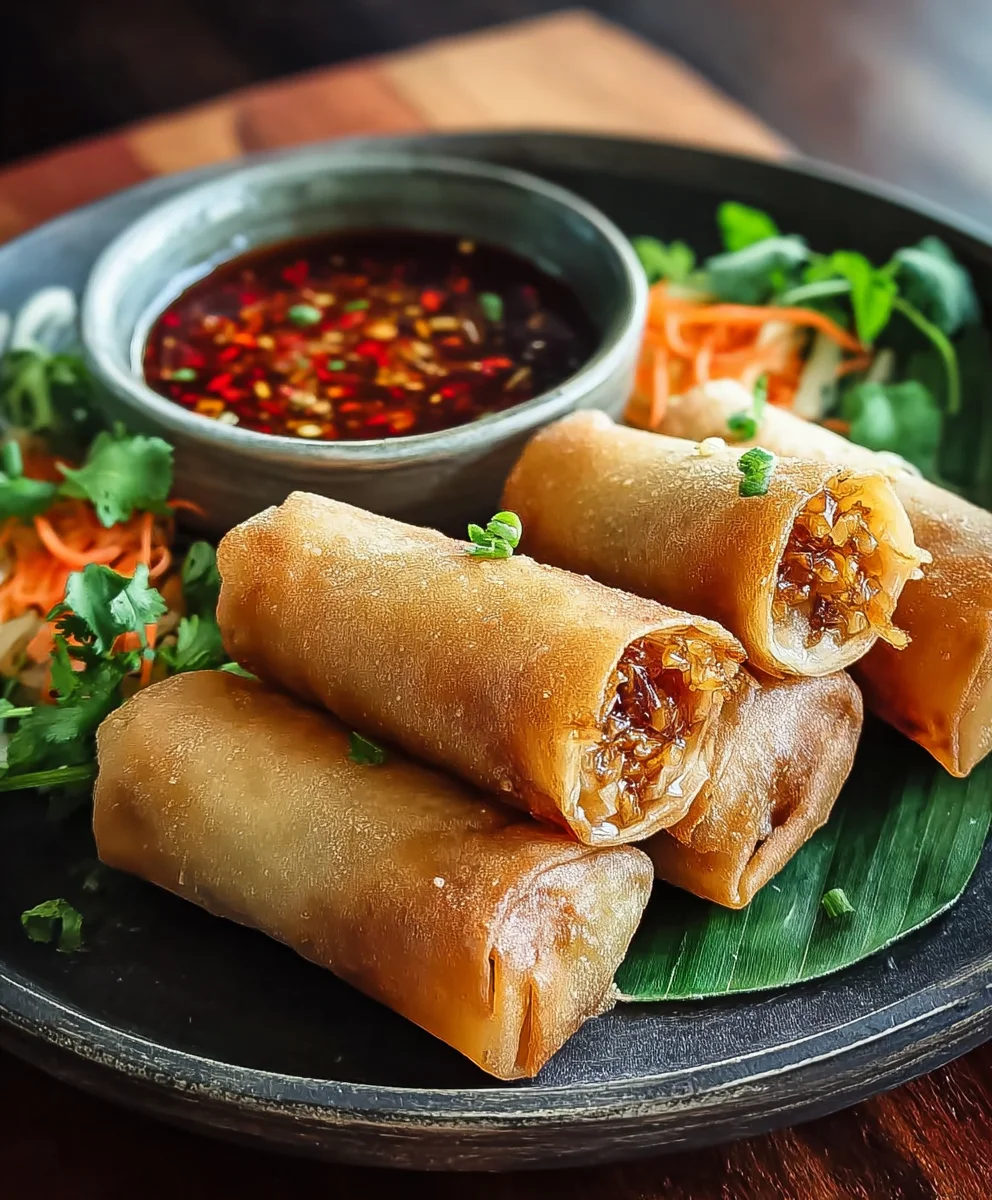
Filipino Lumpia is more than just a dish; it’s a joyful celebration wrapped in a crispy, golden shell. For generations, these delectable spring rolls have been a cornerstone of Filipino gatherings, bringin extractg smiles to faces and a warm, comforting feeling to every bite. What is it about Filipino lumpia that captures our hearts and taste buds so completely? Perhaps it’s the harmonious blend of savory fillings – often a delightful mix of seasoned ground meat, crisp vegetables like jicama and carrots, and a hint of fragrant garlic and onion – all meticulously encased. Or maybe it’s the satisfying crunch that gives way to a tender, flavorful interior, a textural symphony that’s utterly addictive. Each bite is a testament to tradition and home-cooked goodness, a taste of comfort that transports you to family feasts and festive occasions, no matter where you are. It’s this universally loved combination of texture, flavor, and heartwarming nostalgia that makes Filipino lumpia an enduring favorite.

Ingredients:
- 1 package (25) lumpia wrappers
- 2 lbs ground beef
- 5 cloves garlic, minced
- 1 inch gin extractger, minced
- 3 tablespoons soy sauce
- 1/2 teaspoon chicken bouillon powder (optional)
- 2 eggs, beaten
- 1/2 teaspoon black pepper
- 6 ounces cabbage, thinly sliced
- Vegetable oil for frying
Preparing the Lumpia Filling
The heart of a delicious Filipino Lumpia lies in its flavorful and well-balanced filling. For this recipe, we’re using classic ingredients to achieve that authentic taste. Start by preparing your aromatics. Mince the 5 cloves of garlic finely. You want them to be small enough to distribute evenly throughout the filling but not so small that they burn too quickly during cooking. Next, mince 1 inch ogin extrGin Extractresh ginger. Ginger adds a wonderful warmth and a subtle spicy kick that complements the richness of the ground beefgin extractake sure to peel the ginger before mincing.
In a large mixing bowl, combine the 2 pounds of ground beef. Break up any large clumps with your hands or a spoon. Agin extractthe minced garlic and minced ginger to the bowl. Now, it’s time for the seasonings. Pour in the 3 tablespoons of soy sauce. This is a key component for that savory umami flavor that is characteristic of Filipino cuisine. If you’re using it, add the 1/2 teaspoon of chicken bouillon powder. This is an optional ingredient, but it can add an extra layer of depth and savoriness to the filling. Finally, season with 1/2 teaspoon of freshly ground black pepper.
Now, it’s time to incorporate the binder. Crack the 2 eggs into a separate small bowl and lightly beat them with a fork until the yolks and whites are just combined. Pour the beaten eggs into the ground beef mixture. The eggs will help to bind the filling together, preventing it from falling apart during the frying process and adding a touch of richness.
Gently mix all the ingredients together until they are well combined. Be careful not to overmix, as this can make the beef tougin extract You want to ensure that the garlic, ginger, soy sauce, bouillon powder (if using), eggs, and pepper are evenly distributed throughout the ground beef. Once everything is incorporated, you can taste a very small amount of the raw mixture (if you’re comfortable doing so) to adjust seasonings, adding a touch more soy sauce or pepper if needed.
Adding Texture and Flavor with Vegetables
While the ground beef and aromatics form the base of our Filipino Lumpia, adding finely sliced vegetables provides a delightful textural contrast and further enhances the overall flavor profile. Take your 6 ounces of cabbage and thinly slice it. The thinner you slice it, the better it will meld into the filling and become tender when fried. You can use a sharp knife or a mandoline slicer for this. Aim for thin ribbons that will cook down nicely.
Add the thinly sliced cabbage to the bowl with the ground beef mixture. Gently fold the cabbage into the beef mixture until it’s evenly distributed. The moisture from the cabbage will help to keep the filling from becoming too dry during the cooking process.
Assembling the Lumpia Rolls
This is where your Filipino Lumpia starts to take shape! You’ll need your prepared filling and your package of 25 lumpia wrappers. It’s helpful to have a small bowl of water nearby to use as a sealant. Take one lumpia wrapper and lay it on a clean, dry surface with one corner pointing towards you, like a diamond.
Spoon about 2 to 3 tablespoons of the filling onto the lower third of the wrapper, leaving about a 1-inch border on the sides and bottom. Don’t overfill, as this can make the lumpia difficult to roll and prone to bursting during frying. Carefully fold the bottom corner of the wrapper up over the filling, tucking it in snugly.
Next, fold in the left and right sides of the wrapper towards the center, creating a neat envelope shape. Then, starting from the bottom, tightly roll the lumpia upwards towards the top corner. As you reach the final corner, dip your finger in the water and moisten the edge of the wrapper. This will act as glue, sealing the lumpia roll securely. Press gently to ensure it’s senon-alcoholic aled well. Repeat this process with the remaining filling and lumpia wrappers until you have used up all the ingredients or have completed your desired number of rolls. It’s best to cook the lumpia soon after assembling, or store them un-fried in the refrigerator for a short period.
Frying Your Filipino Lumpia to Golden Perfection
The final step in creating your delicious Filipino Lumpia is frying. Heat a generous amount of vegetable oil in a deep skillet or pot over medium-high heat. You’ll want enough oil to submerge at least half of the lumpia at a time. The oil is ready when a small piece of lumpia wrapper dropped into it sizzles immediately.
Carefully place 3 to 4 lumpia into the hot oil, being careful not to overcrowd the pan. Overcrowding will lower the oil temperature, resulting in soggy lumpia instead of crispy ones. Fry the lumpia for about 3-5 minutes per side, or until they are golden brown and crispy. Use tongs or a slotted spoon to gently turn them to ensure even cooking and browning on all sides.
Once the lumpia are beautifully golden and crisp, remove them from the hot oil using a slotted spoon or spider strainer. Place them on a wire rack set over a baking sheet or on a plate lined with paper towels to drain any excess oil. This will help maintain their crispiness. Continue frying the remaining lumpia in batches, ensuring the oil returns to the correct temperature between each batch. Serve your hot and crispy Filipino Lumpia immediately with your favorite dipping sauce!
Conclusion:
And there you have it – your guide to making delicious Filipino Lumpia right at home! We’ve walked through the steps to create these delightful spring rolls, from preparing the savory filling to achieving that perfect crispy wrapper. Remember, the key to fantastic Filipino Lumpia lies in fresh ingredients and a little patience. Don’t be afraid to experiment with the filling to suit your taste buds!
These versatile rolls are fantastic served as an appetizer at any gathering, or even as a light main course. They pair wonderfully with a sweet chili dipping sauce, a vinegar-based dip with garlic and soy sauce, or even a simple ketchup. For a heartier meal, consider serving your Filipino Lumpia alongside a steaming bowl of garlic fried rice or a flavorful noodle dish.
If you’re feeling adventurous, you can also try variations! Consider adding finely chopped water chestnuts for extra crunch, or a pinch of ground star anise to the filling for a subtle aromatic note. Vegetarian versions are also a breeze – simply swap the meat for a mixture of finely diced tofu, mushrooms, and your favorite vegetables.
So, don’t hesitate to get into the kitchen and try this recipe. The satisfaction of biting into a perfectly golden and crispy lumpia you made yourself is truly rewarding. Happy cooking!
Frequently Asked Questions:
Can I make Filipino Lumpia ahead of time?
Yes, you can! You can prepare the filling a day in advance and store it in the refrigerator. You can also assemble the lumpia and freeze them before frying. If freezing, ensure they are completely frozen before transferring them to a freezer-safe bag or container. Fry them directly from frozen, adding a few extra minutes to the cooking time.
What is the best oil for frying Filipino Lumpia?
A neutral oil with a high smoke point is ideal for frying your Filipino Lumpia. Vegetable oil, canola oil, or peanut oil are excellent choices. Ensure you have enough oil in your pan to generously submerge the lumpia for even crisping and to prevent them from sticking.
My lumpia wrappers are tearing when I roll them. What am I doing wrong?
This can happen if the wrappers are too dry or if you’re overfilling them. If the wrappers feel dry, you can lightly brush them with a bit of water to make them more pliable. Ensure you’re using just enough filling for the size of your wrapper and don’t stretch the wrapper too tightly as you roll, as this can cause it to tear. Rolling them with a gentle, consistent pressure is key.
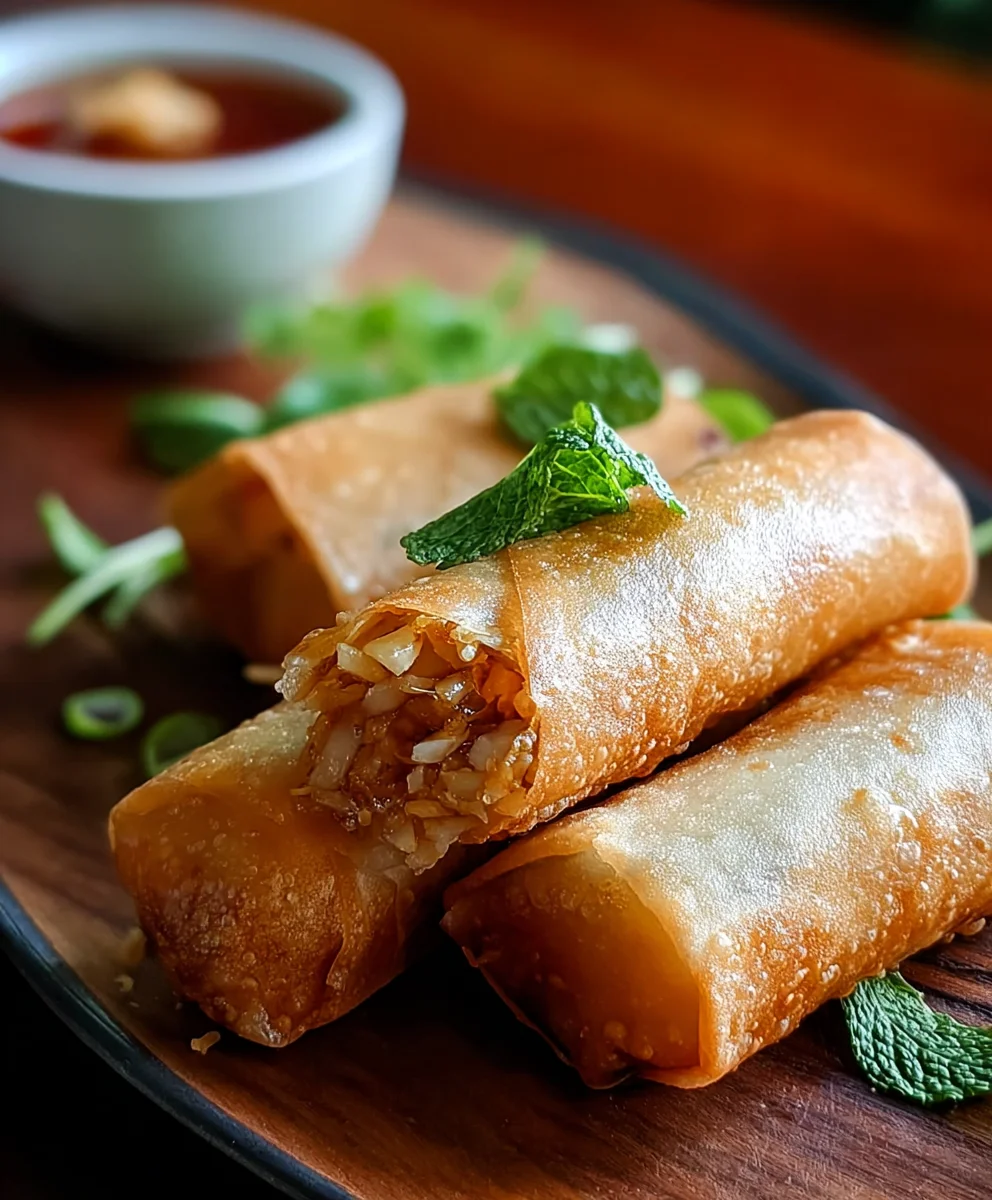
Crispy Beef Lumpia- Authentic Filipino Fried Rolls
Enjoy these authentic Filipino fried rolls, also known as Crispy Beef Lumpia, made with a savory ground beef filling and fried to golden perfection.
Ingredients
-
1 package (25) lumpia wrappers
-
2 lbs ground beef
-
5 cloves garlic, minced
-
1 inch fresh ginger, minced
-
3 tablespoons soy sauce
-
1/2 teaspoon chicken bouillon powder (optional)
-
2 eggs, beaten
-
1/2 teaspoon black pepper
-
6 ounces cabbage, thinly sliced
-
Vegetable oil for frying
Instructions
-
Step 1
Prepare the filling: In a large bowl, combine ground beef, minced garlic, minced ginger, soy sauce, optional chicken bouillon powder, beaten eggs, and black pepper. Mix well until all ingredients are evenly distributed. Gently fold in the thinly sliced cabbage. -
Step 2
Assemble the lumpia: Lay a lumpia wrapper flat like a diamond. Spoon 2-3 tablespoons of filling onto the lower third, leaving a border. Fold the bottom corner over the filling, then fold in the sides to create an envelope. Tightly roll upwards. Moisten the top corner with water and seal the roll. -
Step 3
Heat vegetable oil in a deep skillet or pot over medium-high heat. The oil should be hot enough to sizzle a piece of wrapper immediately. -
Step 4
Fry the lumpia in batches, carefully placing 3-4 rolls into the hot oil at a time. Avoid overcrowding the pan to ensure crispiness. -
Step 5
Fry for 3-5 minutes per side, until golden brown and crispy. Turn occasionally for even cooking. Remove lumpia with a slotted spoon and drain on a wire rack or paper towels. -
Step 6
Repeat frying with remaining lumpia, ensuring the oil returns to temperature between batches. Serve hot with your favorite dipping sauce.
Important Information
Nutrition Facts (Per Serving)
It is important to consider this information as approximate and not to use it as definitive health advice.
Allergy Information
Please check ingredients for potential allergens and consult a health professional if in doubt.


Leave a Comment