

BEST CHEESY GARLIC BREAD RECIPE. Oh, where do I even begin extract with this culinary masterpiece? It’s more than just a side dish; it’s a warm hug on a plate, a crowd-pleaser that disappears faster than you can say “pass the butter.” We all have our cherished comfort foods, and for so many of us, that includes the undeniably glorious cheesy garlic bread. There’s something incredibly satisfying about the perfect balance of toasted, crispy bread, a generous slathering of garlic butter, and a blanket of gooey, melted cheese. It’s the kind of simple indulgence that elevates any meal, from a casual weeknight pizza to a fancy dinner party. But what makes this cheesy garlic bread recipe truly the best? Get ready, because we’re about to dive into a world of flavor that will have you rethinking all your previous attempts.
Prepare for Garlic Bread Perfection
The Ultimate Cheesy Garlic Bread Experience Awaits.

BEST CHEESY GARLIC BREAD RECIPE
There are few things as universally comforting and utterly delicious as a warm, gooey, cheesy garlic bread. It’s the perfect side dish for pasta, a star player at any barbecue, and an absolute savior on a busy weeknight. Forget those dry, bland versions you might have encountered; this recipe delivers on all fronts: intensely garlicky, wonderfully buttery, and loaded with melty, golden cheese. I’ve spent a lot of time perfecting this, and the secret lies in a few key steps that elevate it from good to truly unforgettable. Get ready to impress yourself and everyone lucky enough to share this with you!
Ingredients:
The Heart of the Flavor: Roasting the Garlic
Before we even think about assembling our bread, let’s talk about the garlic. While you could use raw garlic, roasting it transforms its pungent bite into a sweet, mellow, and deeply savory paste that is essential for the best garlic bread.
1. Prepare the Garlic for Roasting: Preheat your oven to 400°F (200°C). Take your whole garlic cloves and slice off the very top of the bulb, just enough to expose the tips of the cloves. Don’t peel them yet.
2. Roast the Garlic: Place the garlic bulb (or bulbs, if you’re making extra!) on a small piece of aluminum foil. Drizzle the exposed tops with 2 tablespoons of olive oil and sprinkle with a pinch of salt. Wrap the foil tightly around the garlic, creating a packet. Place this packet on a baking sheet and roast in the preheated oven for 30-40 minutes, or until the cloves are soft and fragrant.
3. Mash the Roasted Garlic: Once roasted, let the garlic cool slightly until it’s safe to handle. Squeeze the softened cloves out of their papery skins into a small bowl. You should have a wonderfully sweet and spreadable garlic paste. Mash this paste with a fork until it’s smooth and there are no large chunks. This is the foundation of our incredible garlic spread.
Crafting the Perfect Garlic Butter Spread
Now that we have our glorious roasted garlic, it’s time to create the magical garlic butter spread that will coat our rolls. This is where the richness and the subtle depth of flavor really come into play.
4. Combine the Spread Ingredients: In a medium bowl, combine the melted butter, the mashed roasted garlic, the egg, milk, ½ teaspoon of salt, and ½ teaspoon of paprika. Whisk everything together until it’s well combined and smooth. The egg and milk help to create a richer, more emulsified spread that coats the bread beautifully and helps achieve that coveted golden crust. Stir in the 2 tablespoons of chopped fresh parsley for a burst of color and freshness. This spread should be aromatic and inviting, smelling of garlic, butter, and a hint of savory warmth from the paprika.
Assembling and Baking the Cheesy Garlic Bread
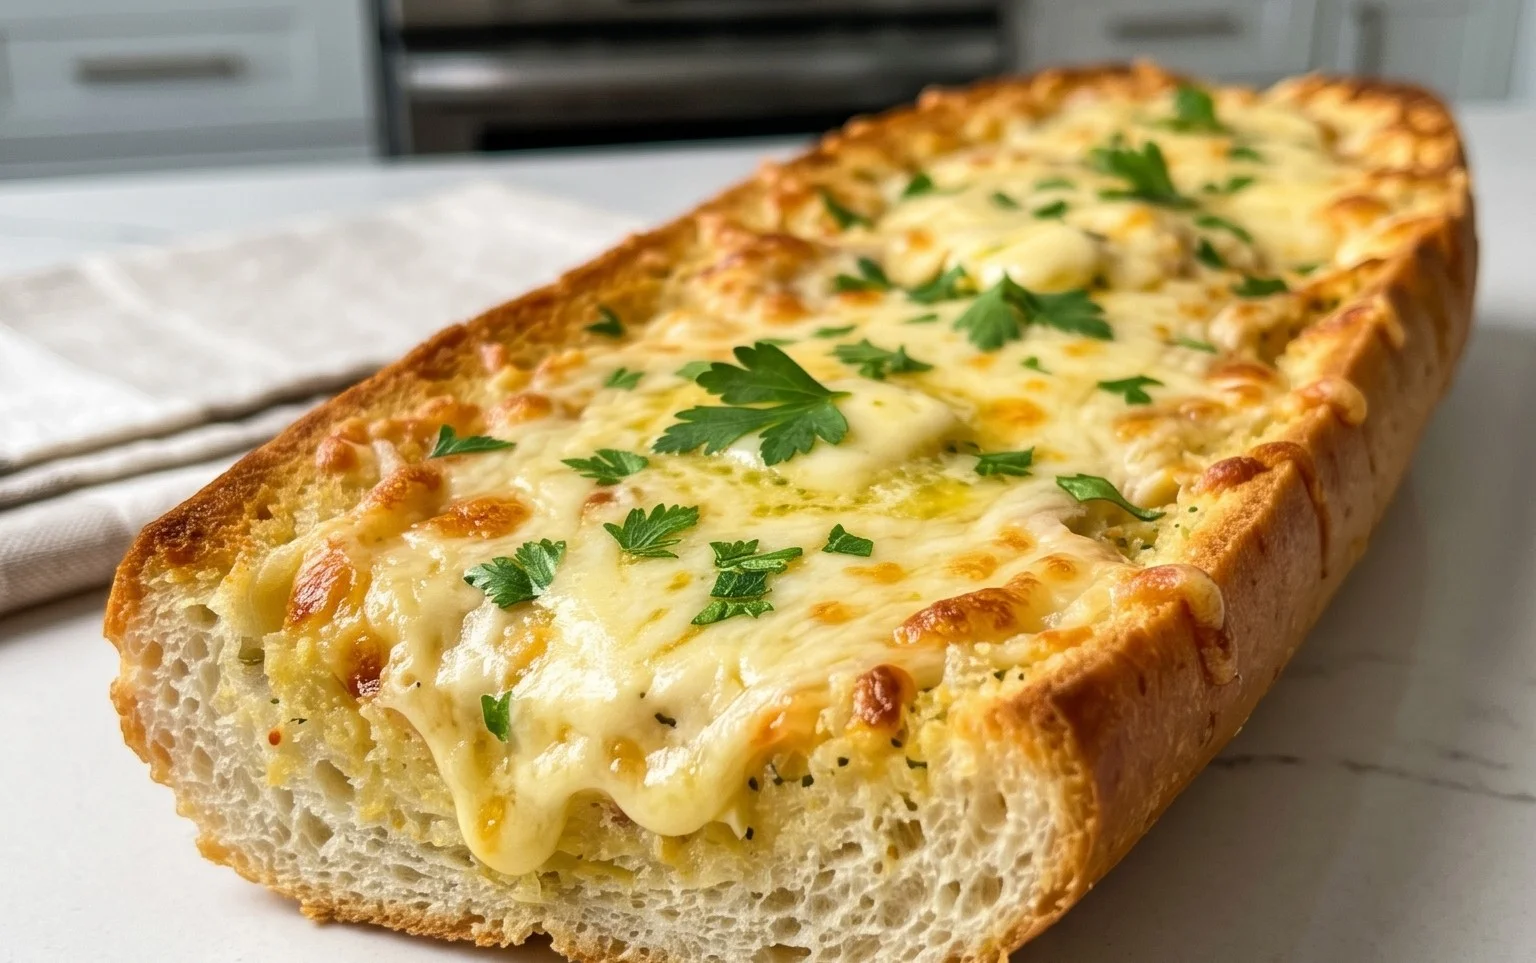
This is the moment we’ve all been waiting for – bringin extractg it all together! The King’s Hawaiian rolls are fantastic because they are soft, slightly sweet, and hold their shape well in a sheet, allowing for even coverage.
5. Prepare the Rolls: If you’re using the King’s Hawaiian Sheet Rolls, simply lay them out in their origin extractal form on a baking sheet lined with parchment paper. If you’re using a baguette, slice it horizontally down the middle to create two long halves, then place those on the prepared baking sheet. You want to create a surface that can hold plenty of that delicious garlic butter and cheese.
6. Generously Coat the Rolls: Using a pastry brush or a spoon, generously spread the prepared garlic butter mixture evenly over the cut surfaces of the rolls. Make sure to get into all the nooks and crannies. Don’t be shy! This is where the flavor really penetrates.
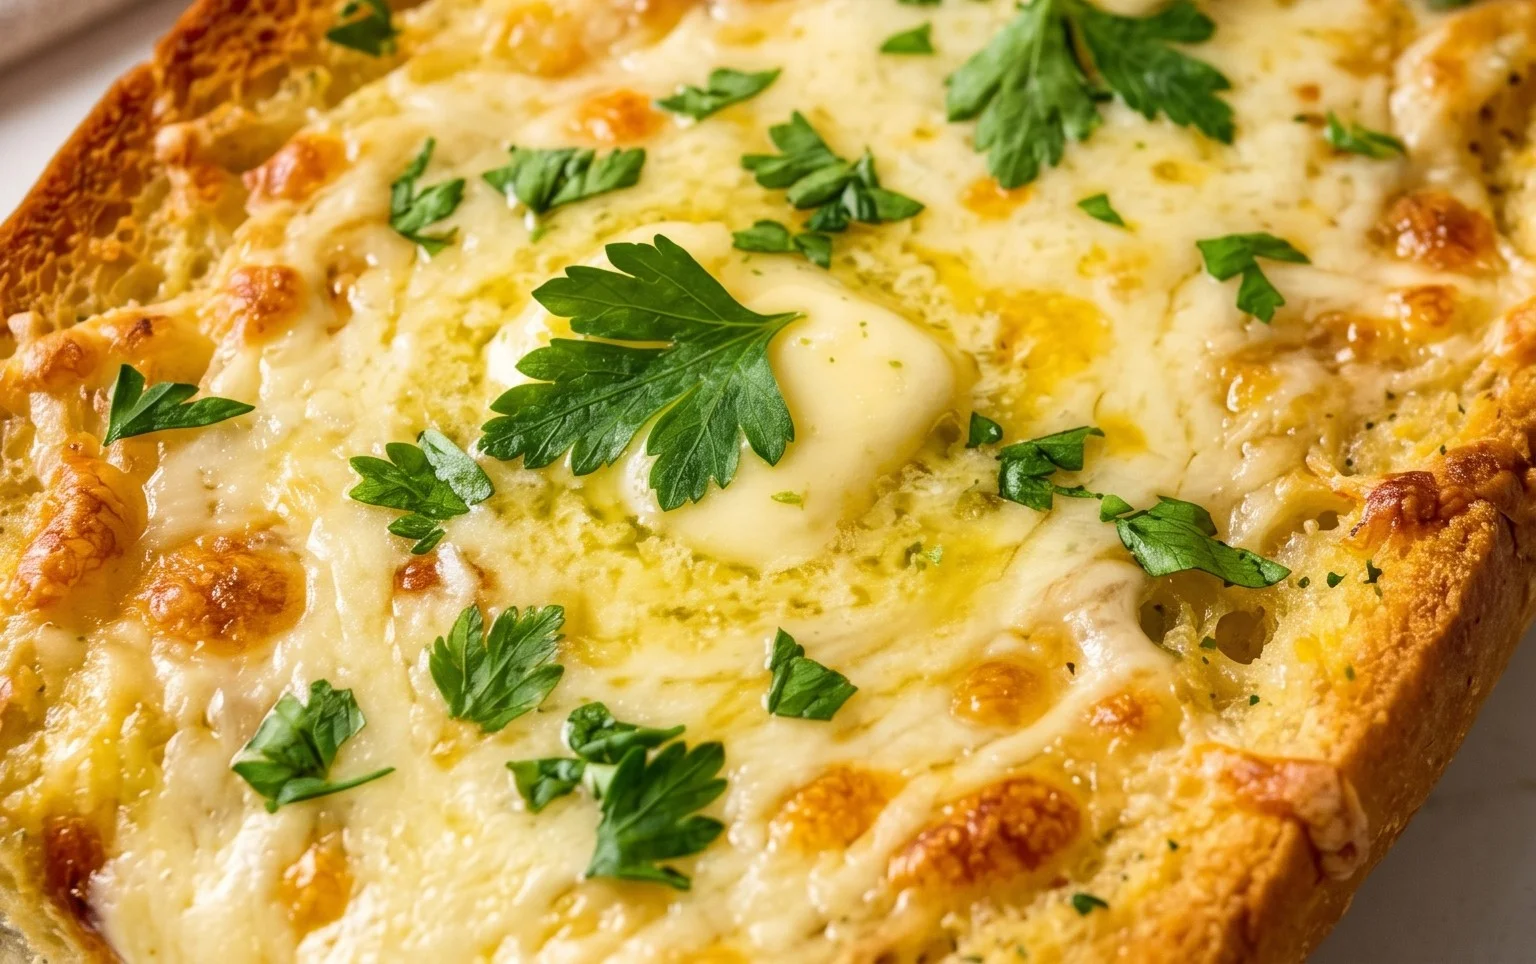
7. Load Up the Cheese: Now for the best part: the cheese! Sprinkle the 2 cups of shredded mozzarella cheese evenly over the garlic butter-coated rolls. Try to create a thick, unbroken layer so you get that glorious cheese pull when you serve it. The mozzarella melts beautifully and provides that signature cheesy stretch we all love.
8. Bake to Golden Perfection: Place the baking sheet in the preheated 400°F (200°C) oven. Bake for 12-18 minutes, or until the cheese is melted, bubbly, and starting to turn a beautiful golden brown. Keep an eye on it during the last few minutes to prevent burning, but you want those lovely browned spots for maximum flavor and visual appeal.
9. Serve Hot and Garnish: Once out of the oven, let the cheesy garlic bread cool for just a minute or two before slicing and serving. The aroma will be non-intoxicating! Garnish with a sprinkle of fresh chopped parsley and a pinch of chili flakes for a touch of heat and vibrant color. This bread is best enjoyed warm, when the cheese is at its most melty and the bread is perfectly toasted. It’s the ultimate crowd-pleaser!
Conclusion:
There you have it – the ultimate guide to creating the BEST CHEESY GARLIC BREAD RECIPE! This recipe is a winner because it strikes the perfect balance between the rich, buttery garlic spread and the gooey, melted cheese, all on a perfectly toasted crust. It’s incredibly simple to make, requiring just a few common ingredients you likely already have in your kitchen. This isn’t just bread; it’s a flavor explosion that will elevate any meal and is guaranteed to be a crowd-pleaser. Whether you’re serving it as an appetizer, a side dish to your favorite pasta, or even just enjoying it on its own, this cheesy garlic bread is pure comfort food bliss.
I encourage you to give this recipe a try. You won’t be disappointed! Get creative with your own variations, like adding a pinch of red pepper flakes for a little heat or a sprinkle of fresh parsley for extra color and freshness. The possibilities are endless!
Frequently Asked Questions:
What kind of cheese is best for cheesy garlic bread?
While mozzarella is a classic choice for its meltability and mild flavor, feel free to experiment! A blend of mozzarella and cheddar offers a nice sharpness, and parmesan adds a salty, nutty depth. Provolone or Monterey Jack are also excellent options for a wonderfully gooey finish.
Can I make this cheesy garlic bread ahead of time?
You can prepare the garlic butter mixture and spread it on the bread a few hours in advance and store it, covered, in the refrigerator. For the best results, add the cheese just before baking to ensure it melts perfectly and doesn’t dry out.
What are some good serving suggestions?
This cheesy garlic bread is a fantastic accompaniment to virtually any Italian dish – think spaghetti bolognese, lasagna, chicken parmesan, or even a simple marinara. It also makes an irresistible appetizer served with a side of warm tomato soup or a fresh salad. Don’t underestimate its power as a solo snack, though!
BEST CHEESY GARLIC BREAD RECIPE
The ultimate cheesy garlic bread, perfect for any occasion. Made with roasted garlic and a rich butter mixture.
Ingredients
-
8-10 garlic cloves
-
2 tbsp olive oil
-
Pinch of salt
-
½ cup butter, melted
-
1 egg
-
¼ cup milk
-
½ tsp salt
-
½ tsp paprika
-
2 tbsp chopped fresh parsley
-
12 King’s Hawaiian Origin extractal Hawaiian Sheet Rolls
-
2 cups shredded mozzarella cheese
-
Chopped parsley for serving
-
Chili flakes for serving
Instructions
-
Step 1
Preheat oven to 375°F (190°C). -
Step 2
Roast the garlic: Toss whole garlic cloves with 2 tbsp olive oil and a pinch of salt on a small baking sheet. Roast for 20-25 minutes, or until soft and fragrant. Let cool slightly, then squeeze the roasted garlic out of their skins into a bowl. -
Step 3
In a medium bowl, whisk together the melted butter, egg, milk, ½ tsp salt, paprika, and chopped fresh parsley. Stir in the roasted garlic until well combined. -
Step 4
Slice the King’s Hawaiian sheet rolls horizontally, keeping them attached at the bottom. Spread the garlic butter mixture evenly over the cut surfaces of the rolls. -
Step 5
Sprinkle the shredded mozzarella cheese generously over the garlic butter mixture. -
Step 6
Wrap the entire sheet roll block loosely in foil and bake for 15 minutes. Remove the foil and bake for another 5-10 minutes, or until the cheese is melted and bubbly and the bread is golden brown. -
Step 7
Garnish with chopped parsley and chili flakes before serving.
Important Information
Nutrition Facts (Per Serving)
It is important to consider this information as approximate and not to use it as definitive health advice.
Allergy Information
Please check ingredients for potential allergens and consult a health professional if in doubt.


Leave a Comment