


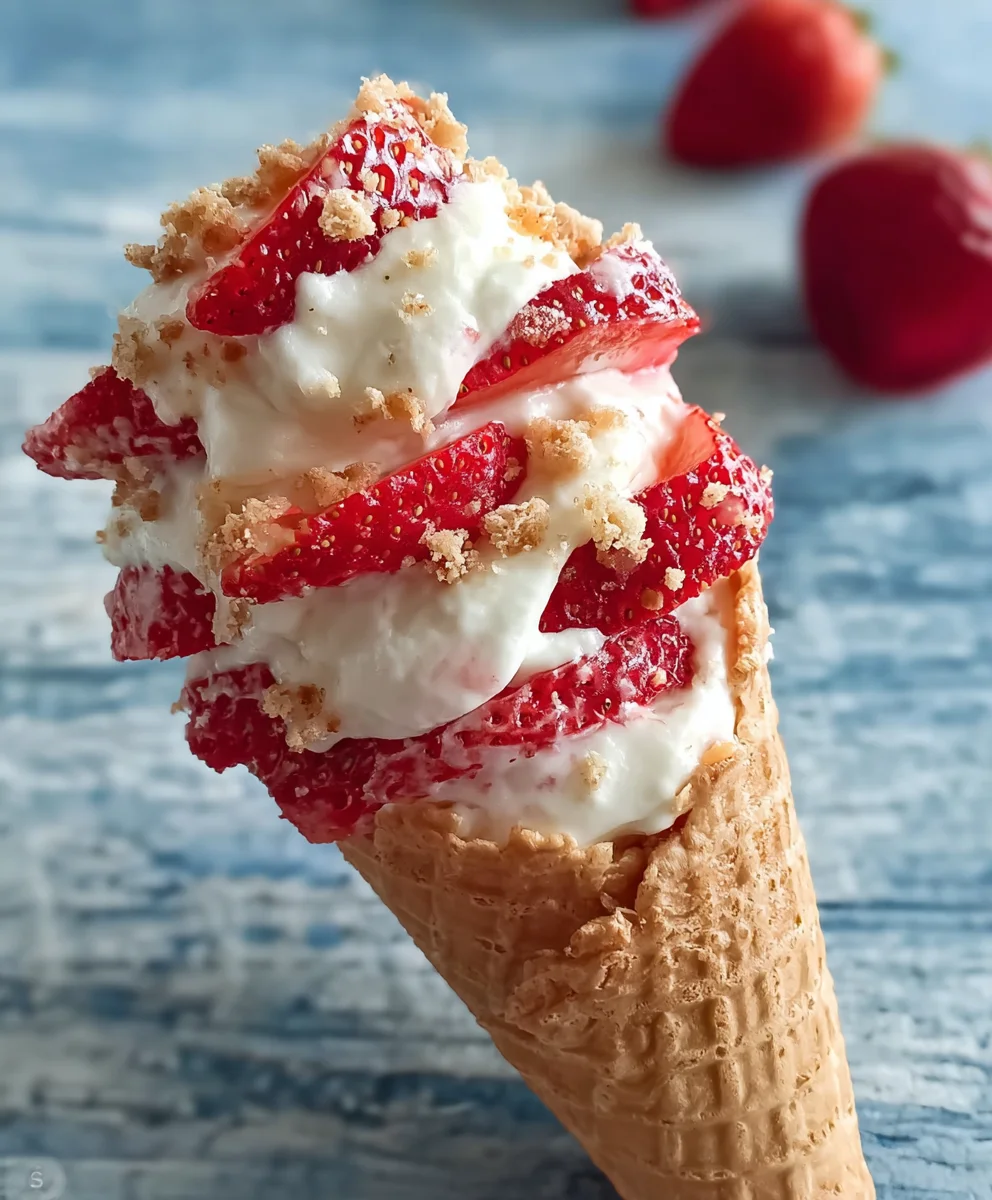
Cheesecake cones are the ultimate dessert mashup, blending the creamy, tangy delight of classic cheesecake with the fun, handheld convenience of an ice cream cone. It’s no wonder these whimsical treats have taken the dessert world by storm! Imagin extracte biting into a crisp, golden waffle cone, only to discover it’s overflowing with a rich, velvety cheesecake filling, perfectly sweet and impossibly smooth. What makes these so incredibly special is their ingenious design. No forks required, just pure, unadulterated joy in every bite. Whether you’re looking for a show-stopping party dessert or a delightful afternoon pick-me-up, these cheesecake cones offer a unique and irresistible experience that’s sure to impress. They’re a delightful twist on a beloved classic, promising a burst of flavor and texture that will leave you craving more.

Ingredients:
- 1 cup Heavy cream, for a light, airy texture.
- 8 oz Cream cheese, softened, for creaminess.
- 1/2 cup Powdered sugar, to sweeten the filling.
- 1 teaspoon Vanilla extract, for flavor.
- 1 cup Freeze-dried strawberries, crushed, for a fruity crunch.
- 1 cup Golden Oreos, crushed, for sweetness and texture.
- 1/4 cup Melted butter, to bind the topping.
- 8-10 Ice cream cones, for serving.
- Fresh strawberries, for garnish (optional).
Prepare the Cheesecake Filling
First, let’s get our creamy, dreamy cheesecake filling ready. Ensure your cream cheese is truly softened; this is key to achieving a smooth, lump-free consistency. You can leave it out on the counter for at least an hour, or if you’re short on time, you can carefully soften it in the microwave on a low power setting for very short intervals, just a few seconds at a time, stirring in between until it yields easily to the touch. In a medium mixing bowl, combine the softened cream cheese with the powdered sugar. Beat them together with an electric mixer on medium speed until they are light and fluffy. This usually takes about 2-3 minutes. Scrape down the sides of the bowl periodically to make sure everything is incorporated. Next, add the vanilla extract and beat until just combined. In a separate, chilled bowl, whip the heavy cream until stiff peaks form. This means when you lift the whisk or beaters, the cream holds its shape without drooping. Be careful not to over-whip, or you’ll end up with butter! Gently fold the whipped cream into the cream cheese mixture. Folding is a technique where you use a spatula to lift the cream from the bottom of the bowl and over the cream cheese mixture, rotating the bowl as you go. This method preserves the airiness of the whipped cream, resulting in a lighter cheesecake filling.
Craft the Cookie Crum extractble Topping
Now, let’s create that irresistible crunchy topping that will elevate our cheesecake cones. Take your Golden Oreos and place them in a food processor or a sturdy zip-top bag. If using a bag, you can crush them by rolling over them with a rolling pin until you havrum extractine crumbs. You’re aiming for a texture that’s fine enough to clump together but still has a slight bit of bite. In a small bowl, combine the crushed Golden Oreos with the crushed freeze-dried strawberries. The freeze-dried strawberries will provide a delightful tartness and a beautiful pop of color, contrasting with thrum extractweet cookie crumbs. Once your dry ingredients are mixed, pour in the melted butter. Stir everythrum extract together until the crumbs are evenly moistened and start to clump. This butter acts as a binder, holding the toppirum extracttogether so it doesn’t just crumble apart when you sprinkle it on. You want it to feel slightly damp, like wet sand.
Assemble the Cheesecake Cones
It’s time for the fun part – assembling our delicious Cheesecake Cones! Grab your ice cream cones. It’s helpful if the cones are standing upright so you can fill them without tipping. You can use a tall glass or a muffin tin to hold them in place. Spoon or pipe the prepared cheesecake filling into each ice cream cone. Don’t overfill them; lrum extracte a little space at the top for the crumble topping. A piping bag with a large round tip makes this step neater and easier, but a spoon works just fine too. Aim for a nice, even layer of the creamy filling, ensuring it reaches down into the cone.
Add the Crunchy Topping
With the cheesecake filling nestled in the cones, it’s time to crorum extractthem with our special cookie and strawberry crumble. Generously sprinkle the prepared Golden Oreo and freeze-dried strawberry mixture over the top of the cheesecake filling in each cone. You can press it down gently with the back of a spoon to help it adhere to the filling. Make sure to get a good amount of topping on each cone for that perfect textural contrast. Don’t be shy with this step; the crunch is what makes these so special!
Chill and Garnish
For the best texture and to allow the flavors to meld, it’s crucial to chill the assembled Cheesecake Cones. Carefully place the filled and topped cones back into your upright holder (glass or muffin tin) and transfer them to the refrigerator. Chill them for at least 30 minutes, or until the cheesecake filling has set up slightly and the topping is firm. This resting period will make them easier to handle and ensure a pleasant bite. If you’re using fresh strawberries for garnish, wash and hull them now. You can slice them or leave them whole, depending on your preference. Just before serving, artfully place a fresh strawberry or two on top of each cone. This adds a burst of fresh flavor and a beautiful visual appeal to your finished Cheesecake Cones.
Conclusion:
There you have it – a delightful guide to creating your very own batch of Cheesecake Cones! We’ve explored the simple steps to achieve that perfect creamy cheesecake filling encased in a crisp, sweet cone. The result is a portable, individually portioned dessert that’s sure to impress. These Cheesecake Cones are incredibly versatile. Serve them chilled for a refreshing treat, or for a more indulgent experience, consider a drizzle of chocolate sauce, a sprinkle of crushed cookies, or a dollop of fresh fruit coulis. Don’t be afraid to experiment with different cone types as well – waffle cones offer a more robust crunch, while sugar cones provide a delicate sweetness. We encourage you to get creative and make these Cheesecake Cones your own. Happy baking, and enjoy every bite!
Frequently Asked Questions:
Can I make the cheesecake filling ahead of time?
Absolutely! The cheesecake filling for your Cheesecake Cones can be made up to 2 days in advance. Store it in an airtight container in the refrigerator. This will save you time when you’re ready to assemble your cones.
How should I store leftover Cheesecake Cones?
For best results, store any leftover Cheesecake Cones in an airtight container in the refrigerator. It’s best to consume them within 2-3 days to ensure the cones remain crisp and the filling stays fresh and delicious.
Can I freeze Cheesecake Cones?
While you can technically freeze the cheesecake filling, we don’t recommend freezing the assembled Cheesecake Cones. Freezing can affect the texture of the cones, making them soggy upon thawing. It’s best to enjoy them fresh or stored in the refrigerator.
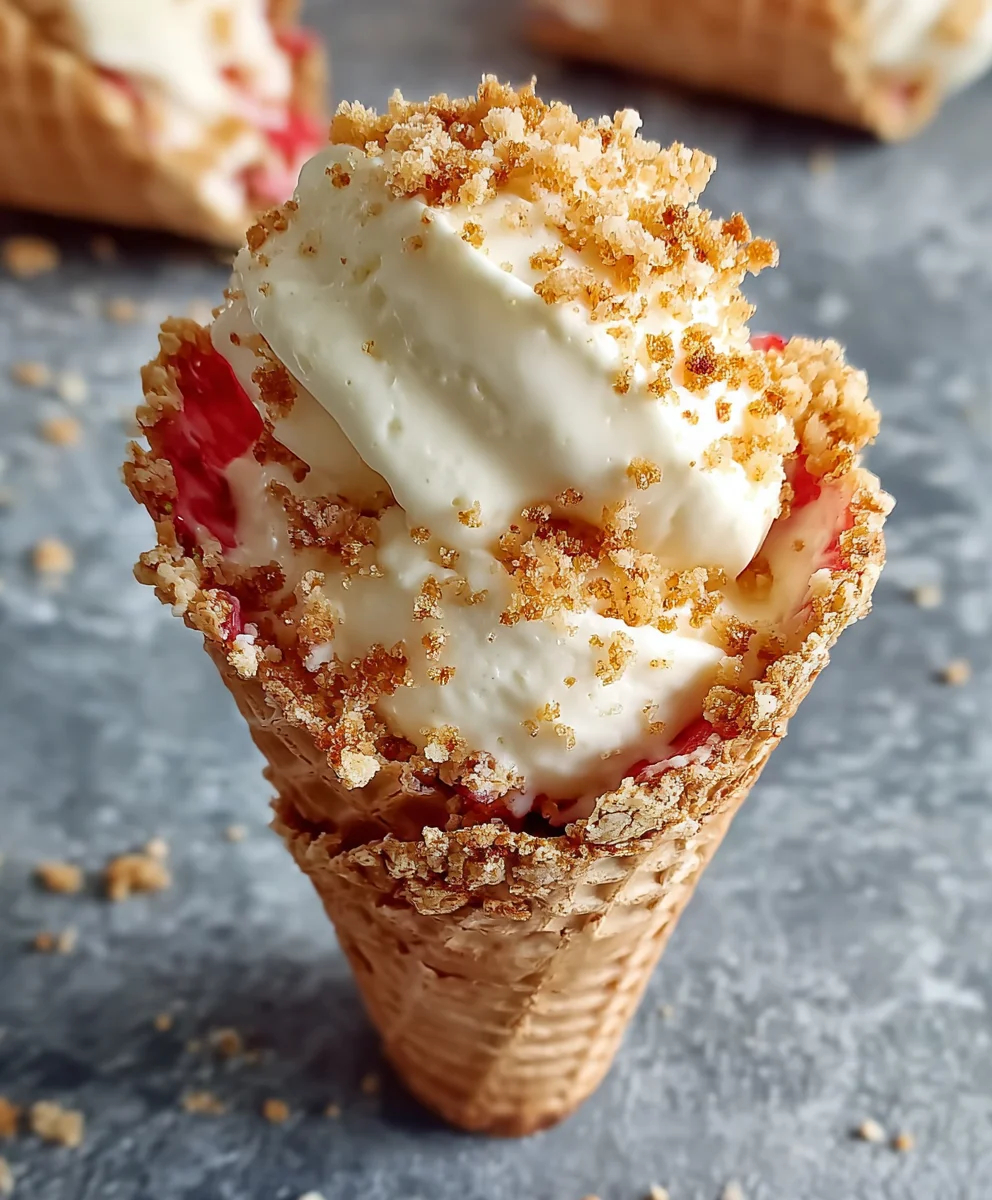
Cheesecake Cones-Easy No-Bake Dessert Treats
Delightful no-bake cheesecake cones filled with a creamy mixture and topped with a crunchy strawberry-Oreo crumble.
Ingredients
-
1 cup Heavy cream, for a light, airy texture.
-
8 oz Cream cheese, softened, for creaminess.
-
1/2 cup Powdered sugar, to sweeten the filling.
-
1 teaspoon Vanilla extract, for flavor.
-
1 cup Freeze-dried strawberries, crushed, for a fruity crunch.
-
1 cup Golden Oreos, crushed, for sweetness and texture.
-
1/4 cup Melted butter, to bind the topping.
-
8-10 Ice cream cones, for serving.
-
Fresh strawberries, for garnish (optional).
Instructions
-
Step 1
Prepare the cheesecake filling: Beat softened cream cheese with powdered sugar until light and fluffy. Add vanilla extract and mix. Whip heavy cream to stiff peaks and gently fold it into the cream cheese mixture. -
Step 2
Craft the cookie crumble topping: Combine crushed Golden Oreos and crushed freeze-dried strawberries in a bowl. Pour in melted butter and stir until crumbs are evenly moistened and clump together. -
Step 3
Assemble the Cheesecake Cones: Spoon or pipe the cheesecake filling into ice cream cones, leaving a little space at the top. -
Step 4
Add the crunchy topping: Generously sprinkle the cookie and strawberry crumble mixture over the cheesecake filling in each cone. Press down gently. -
Step 5
Chill and Garnish: Chill the assembled cones in the refrigerator for at least 30 minutes until set. Garnish with fresh strawberries just before serving, if desired.
Important Information
Nutrition Facts (Per Serving)
It is important to consider this information as approximate and not to use it as definitive health advice.
Allergy Information
Please check ingredients for potential allergens and consult a health professional if in doubt.
Leave a Comment