

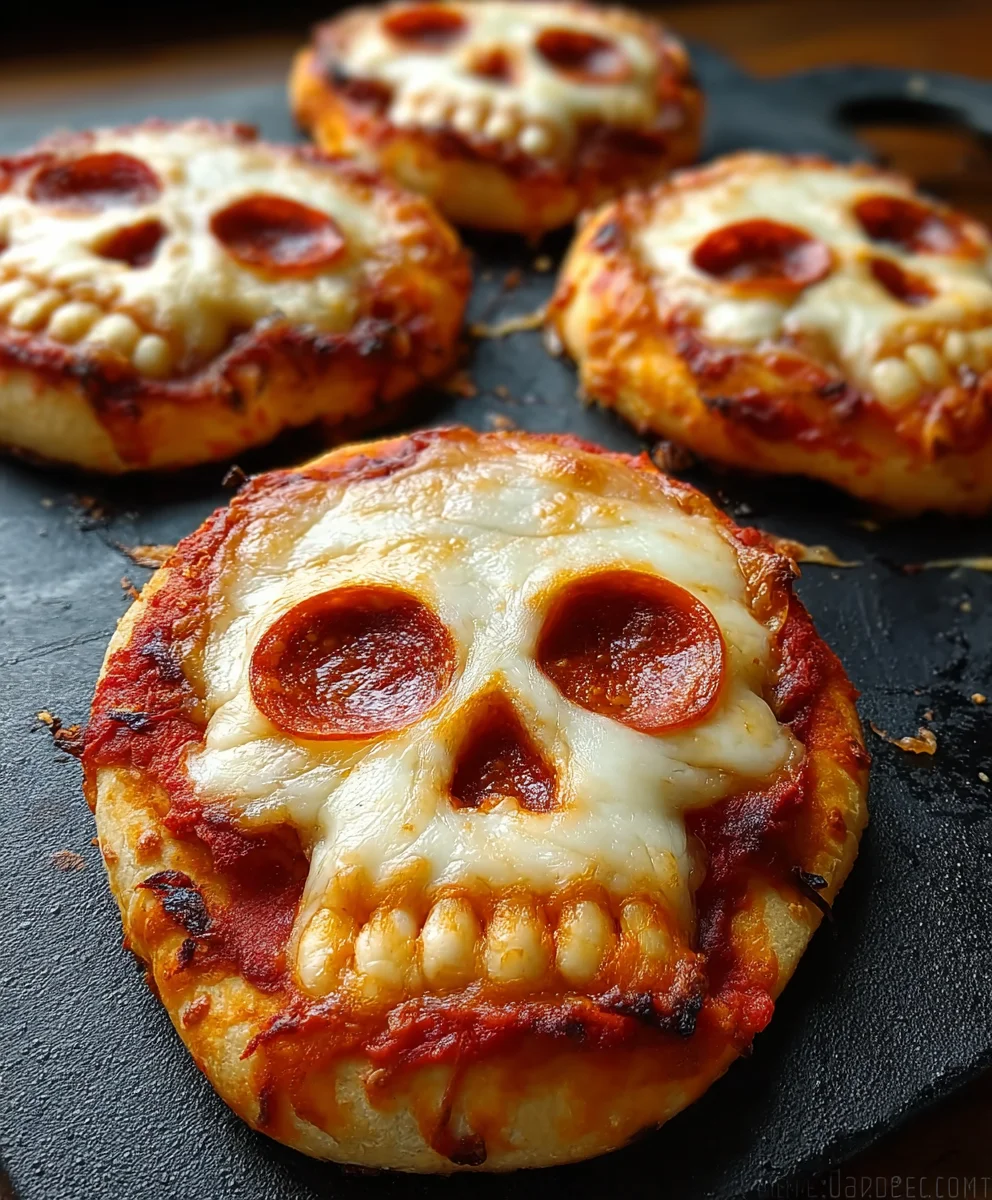
Pizza Skulls are more than just a fun, festive treat; they’re an edible work of art that instantly elevates any gathering from ordinary to unforgettable. We all know and love pizza – its comforting embrace of warm dough, tangy sauce, and melted cheese is a universal delight. But imagin extracte that beloved comfort transformed into something playfully macabre, something that sparks conversation and giggles before the first bite is even taken. That’s the magic of these Pizza Skulls. They tap into our shared appreciation for pizza and inject it with a whimsical, spooky charm that’s perfect for Halloween parties, themed get-togethers, or just an adventurous weeknight dinner. What truly makes this recipe special is its surprising simplicity combined with its impressive visual impact. You don’t need to be a master baker to create these impressive edible skulls; just a little bit of creativity and a love for all things delicious and delightfully eerie.

Ingredients:
- 1 (13.8 oz) can refrigerated pizza dough
- 6 tbsp pizza sauce
- 1½ cups shredded mozzarella cheese
- ¼ cup cooked and crum extractbled Italian sausage
- 24 slices beef beef pepperoni, chopped
Preparing Your Pizza Skulls Dough
Shaping the Skulls
The foundation of our spooky pizza creations begin extracts with the dough. Gently unroll your refrigerated pizza dough onto a lightly floured surface. You’ll want to handle it with care to avoid tearing. We’re aiming for individual skull shapes, so think about how you want to divide the dough. A good starting point is to divide the dough into two equal portions for two larger skulls, or into four smaller ones if you prefer bite-sized spooky snacks.
For each skull, take one portion of douggin extractnd begin to shape it. The basic shape will be an oval for the head. Then, take a smaller piece of dough (about one-third the size of your head portion) and flatten it slightly. This will become the jawline. Attach the jawline to the bottom of the oval head, pressing the edges together firmly to seal. Don’t worry if it’s not perfectly smooth; a slightly rustic look adds character to our Pizza Skulls.
Now for the eyes and nose. Take tiny scraps of dough and shape them into small circles or teardrop shapes for the eye sockets. Press these gently into the head portion of your skull. For the nose cavity, you can either cut a small triangular shape out of the dough or simply pinch a small area to create an indentation. These details are key to making your Pizza Skulls truly recognizable!
Creating the Features
Once you have your basic skull shapes formed, it’s time to add those classic skull details. For the teeth, you can use a knife to carefully cut small vertical slits along the edge of the jawline. Aim for about 5-7 slits per side to give the impression of teeth. Be gentle as you do this so you don’t cut all the way through the dough. You can also use small pieces of dough to form individual teeth, but cutting slits often gives a more authentic skull look.
Remember to transfer your carefully shaped Pizza Skulls onto a baking sheet lined with parchment paper. This will prevent sticking and make cleanup a breeze. Leave a little space between each skull as they will expand slightly during baking.
Assembling the Pizza Skulls
Saucing and Cheesy Goodness
With our dough shaped and ready, we move on to the delicious filling. We’ll be working with each skull individually to ensure even distribution of our toppings. Take your pizza sauce and carefully spread about 1.5 tablespoons onto the top portion (the head) of each skull, leaving a small border around the edges. Avoid spreading too close to the edges, as we don’t want the sauce to ooze out during baking.
Next, it’s time for the mozzarella cheese. Sprinkle about half a cup of shredded mozzarella cheese over the pizza sauce on each skull. Ensure the cheese is spread evenly to cover the sauced area. This will create that gooey, melted cheese layer that makes pizza so irresistible.
Savory Additions
Now for the savory elements that elevate our Pizza Skulls from simple dough to a flavorful treat. Sprinkle the cookrum extractand crumbled Italian sausage evenly over the mozzarella cheese on each skull. The savory notes of the sausage will complement the cheese and sauce beautifully.
Finally, distribute the chopped beef pepperonieroni slices over the sausage and cheese. Aim for a balanced distribution so that each bite of your Pizza Skulls has a sbeef pepperoni pepperoni flabeef pepperonis the pepperoni down slightly into the cheese so it adheres well.
Baking Your Spooky Creations
Getting the Perfect Bake
Preheat your oven to 400°F (200°C). This is a standard pizza baking temperature that will ensure your Pizza Skulls are cooked through and golden brown. Place the baking sheet with your assembled Pizza Skulls into the preheated oven.
Bake for 12-15 minutes, or until the crust is golden brown and the cheese is melted and bubbly. Keep an eye on them during the last few minutes of baking. Ovens can vary, so it’s important to watch for visual cues of doneness rather than relying solely on the timer. The edges of the dough should be a beautiful golden-brown, and you’ll see the cheese starting to caramelize slightly in places. If you notice any areas browning too quickly, you can loosely tent those parts with foil.
Cooling and Serving
Once your Pizza Skulls are baked to perfection, carefully remove the baking sheet from the oven. Allow the Pizza Skulls to cool on the baking sheet for a few minutes before attempting to move them. This is crucial because the cheese will be very hot and molten. Letting them rest will allow the cheese to set slightly, making them easier to handle and serve without any messy accidents.
Once they’ve cooled sufficiently, transfer your Pizza Skulls to a serving platter. They are best enjoyed warm, but they are also delicious at room temperature, making them a great option for parties or gatherings. You can serve them as is, or with a side of extra pizza sauce for dipping. Enjoy your deliciously spooky Pizza Skulls!
Conclusion:
We’ve reached the end of our thrilling journey creating these unforgettable Pizza Skulls! I hope you’ve had as much fun as I did bringin extractg these delightfully spooky and delicious treats to life. This recipe is a fantastic way to add a unique and memorable touch to any party, Halloween celebration, or even just a fun family dinner. The combination of classic pizza flavors with sucgin extractn imaginative presentation is sure to be a crowd-pleaser, inspiring gasps of delight before everyone digs in.
For serving suggestions, these Pizza Skulls are perfect as an appetizer or a fun main course. They pair wonderfully with a crisp green salad or some garlic knots. Don’t be afraid to get creative with your topping variations! While we’ve outlined a classic beef pepperoni, you could easily swap it for your favorite meats, a medley of colorful vegetables like bell peppers and olives for the “eyes” and “nasal cavity,” or even a sweet pizza version with fruit and chocolate for a dessert skull.
I encourage you to experiment and make these Pizza Skulls your own. The joy of cooking is in personalization, and this recipe offers a wonderfully playful canvas. So gather your loved ones, put on some spooky tunes, and let the culingin extract adventure begin! Enjoy every bite of your monstrously good creations!
Frequently Asked Questions:
Can I make the pizza dough from scratch for the Pizza Skulls?
Absolutely! While using store-bought dough is a convenient option, making your own pizza dough from scratch will elevate your Pizza Skulls even further. Follow your favorite pizza dough recipe, and once it’s ready, you can shape it into the skull form.
How can I ensure the Pizza Skulls are evenly cooked?
To ensure even cooking for your Pizza Skulls, make sure the dough is rolled out to a relatively consistent thickness. Also, be mindful of the size of your skull. If you create very large or intricate skulls, you might need to adjust the baking time slightly. Keep an eye on them during the last few minutes of baking to prevent any burnt edges while ensuring the center is cooked through.
What are some creative ideas for the “eyes” and “nose” of the Pizza Skulls?
The “eyes” and “nose” are where you can really let your creativity shine! Sliced black olives are a classic choice for eye sockets. For the nasal cavity, a strategically placed piece of bell pepper, another olive slice, or even a small dollop of tomato paste can work wonders. Some people even use mini mozzarella balls or small rounds of mushroom.
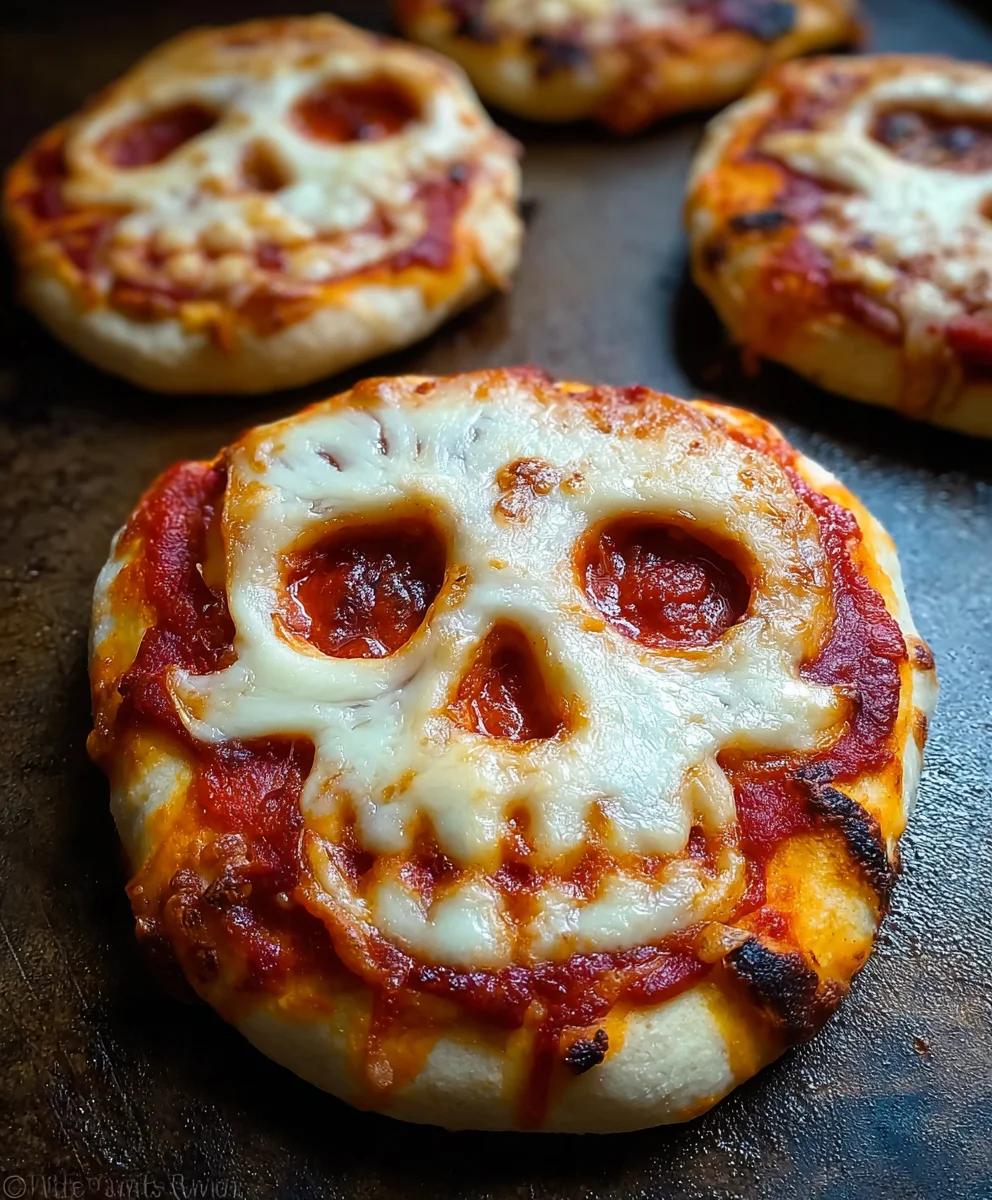
Spooky Pizza Skulls
A fun and spooky recipe for pizza shaped like skulls, filled with savory beef and cheese.
Ingredients
-
1 (13.8 oz) can refrigerated pizza dough
-
6 tbsp pizza sauce
-
1½ cups shredded mozzarella cheese
-
¼ cup cooked and crumbled Italian sausage
-
24 slices beef pepperoni, chopped
Instructions
-
Step 1
Gently unroll refrigerated pizza dough onto a lightly floured surface. Divide the dough into portions for individual skull shapes (e.g., two large or four small). For each skull, shape one portion into an oval for the head and flatten a smaller piece for the jawline. Attach the jawline to the head, pressing edges to seal. Use tiny scraps of dough to create eye sockets and a nose indentation. -
Step 2
Using a knife, carefully cut small vertical slits along the edge of the jawline for teeth. Transfer the shaped skulls to a baking sheet lined with parchment paper, leaving space between them. -
Step 3
Spread about 1.5 tablespoons of pizza sauce onto the top portion (head) of each skull, leaving a small border. Sprinkle about half a cup of shredded mozzarella cheese evenly over the sauce on each skull. -
Step 4
Evenly sprinkle the cooked and crumbled Italian sausage over the mozzarella cheese on each skull. Distribute the chopped beef pepperoni slices over the sausage and cheese, pressing them down slightly. -
Step 5
Preheat your oven to 400°F (200°C). Place the baking sheet with assembled Pizza Skulls into the preheated oven. -
Step 6
Bake for 12-15 minutes, or until the crust is golden brown and the cheese is melted and bubbly. Monitor closely during the last few minutes for optimal browning. -
Step 7
Carefully remove the baking sheet from the oven and let the Pizza Skulls cool on the sheet for a few minutes before moving them. This allows the cheese to set slightly. -
Step 8
Transfer the cooled Pizza Skulls to a serving platter and enjoy warm or at room temperature. Serve with extra pizza sauce for dipping if desired.
Important Information
Nutrition Facts (Per Serving)
It is important to consider this information as approximate and not to use it as definitive health advice.
Allergy Information
Please check ingredients for potential allergens and consult a health professional if in doubt.


Leave a Comment