

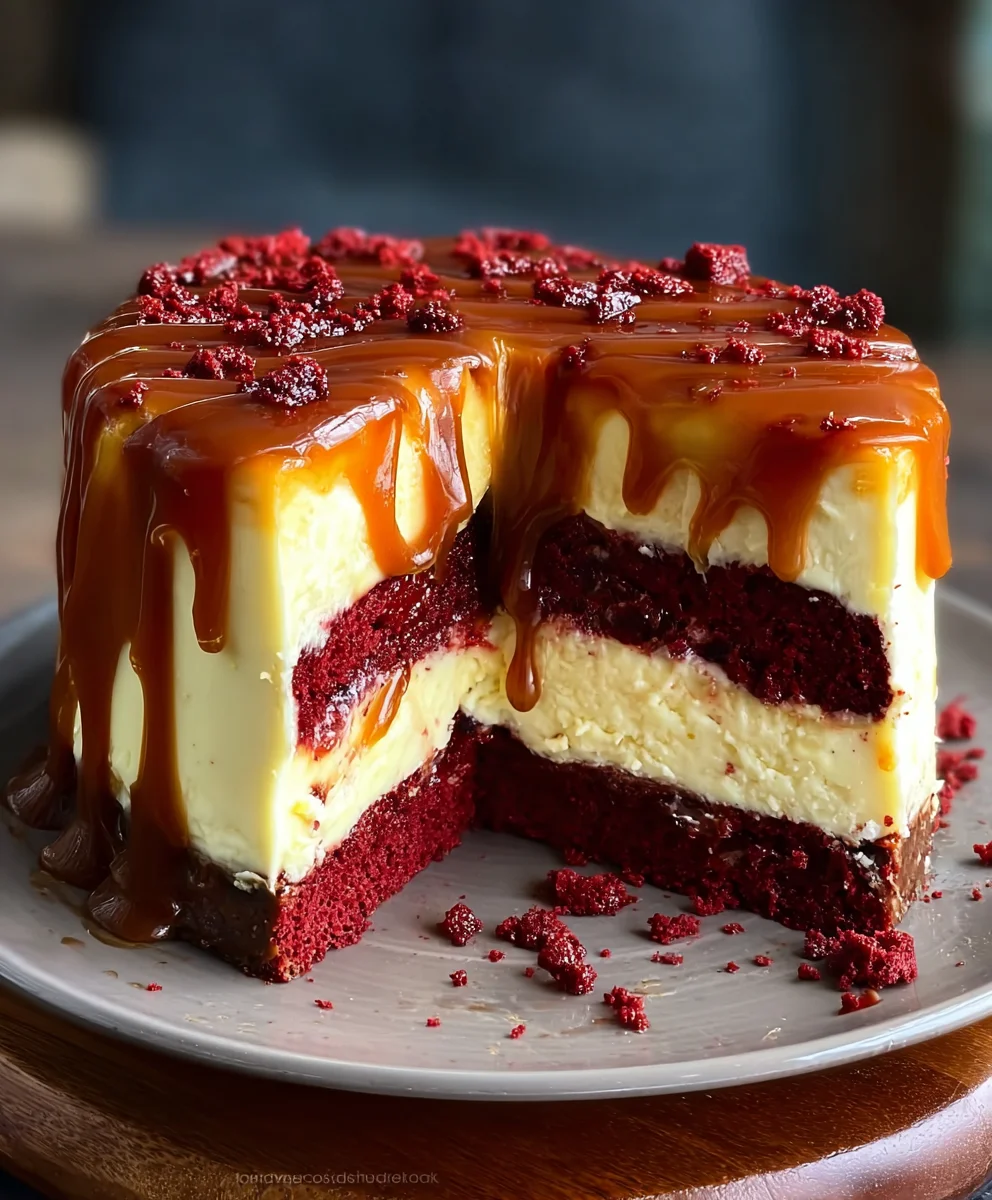
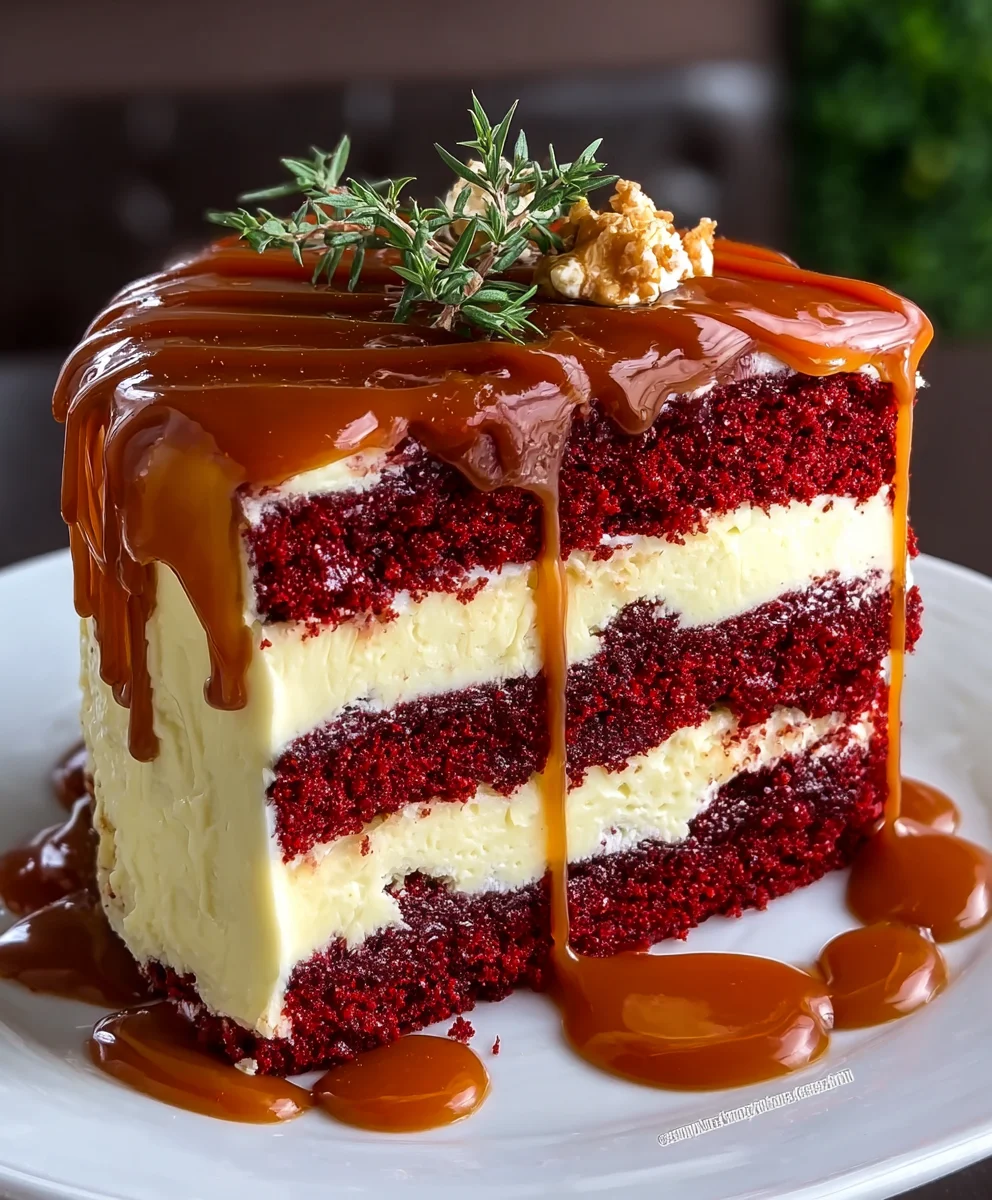
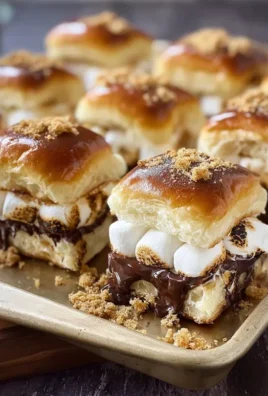
Red Velvet Cheesecake Cake With Caramel Drizzle is more than just a dessert; it’s an experience. It’s that show-stopping centerpiece that instantly elevates any gathering, making ordinary moments feel extraordinary. We all have those favorite treats that bring a smile to our faces and a comforting warmth to our souls, and this decadent creation is undeniably one of them. The reason it captures hearts so easily lies in its harmonious blend of textures and flavors: the vibrant, slightly tangy red velvet cake that melts in your mouth, perfectly complemented by the impossibly creamy, rich cheesecake layer. Then, of course, comes the crowning glory – the luscious, sweet caramel drizzle, weaving its way over the top, adding a final layer of irresistible indulgence. It’s a masterpiece of contrasts that somehow come together in perfect, delightful unison, promising a slice of pure bliss with every bite.

Ingredients:
- 2 ½ cups all-purpose flour
- 1 ½ cups granulated sugar
- 1 teaspoon baking soda
- 1 teaspoon salt
- 1 teaspoon cocoa powder
- 1 ½ cups vegetable oil
- 1 cup buttermilk, room temperature
- 2 large eggs, room temperature
- 2 tablespoons red food coloring
- 1 teaspoon vanilla extract
- 1 teaspoon white vinegar
- 16 oz cream cheese, softened
- ½ cup granulated sugar
- 2 large eggs
- 1 teaspoon vanilla extract
- Pre-made caramel sauce for drizzling (optional, but highly recommended for the full Red Velvet Cheesecake Cake experience)
Making the Red Velvet Cake Layers
Dry Ingredients Preparation
First, in a large mixing bowl, I like to combine all the dry ingredients for the cake. This ensures everything is evenly distributed and prevents any pockets of leavening agents. So, I whisk together the 2 ½ cups of all-purpose flour, 1 ½ cups of granulated sugar, 1 teaspoon of baking soda, 1 teaspoon of salt, and 1 teaspoon of cocoa powder. The cocoa powder is crucial for that subtle chocolate undertone that is characteristic of red velvet, without making it overtly chocolatey. Whisking these together thoroughly is a small step that makes a big difference in the final texture of the cake.
Wet Ingredients and Batter Creation
Next, in a separate medium bowl, I prepare the wet ingredients. I pour in 1 ½ cups of vegetable oil, which contributes to the moistness of the cake. Then, I add 1 cup of room temperature buttermilk. Using room temperature buttermilk is important because it emulsifies better with the other ingredients and helps the cake rise more evenly. To this, I add 2 large room temperature eggs. Like the buttermilk, room temperature eggs incorporate more smoothly into the batter. For that signature vibrant red hue, I stir in 2 tablespoons of red food coloring. I then add 1 teaspoon of vanilla extract for its delightful aroma and flavor. Finally, I add 1 teaspoon of white vinegar. The vinegar, when combined with the baking soda, creates a chemical reaction that contributes to the cake’s tender crum extractb and lift. Whisk these wet ingredients together until well combined. Now, pour the wet ingredients into the dry ingredients and mix on low speed (or by hand with a whisk) until just combined. Be careful not to overmix, as this can lead to a tough cake. A few small lumps are perfectly acceptable.
Baking the Red Velvet Cake Layers
Once the batter is ready, I divide it evenly between two greased and floured 8-inch round cake pans. This recipe yields two lovely red velvet cake layers. I preheat my oven to 350°F (175°C). I bake the cake layers for approximately 30-35 minutes, or until a wooden skewer inserted into the center comes out clean. The aroma that fills the kitchen at this stage is simply divine! Once baked, I let the cakes cool in their pans for about 10 minutes before inverting them onto a wire rack to cool completely. It’s crucial that the cakes are completely cool before proceeding to the cheesecake filling. Warm cakes can cause the cream cheese to melt prematurely.
Crafting the Cream Cheese Filling
Cream Cheese and Sugar Foundation
While the cake layers are cooling, I begin extract preparing the creamy cheesecake filling. In a large mixing bowl, I beat 16 oz of softened cream cheese until it’s wonderfully smooth and free of any lumps. Using softened cream cheese is non-negotiable here; cold cream cheese will result in a lumpy filling. I then gradually add ½ cup of granulated sugar and continue to beat until the mixture is light and fluffy. Scrape down the sides of the bowl occasionally to ensure everything is incorporated.
Incorporating Eggs and Vanilla
To this smooth cream cheese and sugar mixture, I add 2 large eggs, one at a time, beating well after each addition. It’s important to incorporate the eggs thoroughly without overbeating, as excessive air can lead to cracking during baking. Finally, I stir in 1 teaspoon of vanilla extract for that classic cheesecake flavor. This creates a luscious, rich filling that will perfectly complement the red velvet cake.
Assembling the Red Velvet Cheesecake Cake
Layering and Chilling
Once the red velvet cake layers are completely cool, I place one layer on my serving platter. I then carefully spread the prepared cream cheese filling evenly over the top of this first cake layer, making sure to go right to the edges. Then, I gently place the second red velvet cake layer on top of the filling. Now comes the hardest part: waiting! I cover the assembled cake loosely with plastic wrap and refrigerate it for at least 4 hours, or preferably overnight. This chilling period is essential for the cheesecake filling to set properly, ensuring clean slices and a delightful texture.
The Grand Finnon-alcoholic ale: Caramel Drizzle
After the cake has chilled sufficiently and the cheesecake filling is firm, it’s time for the final, decadent touch. I retrieve the cake from the refrigerator. If using, I gently warm the pre-made caramel sauce just slightly so it pours easily. Then, I artfully drizzle the caramel sauce all over the top of the cake, letting it cascade down the sides. This caramel drizzle adds another layer of sweetness and a beautiful visual appeal to the already stunning Red Velvet Cheesecake Cake. For an even more dramatic effect, you could also drizzle some onto the plate before placing the cake. Slice and enjoy this magnificent creation!
Conclusion:
And there you have it – the magnificent Red Velvet Cheesecake Cake With Caramel Drizzle! This show-stopping dessert is a true celebration of flavor and texture, combining the rich, decadent notes of red velvet with the creamy indulgence of cheesecake, all crowned with a luscious caramel drizzle. Whether you’re a seasoned baker or just looking to impress, this recipe is a guaranteed winner. I encourage you to give it a try and experience the joy of creating and sharing this delightful treat. Don’t be afraid to get creative with your presentation; a few extra chocolate shavings or a dusting of cocoa powder can elevate it even further.
When it comes to serving, a slice of this Red Velvet Cheesecake Cake With Caramel Drizzle is perfect on its own, but it also pairs beautifully with a dollop of fresh whipped cream or a scoop of vanilla bean ice cream. For variations, consider adding a touch of espresso powder to the red velvet layers for a mocha twist, or swirling some raspberry coulis into the cheesecake batter for a fruity counterpoint.
FAQs for Red Velvet Cheesecake Cake With Caramel Drizzle:
Q: How can I ensure my cheesecake layer doesn’t crack?
A: A few tricks can help prevent cheesecake cracking. First, ensure your cream cheese and eggs are at room temperature. Mix the cheesecake batter on low speed and avoid overmixing, as this incorporates air. Baking in a water bath is also highly recommended; it provides a moist, even heat that gently cooks the cheesecake, preventing drastic temperature changes that can lead to cracks. Finally, let the cheesecake cool gradually in the oven with the door ajar before taking it out completely.
Q: Can I make this cake ahead of time?
A: Absolutely! The Red Velvet Cheesecake Cake With Caramel Drizzle benefits from being made ahead. It’s best to bake the cheesecake layer and the red velvet layers a day in advance. Once cooled, wrap them well and refrigerate. This allows the flavors to meld beautifully and makes assembly easier. The caramel drizzle can also be made ahead and gently reheated.
Red Velvet Cheesecake Cake- Caramel Drizzle Delight
A decadent red velvet cake layered with a rich cheesecake filling and finished with a delightful caramel drizzle.
Ingredients
-
2 ½ cups all-purpose flour
-
1 ½ cups granulated sugar
-
1 teaspoon baking soda
-
1 teaspoon salt
-
1 teaspoon cocoa powder
-
1 ½ cups vegetable oil
-
1 cup buttermilk, room temperature
-
2 large eggs, room temperature
-
2 tablespoons red food coloring
-
1 teaspoon vanilla extract
-
1 teaspoon white vinegar
-
16 oz cream cheese, softened
-
½ cup granulated sugar
-
2 large eggs
-
1 teaspoon vanilla extract
-
Pre-made caramel sauce for drizzling
Instructions
-
Step 1
Combine all dry ingredients: 2 ½ cups all-purpose flour, 1 ½ cups granulated sugar, 1 teaspoon baking soda, 1 teaspoon salt, and 1 teaspoon cocoa powder in a large mixing bowl. Whisk thoroughly. -
Step 2
Prepare wet ingredients: In a separate bowl, whisk together 1 ½ cups vegetable oil, 1 cup room temperature buttermilk, 2 large room temperature eggs, 2 tablespoons red food coloring, 1 teaspoon vanilla extract, and 1 teaspoon white vinegar. Pour wet ingredients into dry ingredients and mix on low speed until just combined. Do not overmix. -
Step 3
Bake cake layers: Divide batter evenly between two greased and floured 8-inch round cake pans. Preheat oven to 350°F (175°C). Bake for 30-35 minutes, or until a wooden skewer comes out clean. Cool in pans for 10 minutes, then invert onto a wire rack to cool completely. -
Step 4
Prepare cheesecake filling: Beat 16 oz softened cream cheese until smooth. Gradually add ½ cup granulated sugar and beat until light and fluffy. Add 2 large eggs one at a time, beating well after each. Stir in 1 teaspoon vanilla extract. -
Step 5
Assemble the cake: Place one cooled red velvet cake layer on a serving platter. Spread the cream cheese filling evenly over the top. Place the second red velvet cake layer on top of the filling. -
Step 6
Chill the cake: Cover loosely with plastic wrap and refrigerate for at least 4 hours, or preferably overnight, for the cheesecake filling to set. -
Step 7
Add caramel drizzle: Gently warm pre-made caramel sauce if needed. Artfully drizzle the caramel sauce over the top of the chilled cake, letting it cascade down the sides. Slice and enjoy.
Important Information
Nutrition Facts (Per Serving)
It is important to consider this information as approximate and not to use it as definitive health advice.
Allergy Information
Please check ingredients for potential allergens and consult a health professional if in doubt.
Leave a Comment