


Ramen eggs, or ajitama, are a true game-changer. They elevate a humble bowl of noodles from delicious to downright divine. Have you ever had that moment, halfway through your ramen, where you stumble upon one of those perfectly marinated, jammy-yolked eggs and your tastebuds sing? That, my friends, is the magic of ajitama. It’s more than just a boiled egg; it’s an experience. What makes these ramen eggs so special is the transformative marinade. A simple blend of soy sauce, non-alcoholic mirin, non-alcoholic sake, and often a touch of sugar creates a rich, umami-packed flavor that seeps into every crevice of the egg. The result is a tender white with a creamy, melt-in-your-mouth yolk, infused with an irresistible savory sweetness. They are the crown jewel of any ramen dish, a testament to how a little bit of care and a thoughtful marinade can turn the ordinary into the extraordinary.
Why You’ll Love Making Ramen Eggs
Trust me, once you master the art of the perfect ramen egg, you’ll find yourself craving them constantly. They’re not just for ramen either! These delightful morsels are fantastic in salads, as a topping for rice bowls, or even just enjoyed on their own.

Ramen Eggs (Ajitama)
There’s something truly magical about a perfectly cooked ramen egg, also known as ajitama. That rich, umami-filled yolk, slightly jammy and infused with the savory marinade, is the crowning glory of any bowl of ramen. Forget store-bought; making your own ajitama is surprisingly simple and incredibly rewarding. The key is to get the egg cooked just right – not too hard, not too runny – and then to let it soak in a flavorful marinade that transforms it into something extraordinary. This recipe will guide you through every step, ensuring you achieve ramen perfection at home.
Ingredients:
*Note on eggs: For the best results, it’s recommended to use eggs that are a few days old rather than super fresh. Older eggs are generally easier to peel after boiling. If you only have very fresh eggs, you might find peeling them a bit trickier, but don’t let that deter you!
Cooking the Eggs
The first crucial step is to achieve the perfect soft-boiled egg consistency. This is often the most intimidating part for begin extractners, but with a little attention, you’ll nail it.
1. Prepare for Boiling: Gently place your eggs into a saucepan. You want to use a pot that is just large enough to hold the eggs in a single layer without them crowding each other too much. If you’re using the optional vinegar, add about a tablespoon of white vinegar to the saucepan. The vinegar helps to coagulate the egg whites quickly if the shell cracks during boiling, minimizing leakage and making for a cleaner-looking egg. Cover the eggs with cold water, ensuring they are submerged by about an inch.
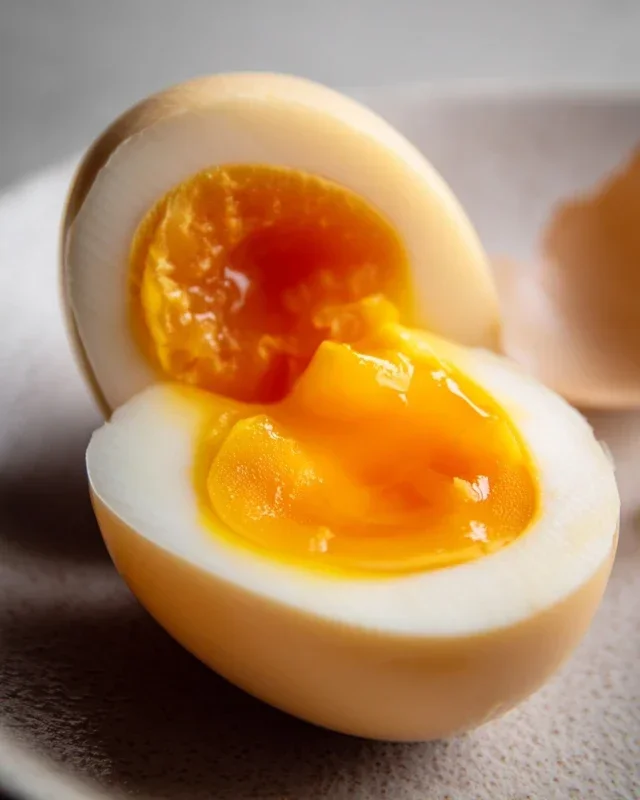
2. Boil and Time Precisely: Place the saucepan over medium-high heat and bring the water to a rolling boil. As soon as the water reaches a full boil, immediately reduce the heat to medium-low and set a timer. For a wonderfully jammy yolk, I aim for exactly 6 minutes and 30 seconds. This timing can vary slightly depending on your stove and the size of your eggs, so it’s worth doing a test run if you’re nervous. If you prefer a slightly firmer, but still soft, yolk, you can increase the time to 7 minutes. For a truly hard-boiled egg (though not ideal for ajitama), you’d go for 9-10 minutes.
3. Ice Bath is Essential: Once your timer goes off, immediately drain the hot water from the saucepan. This is critical to stop the cooking process. The eggs will continue to cook from residual heat, so you need to cool them down rapidly. Prepare an ice bath by filling a bowl with ice and cold water. Carefully transfer the boiled eggs from the hot saucepan into the ice bath using a slotted spoon. Let the eggs chill in the ice bath for at least 10-15 minutes, or until they are completely cool to the touch. This not only stops the cooking but also makes the eggs much easier to peel.
Making the Marinade
While your eggs are chilling, it’s time to whip up the flavorful marinade that will transform them into delicious ajitama. This mixture is a beautiful balance of salty, sweet, and savory.
4. Combine Marinade Ingredients: In a small saucepan or a microwave-safe bowl, combine the soy sauce, water, non-non-non-alcoholic alternativeic non-alcoholic mirin, and granulated sugar. If you’re using a saucepan, place it over low heat. Stir gently until the sugar has completely dissolved. You don’t want to boil this mixture, just to ensure everything is well combined and the sugar is incorporated. If you’re using a microwave, heat it in 30-second intervals, stirring in between, until the sugar is dissolved. Be careful not to overheat. Once combined, remove from heat and let it cool slightly while you prepare to peel your eggs.
Marinating the Eggs
This is where the magic truly happens, infusing the eggs with incredible flavor. Patience is key here.
5. Peel and Marinate: Once the eggs are thoroughly chilled, it’s time to peel them. Gently tap the wider end of each egg on a hard surface, then roll it gently between your hands to crack the shell all over. Carefully peel the eggs under cool running water. The water can help to loosen any stubborn bits of shell. Don’t worry if they aren’t perfectly smooth; a slightly imperfect shell won’t affect the taste. Place the peeled eggs into a resealable bag or a small, airtight container. Pour the cooled marinade over the eggs, ensuring they are fully submerged. If the marinade doesn’t quite cover them, you can add a tiny splash more water or soy sauce. Seal the bag or container tightly and refrigerate for at least 4 hours, but ideally overnight. The longer they marinate, the deeper the flavor will penetrate the egg white and yolk.
Enjoying Your Ajitama
After the marinating period, your ajitama are ready to be enjoyed! Carefully remove them from the marinade. You can slice them in half lengthwise with a sharp knife for a beautiful presentation, revealing that gorgeous jammy yolk. They are perfect additions to your homemade ramen, but they’re also fantastic on their own, in rice bowls, or even as a protein boost in salads. The leftover marinade is also incredibly flavorful and can be used as a dipping sauce for dumplings or as a base for other marinades. Enjoy this simple yet profound culinary creation!
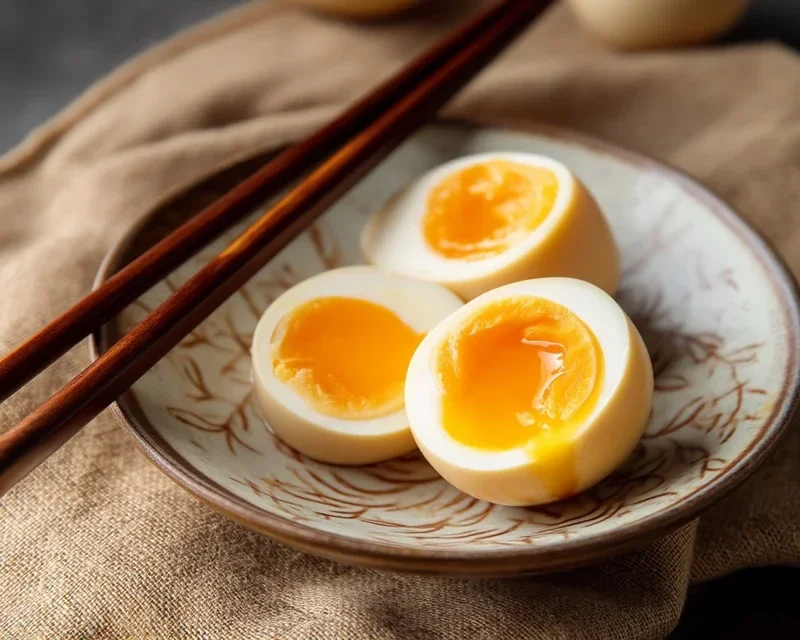
Conclusion:
There you have it! Crafting perfect ramen eggs, also known as ajitama, is a truly rewarding experience. The beauty of this recipe lies in its simplicity and the incredible depth of flavor it adds to any dish. These marinated soft-boiled eggs are a cornerstone of delicious ramen, transforming a simple bowl into a culinary masterpiece with their rich, savory, and slightly sweet profile. The glossy, jammy yolk and the marinated whites offer a textural and flavor contrast that is simply irresistible. Don’t be intimidated; with these clear steps, you’ll be impressing yourself and your guests in no time. I highly encourage you to give this ramen egg recipe a try!
Beyond ramen, these versatile beauties are fantastic sliced atop avocado toast, added to bento boxes, or even enjoyed on their own as a flavorful snack. Feel free to experiment with different marinades; a touch of non-alcoholic mirin for extra sweetness, a splash of non-alcoholic sake for depth, or even a hint of chili oil for a spicy kick can create exciting variations. This is just the begin extractning of your ajitama journey!
Frequently Asked Questions:
How long do ramen eggs last?
Once marinated and stored in an airtight container in the refrigerator, ramen eggs will typically last for about 3 to 4 days. The marinade helps preserve them to some extent, but their texture is best when consumed within this timeframe.
Can I use a different type of soy sauce?
Absolutely! While traditional Japanese soy sauce is recommended for its balanced flavor, you can experiment with other types. Consider using low-sodium soy sauce if you’re watching your salt intake, or even a dark soy sauce for a richer color and slightly more intense flavor. Just be mindful that the saltiness might vary, so you may need to adjust other seasonings accordingly.
What if I overcook the eggs?
If your eggs end up being too hard-boiled, they won’t have that signature jammy yolk that makes ajitama so special. However, they will still be perfectly edible and flavorful from the marinade! You can chop them up and add them to fried rice, salads, or even use them in place of regular hard-boiled eggs in other dishes. The flavor infusion will still be there!
Ramen Eggs (Ajitama)
Perfectly seasoned, soft-boiled eggs for ramen, made with a savory soy sauce marinade.
Ingredients
-
6 large eggs
-
½ cup light sodium soy sauce
-
¼ cup water
-
¼ cup non-alcoholic mirin
-
2 tablespoons granulated sugar
-
1 tablespoon vinegar (optional)
Instructions
-
Step 1
Boil the eggs: Bring a pot of water to a rolling boil. Gently lower the eggs into the boiling water using a slotted spoon. Cook for 6-7 minutes for a soft, jammy yolk. For firmer yolks, cook for 8-9 minutes. -
Step 2
Immediately transfer the cooked eggs to an ice bath to stop the cooking process. Let them cool for at least 10 minutes. -
Step 3
Prepare the marinade: In a small saucepan, combine the soy sauce, water, non-alcoholic mirin, and granulated sugar. Heat gently over medium heat, stirring until the sugar is dissolved. Do not boil. -
Step 4
Peel the cooled eggs carefully. If desired, add vinegar to the boiling water in step 1 to help with peeling. -
Step 5
Marinate the eggs: Place the peeled eggs in a resealable bag or a shallow container. Pour the cooled marinade over the eggs, ensuring they are fully submerged. -
Step 6
Refrigerate for at least 4 hours, or preferably overnight, turning the eggs occasionally for even marination.
Important Information
Nutrition Facts (Per Serving)
It is important to consider this information as approximate and not to use it as definitive health advice.
Allergy Information
Please check ingredients for potential allergens and consult a health professional if in doubt.



Leave a Comment