


How to Make the Perfect Grilled Pizza is a culinary quest many of us embark on, and for good reason! There’s something incredibly satisfying about crafting a pizza from scratch, especially when it involves the smoky, char-kissed magic that only a grill can provide. Forget soggy bottoms and bland crusts; grilled pizza elevates this beloved dish to a whole new level of deliciousness. The secret lies in the high heat and quick cooking time, which create a delightfully crispy crust with a chewy interior. Plus, the grill imparts a subtle smokiness that complements the vibrant toppings beautifully. Whether you’re a seasoned grill master or a curious begin extractner, mastering the art of the perfect grilled pizza will undoubtedly impress your friends and family, turning any backyard gathering into a gourmet pizza party.

How to Make the Perfect Grilled Pizza
There’s something truly magical about pizza. But have you ever considered taking that magic outdoors and onto the grill? Grilling pizza might sound a little unconventional, but trust me, it’s a game-changer. The high heat of the grill creates an incredibly crispy, slightly smoky crust that’s impossible to replicate in a conventional oven. It’s also surprisingly quick and incredibly fun, especially for a backyard gathering. Forget waiting for delivery; you can have a gourmet, homemade pizza hot off the grill in under 30 minutes. Let’s dive into how to achieve pizza perfection using this fantastic method.
Ingredients:
Cooking Instructions:
1. Prepare Your Dough and Grill
The first crucial step to a perfect grilled pizza is proper preparation. If you’re using store-bought dough, let it sit at room temperature for at least 30 minutes to an hour. This makes it much easier to stretch and handle. Cold dough is tough and prone to tearing. If you’re making your own dough, ensure it’s at its peak fermentation and also at room temperature.
While your dough is resting, preheat your grill to medium-high heat, around 450-500 degrees Fahrenheit (230-260 degrees Celsius). You want the grill grates to be nice and hot. Once the grill is preheated, clean the grates thoroughly with a wire brush. This prevents the dough from sticking. For extra insurance against sticking, you can lightly oil the grates with a paper towel dipped in a high-heat oil (like canola or vegetable oil) using long tongs.
2. Shape and Par-Bake the Dough
Now it’s time to get your dough ready for the grill. Lightly dust a clean surface and your hands with cornmeal or flour. Gently stretch and shape your pizza dough into your desired shape, usually a circle or oval, about 10-12 inches in diameter. Don’t overwork the dough; you want to maintain some airiness. Aim for a thickness of about 1/4 inch. If it springs back, let it rest for a few minutes and try again.
Carefully transfer one side of the dough onto the preheated grill grates. You’re going to par-bake this side for about 2-4 minutes, or until it’s lightly golden brown and has a few grill marks. You’ll be able to tell it’s ready when you can easily lift it with a spatula. This initial cook on the grill is what gives us that amazing crispy crust. Once one side is done, use a spatula and tongs to carefully flip the dough over.
3. Sauce and Cheese It Up
With the first side of the dough now cooked and on the grill, it’s time to add our toppings. Working quickly so the dough doesn’t get soggy, spread your pizza sauce evenly over the par-baked side, leaving about a 1/2-inch border for the crust. Don’t go too heavy on the sauce, as excess moisture can make the crust soggy.
Next, sprinkle on your shredded mozzarella cheese, followed by the grated Parmesan. If you’re using other toppings that need to be cooked, such as raw vegetables or uncooked sausage, it’s best to add them now. For toppings that are already cooked or just need warming, you can add them towards the end of the cooking process. Distribute your toppings evenly across the cheese.
4. Grill to Perfection
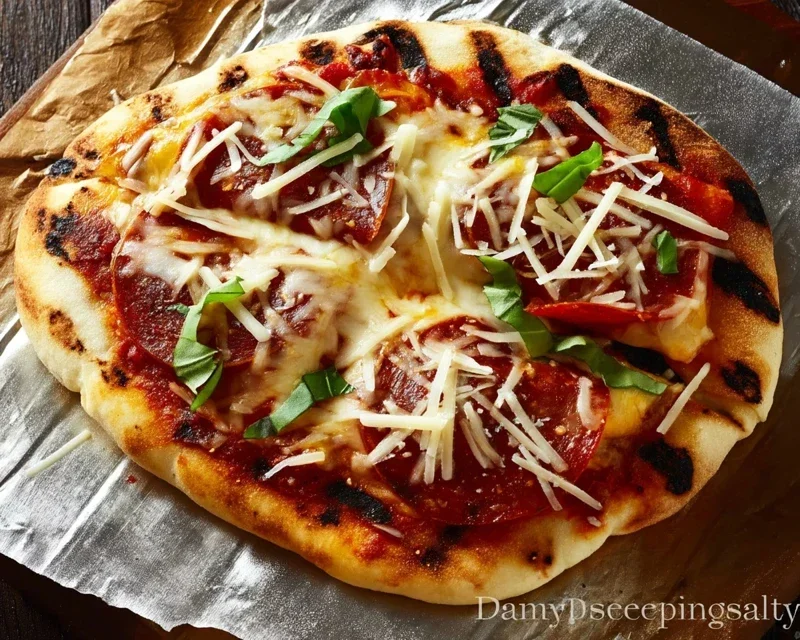
This is where the magic really happens. Once your pizza is sauced and cheesed, carefully close the lid of your grill. The residual heat and the convection within the grill will cook the toppings and melt the cheese beautifully. Grill for another 5-8 minutes, or until the crust is golden brown and the cheese is bubbly and slightly browned in spots. Keep a close eye on it; grilled pizza cooks much faster than oven-baked pizza.
During the last couple of minutes of grilling, you can add any delicate toppings like fresh basil leaves, which will wilt nicely in the heat. If you like a bit more char on your crust, you can even carefully lift the pizza with a spatula and let the direct heat kiss the bottom for another 30 seconds, but be very careful not to burn it. The goal is a beautifully cooked, slightly smoky, and wonderfully crisp crust.
5. Rest and Serve
Once your grilled pizza is cooked to perfection, carefully remove it from the grill using a spatula and transfer it to a cutting board. Let the pizza rest for a minute or two before slicing. This allows the cheese to set slightly, making it easier to cut and preventing all the delicious toppings from sliding off. Drizzle with a little extra olive oil if you like, and scatter with fresh basil or a pinch of red pepper flakes. Slice your masterpiece and enjoy the incredibly satisfying crunch and delicious flavor of your homemade grilled pizza! It’s truly a rewarding culinary experience.
Conclusion:
There you have it! Mastering the art of making the perfect grilled pizza is a truly rewarding experience. By following these steps, you’ll unlock a smoky, slightly charred crust that store-bought simply can’t replicate, combined with your favorite fresh toppings. This recipe is fantastic because it’s surprisingly simple, incredibly versatile, and delivers restaurant-quality results right in your backyard. It’s ideal for any gathering, from casual weeknight dinners to lively weekend parties. Serve your delicious creation with a crisp green salad or some grilled vegetables for a complete meal. Don’t be afraid to experiment with different cheeses, sauces, and toppings – the possibilities are endless! From classic Margherita to adventurous combinations, this grilled pizza method is your gateway to culinary creativity. Give it a try; you’ll be amazed at how easy and delicious homemade grilled pizza can be!
Frequently Asked Questions:
Can I make the dough ahead of time?
Absolutely! You can prepare your pizza dough up to 2-3 days in advance and store it in the refrigerator. Allow it to come to room temperature for about 30-60 minutes before you plan to grill for easier handling.
What kind of grill should I use?
Both charcoal and gas grills work wonderfully for grilled pizza. The key is to preheat your grill to a medium-high heat (around 450-500°F or 230-260°C) to achieve that desirable char and crispness on the crust.
My pizza is sticking to the grill grates. What did I do wrong?
Ensure your grill grates are clean and well-oiled before placing the dough directly onto them. Lightly brushing the dough with olive oil before grilling also helps prevent sticking and contributes to a beautiful, golden-brown crust.
Perfect Grilled Pizza
A simple guide to achieving a delicious, crispy, and smoky pizza on the grill.
Ingredients
-
1 lb pizza dough
-
1/2 cup tomato sauce
-
8 oz mozzarella cheese, shredded
-
4 oz pepperoni
-
1/4 cup chopped fresh basil
-
2 tbsp olive oil
Instructions
-
Step 1
Preheat your grill to medium-high heat (around 400-450°F or 200-230°C). If using a charcoal grill, bank the coals to one side for indirect heat. -
Step 2
Divide the pizza dough into two equal portions. Lightly flour a clean surface and stretch or roll out each portion into a roughly 10-12 inch circle or oval. -
Step 3
Brush one side of each pizza dough circle generously with olive oil. This will be the side that hits the grill first. -
Step 4
Carefully place one dough circle, oiled-side down, onto the preheated grill grates. Close the lid and grill for 3-5 minutes, or until the bottom is golden brown and has grill marks. -
Step 5
Flip the pizza dough over using tongs or a spatula. Quickly spread a thin layer of tomato sauce over the grilled side, leaving a small border for the crust. Sprinkle with shredded mozzarella cheese and arrange the pepperoni slices. -
Step 6
Close the grill lid and continue to cook for another 5-7 minutes, or until the cheese is melted and bubbly, and the crust is cooked through and slightly charred. Repeat with the second pizza. -
Step 7
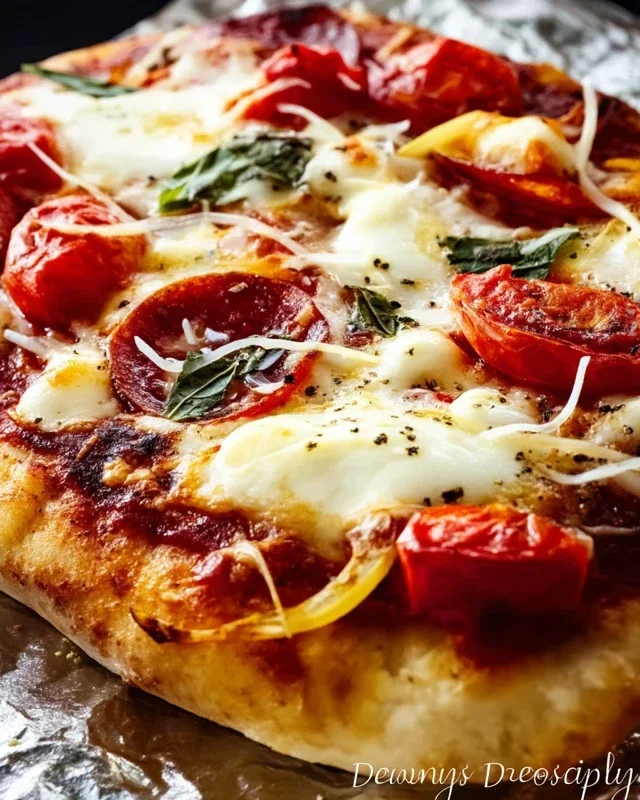
Remove the finished pizza from the grill and sprinkle with fresh basil. Let it cool slightly before slicing and serving.
Important Information
Nutrition Facts (Per Serving)
It is important to consider this information as approximate and not to use it as definitive health advice.
Allergy Information
Please check ingredients for potential allergens and consult a health professional if in doubt.


Leave a Comment