


Nut Free Pesto is a culinary revelation for so many of us! For years, the vibrant, herbaceous goodness of pesto felt out of reach, a delicious treat reserved for those without nut allergies. But I’m here to tell you, that deliciousness is now accessible to everyone. This Nut Free Pesto recipe is a game-changer, delivering all the bright, garlicky, and cheesy flavors you crave, without a single nut in sight. Imagin extracte coating your favorite pasta, drizzling it over grilled chicken or fish, or slathering it onto a toasted baguette – the possibilities are endless! What truly makes this special is the clever substitution that allows us to achieve that wonderful texture and depth of flavor. You’ll be amazed at how easily we can recreate that classic pesto magic, making it a go-to for family meals and entertaining alike.

Nut-Free Pesto: A Burst of Freshness for Everyone
For many, pesto conjures up images of vibrant green goodness, but for those with nut allergies, the traditional recipe is a no-go. Fear not! This delicious nut-free pesto recipe is here to bring that classic Italian flavor to your table, safe and satisfying for everyone. Whether you’re making pasta, spreading on a sandwich, or drizzling over roasted vegetables, this versatile sauce is a game-changer. Forget store-bought options filled with hidden allergens; making your own pesto is surprisingly simple and incredibly rewarding. You’ll be amazed at how a few fresh ingredients can transform into such a flavorful condiment.
This nut-free version achieves that delightful texture and rich taste without relying on pine nuts. We’re focusing on fresh herbs, pungent garlic, savory Parmesan, and good quality olive oil to create a truly exceptional sauce. It’s a recipe that caters to a wide range of dietary needs and preferences, making it a go-to for busy weeknights or impressive dinner parties. Plus, it’s a fantastic way to use up that abundance of fresh basil you might have growing in your garden or picked up at the farmer’s market. The vibrant aroma alone will fill your kitchen with the promise of delicious meals to come.
Ingredients:
Crafting Your Nut-Free Pesto: Step-by-Step
Creating this delightful nut-free pesto is a straightforward process that requires minimal effort and time. You’ll want to start with the freshest ingredients you can find for the best flavor.
Prepare Your Basil: Begin extract by washing your fresh basil leaves thoroughly under cool running water. Gently pat them dry with paper towels or use a salad spinner to remove excess moisture. Any remaining water can make your pesto watery, so ensure they are as dry as possible. Remove the larger stems, as they can be a bit tough and fibrous, detracting from the smooth texture of the pesto. You want to use just the tender leaves for the most delicate flavor and perfect consistency. Don’t be shy with the basil; packing it into the measuring cup will give you a good, generous amount.
Garlic and Cheese Foundation: Next, let’s get the flavor base going. Peel your garlic cloves. You can give them a rough chop if you’re using a food processor, or mince them finely if you’re using a mortar and pestle. The size of the chop will depend on your preferred method of pesto making and how finely you like your garlic integrated into the sauce. In a separate bowl, ensure your Parmesan cheese is freshly grated. Pre-shredded cheeses often contain anti-caking agents that can affect the texture and flavor of your pesto, so grating it yourself is highly recommended for the best results.
Combining the Core Flavors (Food Processor Method): If you’re using a food processor, add the dried basil leaves and the peeled garlic cloves to the bowl. Pulse a few times until the ingredients are roughly chopped. Then, add the freshly grated Parmesan cheese, salt, and pepper. With the food processor running on low, slowly drizzle in the olive oil through the feed tube. Continue processing until the pesto reaches your desired consistency. Some people prefer a slightly chunkier pesto, while others like it super smooth. Stop and scrape down the sides of the bowl as needed to ensure everything is well combined.
Combining the Core Flavors (Mortar and Pestle Method): For a more traditional and hands-on approach, use a mortar and pestle. Start by adding the garlic cloves and a pinch of salt to the mortar. Grind them together into a paste. Then, add the basil leaves gradually, a handful at a time, and continue to grind and crush them against the sides of the mortar until you achieve a paste-like consistency. This method will take a bit more elbow grease but yields a wonderfully authentic flavor and texture. Once the basil and garlic are well processed, stir in the grated Parmesan cheese, pepper, and finally, slowly drizzle in the olive oil, mixing until well combined and emulsified.
Adjusting and Perfecting: Once your pesto is blended, taste it. This is the crucial step for personalization! Does it need a little more salt to bring out the flavors? Perhaps a touch more pepper for a gentle warmth? You can also adjust the consistency. If it’s too thick for your liking, add another tablespoon of olive oil and blend again. If you prefer a richer flavor, a tiny splash more olive oil can do wonders. Remember, the flavors will meld and deepen as it sits, so it’s often best to season it slightly less initially and adjust as needed. This allows you to fine-tune it perfectly to your taste preferences.
Serving Suggestions and Storage
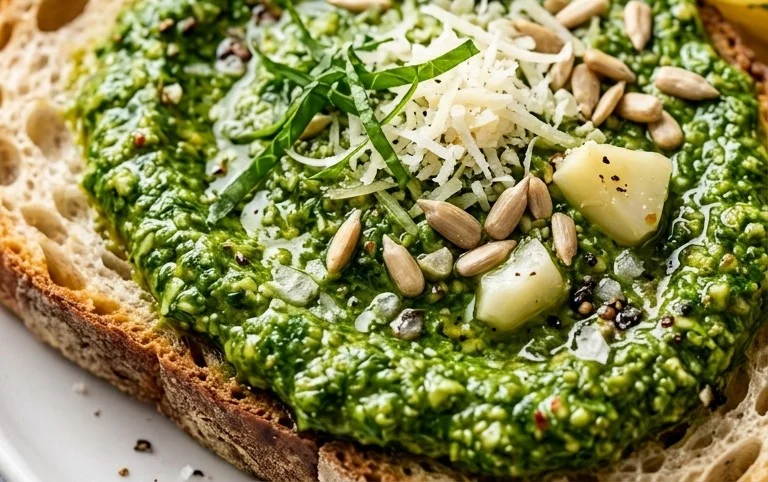
Once your nut-free pesto is ready, the possibilities are endless! Toss it with your favorite pasta for a quick and vibrant meal. It’s also fantastic as a spread for sandwiches, a topping for bruschetta, or a flavor booster for roasted vegetables like zucchini, asparagus, or cherry tomatoes. You can even swirl it into soups or use it as a marinade for chicken or fish.
To store your delicious pesto, transfer it to an airtight container. To prevent browning and maintain its fresh green color, pour a thin layer of olive oil over the surface of the pesto before sealing. This acts as a barrier from the air. It will keep in the refrigerator for up to a week. For longer storage, you can freeze it in ice cube trays, then transfer the frozen pesto cubes to a freezer-safe bag. This makes it easy to grab a portion whenever you need a burst of flavor. Enjoy this versatile and allergy-friendly pesto!
Conclusion:
I truly hope you enjoy making and savoring this nut-free pesto! It’s a fantastic alternative for those with nut allergies or simply looking for a different flavor profile. The beauty of this nut-free pesto lies in its vibrant freshness, versatility, and the fact that it’s so easy to whip up. You’ll be amazed at how quickly you can transform simple ingredients into something so delicious and satisfying. It’s perfect for adding a burst of herbaceous goodness to so many dishes.
Serving suggestions are endless! Drizzle it over pasta for a quick and easy meal, spread it on sandwiches or wraps for a flavorful kick, toss it with roasted vegetables, use it as a dip for crudités, or even dollop it onto grilled chicken or fish. For variations, feel free to experiment! You can swap basil for spinach or arugula for a milder or peppery twist. Adding a pinch of red pepper flakes can introduce a subtle heat, and a splash of lemon juice can brighten the flavors even further. Give this nut-free pesto a try – I’m confident it will become a staple in your kitchen!
Frequently Asked Questions:
Why is this recipe nut-free?
This recipe is specifically designed to be nut-free to accommodate individuals with nut allergies, ensuring they can enjoy the delicious flavors of pesto safely. It uses seeds as a substitute for traditional pine nuts.
What are some other seed options I can use instead of sunflower seeds?
Pumpkin seeds (pepitas) are an excellent alternative, offering a slightly earthier flavor. Toasted sesame seeds can also add a unique nutty depth without any actual nuts. Ensure any seeds you use are raw and unsalted for the best flavor control.
How long does this nut-free pesto last in the refrigerator?
When stored properly in an airtight container with a thin layer of olive oil on top to prevent oxidation, this nut-free pesto can last for up to 5 days in the refrigerator. The oil acts as a protective barrier, helping to maintain its vibrant color and fresh taste.
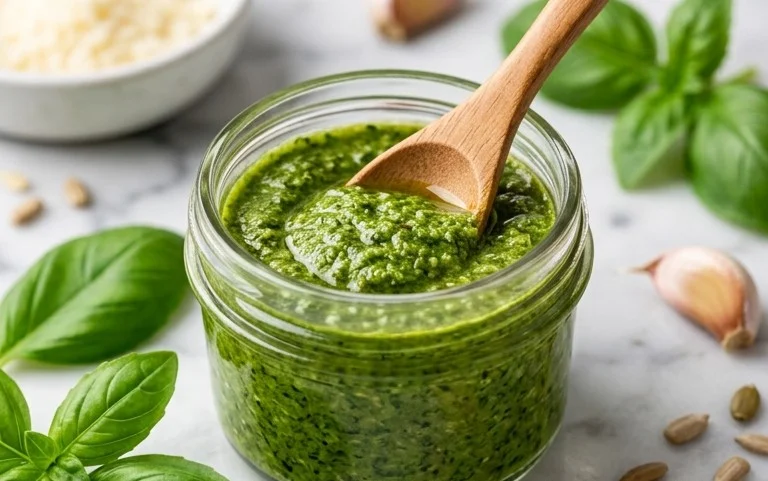
Nut-Free Pesto
A delicious and nut-free version of classic pesto, perfect for those with allergies.
Ingredients
-
2 cups fresh basil
-
2 garlic cloves
-
1/2 cup freshly grated Parmesan cheese
-
1/4 cup olive oil
-
1/4 teaspoon salt
-
1/8 teaspoon pepper
Instructions
-
Step 1
Wash and dry the fresh basil leaves thoroughly. -
Step 2
Peel the garlic cloves. -
Step 3
Combine basil, garlic, Parmesan cheese, salt, and pepper in a food processor. -
Step 4
Pulse the ingredients until coarsely chopped. -
Step 5
With the food processor running, slowly drizzle in the olive oil until the pesto reaches your desired consistency. -
Step 6
Taste and adjust seasoning if needed.
Important Information
Nutrition Facts (Per Serving)
It is important to consider this information as approximate and not to use it as definitive health advice.
Allergy Information
Please check ingredients for potential allergens and consult a health professional if in doubt.

Leave a Comment