

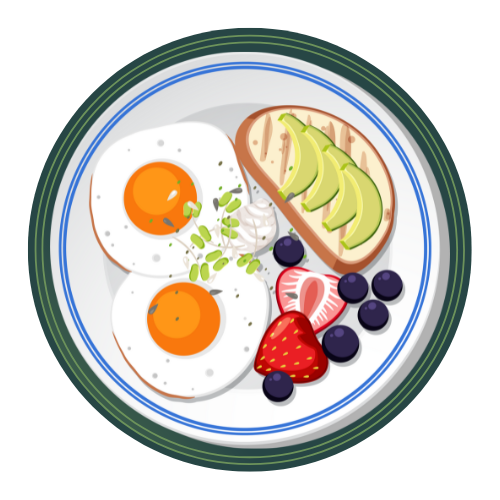
Gyeran Mari, the delightful Korean rolled omelette, is a dish that truly embodies comfort and versatility. For me, it’s more than just an omelette; it’s a culinary hug, a delightful dance of textures and flavors that can elevate any meal. Have you ever encountered a dish so simple yet so profoundly satisfying? That’s the magic of Gyeran Mari. It’s a staple in Korean homes and bento boxes for good reason. Its appeal lies in its incredibly adaptable nature. Whether you’re craving a light breakfast, a flavorful side dish, or a fun addition to a picnic, this Korean rolled omelette delivers. What makes Gyeran Mari truly special is its beautiful, often vibrant, presentation and the endless possibilities for customization. We can pack it with finely chopped vegetables, savory bits of beef ham or cheese, or keep it elegantly plain. The act of rolling it into a perfect cylinder, then slicing it into appealing rounds, is as rewarding as it is delicious.

Gyeran Mari (Korean Rolled Omelette)
Gyeran Mari, a staple in Korean cuisine, is more than just a rolled omelette; it’s a delightful visual and textural experience. Its elegant presentation, coupled with its simple yet satisfying flavor, makes it a perfect addition to any meal, from a quick breakfast to a bento box centerpiece or a flavorful side dish. What I love most about Gyeran Mari is its versatility. You can customize it with various fillings, but even the classic version with just a few simple vegetables is incredibly delicious. The process of rolling the omelette might seem a little intimidating at first, but with a little practice, you’ll be creating these beautiful logs of eggy goodness in no time! Let’s dive into how to make this wonderful dish.
Ingredients:
Cooking Instructions:
1. Preparing the Egg Mixture
The first step to creating our delicious Gyeran Mari is to get our egg mixture ready. In a medium-sized bowl, crack all 5 medium eggs. It’s important to crack them carefully to avoid getting any shell fragments into the mixture, though if you do, a larger piece of shell can be used to scoop out smaller ones. Once the eggs are in the bowl, add the finely chopped green onion and the finely chopped or grated carrot. The smaller the pieces of carrot, the easier they will be to incorporate and the more evenly they will distribute. Next, season the mixture with 1/4 teaspoon of salt and 1/8 teaspoon of black or white pepper. You can adjust the salt and pepper to your personal preference, but this amount provides a good starting point. Now, using a whisk or a fork, vigorously beat the eggs until the yolks and whites are completely combined and there are no streaks of either visible. Aim for a smooth, homogenous yellow liquid. This aeration helps create a lighter, fluffier omelette.
2. Heating the Pan and Initial Pour
For Gyeran Mari, a non-stick frying pan is your best friend. Ideally, you’ll want a square or rectangular pan, which makes the rolling process a bit easier and results in a more uniform shape. However, a round pan works perfectly fine too! Place your non-stick frying pan over medium-low heat. It’s crucial to have the heat at a moderate level; too high, and the egg will cook too quickly and burn before you can roll it. Add 1 teaspoon of neutral oil to the pan and swirl it around to coat the entire surface. You can use a paper towel to gently spread the oil if needed, ensuring an even layer. Once the pan is heated and oiled, pour about a quarter of the egg mixture into the pan. This first pour should create a thin layer that covers the bottom of the pan. If your pan is large, you might need to tilt it slightly to ensure the egg spreads evenly.
3. Cooking and Folding the First Layer
Let the first layer of egg cook undisturbed until the edges start to set and the surface is still slightly wet but not liquid. This usually takes about 1 to 2 minutes. Using a heat-resistant spatula, gently lift one edge of the cooked egg. Carefully and slowly begin extract to roll the cooked egg from that edge towards the center of the pan. Don’t worry if it’s not a perfect roll at this stage; we’re building layers. Once you’ve rolled the first portion, push it to one side of the pan.
4. Adding More Egg and Continuing the Roll
Now, pour another portion of the remaining egg mixture into the empty space in the pan, allowing it to flow underneath the rolled portion. Again, tilt the pan if necessary to ensure the new egg mixture spreads evenly and connects with the existing roll. Let this new layer cook until it’s almost set but still slightly moist on top, just like before. Once it’s ready, gently lift the rolled part and continue rolling it over the new layer of egg. The goal here is to keep adding layers of egg and rolling them into the existing omelette, gradually building up the thickness and creating that signature cylindrical shape. This process requires patience; it’s about building up the layers incrementally.
5. Finishing the Roll and Cooking Through
Continue this process of pouring egg, letting it cook slightly, and rolling until all the egg mixture has been used. As you get to the final layers, you might find it a bit trickier to roll, but persevere! Once the entire omelette has been rolled into a log, you can gently press it with your spatula to help seal any loose edges and ensure it holds its shape. Continue to cook the rolled omelette over low heat for another minute or two on each side, turning it gently with the spatula, to ensure the inside is fully cooked and the exterior is a beautiful golden-brown color. This step helps to cook any remaining liquid egg within the rolled layers and gives the omelette a nice color.
6. Resting and Slicing
Once your Gyeran Mari is cooked to perfection, carefully slide it out of the pan and onto a cutting board. It’s best to let it rest for a minute or two. This allows the steam to settle and makes slicing much cleaner. Then, using a sharp knife, slice the omelette into bite-sized pieces, about 1 to 1.5 inches thick. You’ll see the beautiful layers of egg and vegetables revenon-alcoholic aled, a testament to your careful rolling. Serve your Gyeran Mari warm and enjoy this simple yet incredibly satisfying Korean classic! It’s wonderful on its own, or as part of a larger Korean meal.

Conclusion:
And there you have it – your guide to making delicious Gyeran Mari, or Korean Rolled Omelette! This simple yet impressive dish is incredibly versatile and a fantastic addition to any meal. Its fluffy texture, customizable fillings, and beautiful presentation make it a crowd-pleaser for breakfast, lunch, or a light dinner. I truly hope you’ll give this Gyeran Mari recipe a try; it’s so rewarding to see that beautiful spiral unfold.
Gyeran Mari is wonderful served on its own with a side of dipping sauce, alongside kimchi and rice for a complete Korean meal, or even as a savory pancake substitute in a brunch spread. Don’t be afraid to experiment with different additions! Finely chopped scallions, bell peppers, mushrooms, or even a sprinkle of cheese can elevate your rolled omelette to new heights. The possibilities are truly endless, making each Gyeran Mari unique.
Frequently Asked Questions:
What are the best dipping sauces for Gyeran Mari?
A classic soy sauce-based dip is always a winner. You can mix soy sauce with a splash of vinegar, a pinch of sugar, sesame seeds, and some finely chopped green onions for a simple and flavorful accompaniment. Gochujang-based sauces also add a nice kick if you enjoy a bit of spice.
Can I make Gyeran Mari ahead of time?
While Gyeran Mari is best enjoyed fresh and warm, you can certainly make it a few hours in advance. Store it wrapped tightly in plastic wrap at room temperature or in the refrigerator. Gently reheat it in a non-stick pan over low heat to revive its texture and warmth before serving.
What if my omelette breaks while rolling?
Don’t worry if your first few attempts aren’t perfectly rolled or if it breaks a little! It happens to the best of us, especially when you’re starting out. The taste will still be amazing. With practice, you’ll get a better feel for the heat and the rolling technique. Even a slightly imperfect Gyeran Mari is delicious!

Gyeran Mari (Korean Rolled Omelette)
A simple and visually appealing Korean rolled omelette, perfect as a side dish or a light meal. Customizable with various fillings.
Ingredients
-
5 medium eggs
-
1 green onion (chopped)
-
2 tbsp carrot (chopped or grated)
-
1/4 tsp salt
-
1/8 tsp black pepper
-
1 tsp neutral oil
Instructions
-
Step 1
In a medium bowl, whisk together the 5 medium eggs, 1/4 tsp salt, and 1/8 tsp black pepper until well combined and slightly frothy. -
Step 2
Gently stir in the 1 green onion (chopped) and 2 tbsp carrot (chopped or grated) into the egg mixture. -
Step 3
Heat 1 tsp neutral oil in a non-stick rectangular or square pan over medium-low heat. -
Step 4
Pour about one-third of the egg mixture into the pan, tilting the pan to spread it evenly into a thin layer. Cook until the bottom is set but the top is still slightly wet. -
Step 5
Starting from one end, carefully roll the cooked egg layer onto itself using a spatula. Push the rolled egg to one side of the pan. -
Step 6
Pour another third of the egg mixture into the empty part of the pan, lifting the rolled egg slightly to allow the new mixture to flow underneath. Cook until set. -
Step 7
Roll the existing omelette over the newly cooked layer, continuing to build the roll. Repeat this process with the remaining egg mixture. -
Step 8
Once the omelette is fully rolled and cooked through, remove it from the pan and let it rest for a minute before slicing.
Important Information
Nutrition Facts (Per Serving)
It is important to consider this information as approximate and not to use it as definitive health advice.
Allergy Information
Please check ingredients for potential allergens and consult a health professional if in doubt.

Leave a Comment