


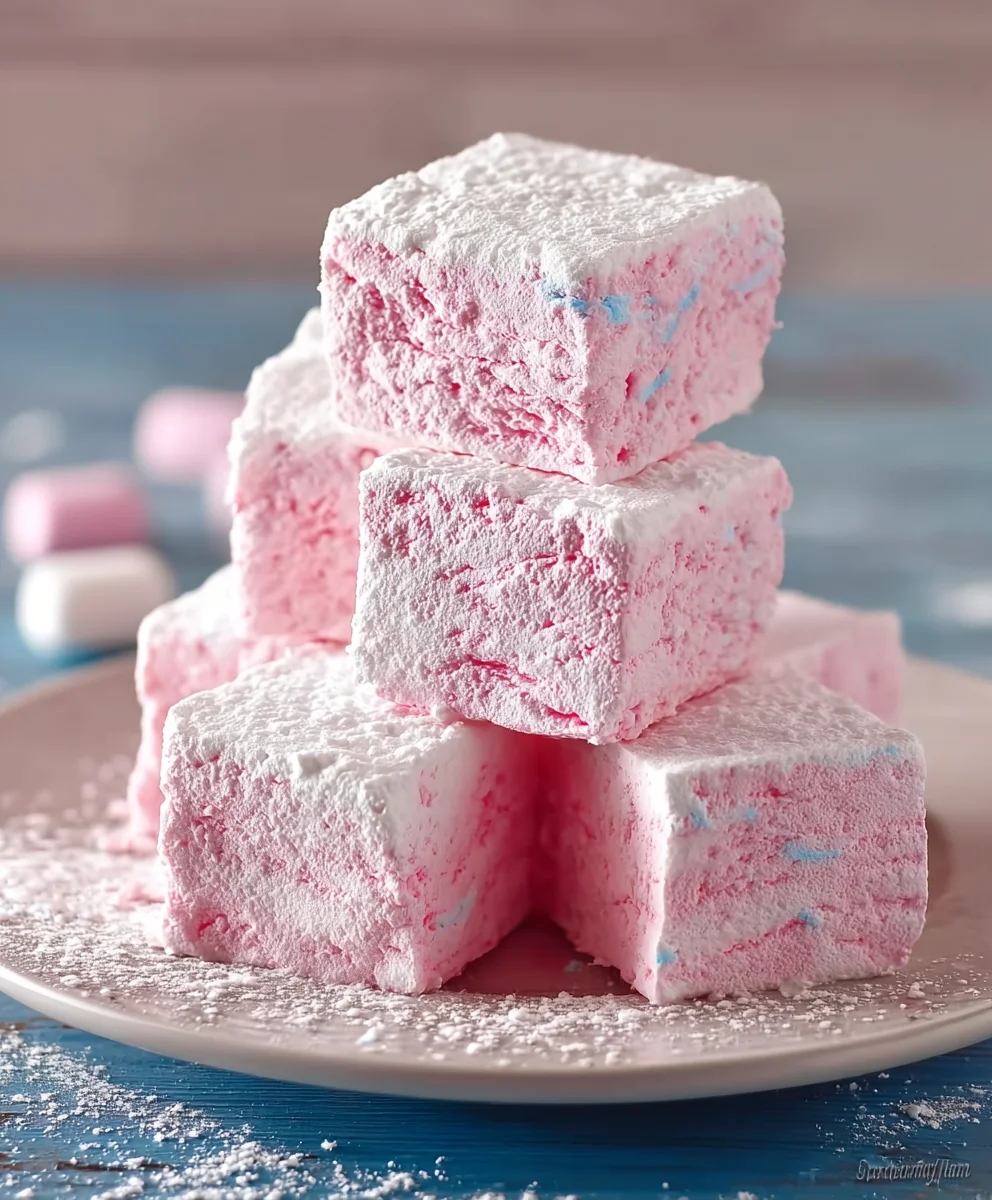
Cotton Candy Marshmallows are more than just a sweet treat; they’re a whimsical journey back to childhood, a burst of pure joy captured in a fluffy, melt-in-your-mouth bite. Imagin extracte the ethereal sweetness of carnival spun cotton candy, now infused into the soft, pillowy goodness of a perfectly made marshmallow. This isn’t just any marshmallow; it’s an experience. People absolutely adore these Cotton Candy Marshmallows because they evoke such happy nostalgia. They are incredibly simple to make at home, yet their unique flavor profile and delightful texture set them apart from anything you’d find in a standard candy aisle. The magic lies in their ability to transform a simple gathering into a fun, festive occasigin extract bringing smiles to faces of all ages. Get ready to unlock the secrets to creating these enchanting delights right in your own kitchen.

Ingredients:
- 3 envelopes unflavored gelatin
- 1 cup cold water, divided
- 1 1/2 cups granulated sugar
- 1 cup light corn syrup
- 1/4 teaspoon salt
- 1 teaspoon cotton candy extract
- Pink food coloring
- Blue food coloring
- Powdered sugar, for dusting
Preparing the Marshmallow Base
The first step in creating these delightful Cotton Candy Marshmallows is to prepare the gelatin, which acts as the crucial setting agent. In a large bowl of your stand mixer, or in a large bowl if you’re using a hand mixer, sprinkle the 3 envelopes of unflavored gelatin evenly over 1/2 cup of the cold water. Do not stir at this stage; allow the gelatin to “bloom” for about 5 to 10 minutes. You’ll notice it absorb the water and transform into a thick, jelly-like consistency. This blooming process ensures the gelatin dissolves smoothly in the hot sugar mixture, leading to a perfectly set marshmallow. While the gelatin is blooming, prepare your baking pan. Lightly grease a 9×13 inch baking pan with non-stick cooking spray or a neutral oil like vegetable or canola oil. Then, generously dust the bottom and sides of the pan with powdered sugar. This is a critical step to prevent the sticky marshmallows from adhering to the pan. Aim for a good coating, as marshmallows are notoriously sticky when they’re fresh. Set this prepared pan aside.
Cooking the Sugar Syrup
Now, let’s get to the heart of the marshmallow: the sugar syrup. In a medium-sized saucepan, combine the 1 1/2 cups of granulated sugar, 1 cup of light corn syrup, the remaining 1/2 cup of cold water, and the 1/4 teaspoon of salt. Place this saucepan over medium heat. Stir the mixture constantly with a whisk or wooden spoon until the sugar has completely dissolved. Once the sugar is dissolved, stop stirring. Bring the syrup to a boil. It’s important to avoid stirring the syrup once it starts boiling, as this can cause sugar crystals to form and result in a grainy texture. Insert a candy thermometer into the side of the saucepan, making sure it doesn’t touch the bottom of the pan. Allow the syrup to boil undisturbed until it reaches 240 degrees Fahrenheit (115 degrees Celsius). This is the firm ball stage and is essential for achieving the correct marshmallow consistency. This process will take approximately 10-15 minutes, so keep a close eye on your thermometer.
Whipping the Marshmallows
Once the sugar syrup reaches 240 degrees Fahrenheit, immediately remove the saucepan from the heat. Carefully remove the candy thermometer. With your stand mixer running on low speed (or your hand mixer on low), slowly and carefully pour the hot sugar syrup in a thin, steady stream down the side of the mixing bowl, avoiding the whisk attachment itself. Be extremely cautious as the syrup is very hot and can cause burns. Continue to stream the syrup into the bowl. Once all the syrup has been added, gradually increase the mixer speed to high. Continue to whip the mixture for about 10-15 minutes. You’ll see the mixture transform from a thin, translucent syrup into a thick, glossy, white marshmallow fluff. It will increase significantly in volume and become opaque. This extended whipping time is what incorporates air, giving marshmallows their light and airy texture. The mixture should be thick enough to hold stiff peaks.
Coloring and Flavoring
As the marshmallow mixture is whipping, it’s time to add that signature cotton candy flavor and vibrant color. Once the marshmallow fluff has reached a thick, glossy consistency, and while the mixer is still running on high speed, add the 1 teaspoon of cotton candy extract. Distribute it evenly for consistent flavor. Now for the fun part – the coloring! Divide the marshmallow mixture into two separate bowls. This is where we’ll create our classic pink and blue cotton candy hues. To one bowl, add a few drops of pink food coloring. To the second bowl, add a few drops of blue food coloring. You can adjust the amount of food coloring to achieve your desired intensity of color. Continue to mix on low speed for a minute or two in each bowl until the color is evenly distributed and there are no streaks. The goal is a uniform, appealing color in each portion.
Assembling and Setting
This is the final stage before you can enjoy your homemade Cotton Candy Marshmallows. Working quickly, as the marshmallow mixture will start to set, spoon dollops of the pink and blue marshmallow fluff into your prepared, powdered sugar-dusted baking pan. You can spoon them in randomly for a swirled effect, or try to create distinct sections of color. Use an offset spatula or the back of a spoon, lightly greased or dusted with powdered sugar, to spread the marshmallow mixture as evenly as possible in the pan. Again, be quick and gentle. Once the marshmallow is spread to your liking, generously dust the top with more powdered sugar. This prevents sticking and gives the marshmallows that classic powdery finish. You can also add a light dusting of edible glitter at this stage for an extra touch of sparkle, if desired. Cover the pan loosely with plastic wrap and let it sit at room temperature for at least 4 hours, or preferably overnight, to allow the marshmallows to set completely.
Conclusion:
You’ve now learned how to create delightful Cotton Candy Marshmallows right in your own kitchen! This recipe is a fantastic way to bring a touch of carnival magic to any occasion, from birthday parties to a cozy movie night. The fluffy, airy texture combined with that unmistakable sweet, spun-sugar flavor makes these a guaranteed hit with both kids and adults alike. Don’t be afraid to get creative with your flavorings and colors; the possibilities are truly endless when it comes to customizing your Cotton Candy Marshmallows.
For serving suggestions, these are wonderful enjoyed on their own as a sweet treat, or try them dipped in melted chocolate for an extra layer of indulgence. They also make for an impressive addition to a dessert table, piled high in a decorative bowl. For a fun twist, consider using them to top hot chocolate or incorporating them into s’mores for a unique flavor experience.
If you’re feeling adventurous with variations, experiment with adding a drop of food-grade flavoring extracts like vanilla, strawberry, or even a hint of lemon zest to the sugar mixture before whipping. You can also play with food coloring to create vibrant rainbow effects or pastel hues.
We truly hope you enjoy making and sharing these whimsical Cotton Candy Marshmallows. They’re a simple yet incredibly rewarding treat that’s sure to bring smiles and sweet memories. So, gather your ingredients, turn on some fun music, and get ready to whip up a batch of pure sugary joy!
FAQs:
Can I make Cotton Candy Marshmallows without a stand mixer?
While a stand mixer makes the process significantly easier and more hands-off, it is possible to make Cotton Candy Marshmallows by hand. You’ll need a sturdy whisk and a lot of elbow grease to achieve the necessary volume and consistency. It will require considerable time and effort, so be prepared for a workout!
How long do Cotton Candy Marshmallows stay fresh?
Properly stored, Cotton Candy Marshmallows will stay fresh for about 1 to 2 weeks. It’s best to keep them in an airtight container at room temperature. Avoid refrigeration, as this can make them sticky and compromise their texture. Ensure they are completely cooled before storing to prevent condensation.
What is the best way to cut the marshmallows?
To cut your Cotton Candy Marshmallows cleanly, lightly grease a sharp knife or pizza cutter with a neutral oil or cooking spray. You can also dust your cutting surface and the knife with a bit of cornstarch or powdered sugar to prevent sticking. Cut them into your desired shapes, and enjoy!
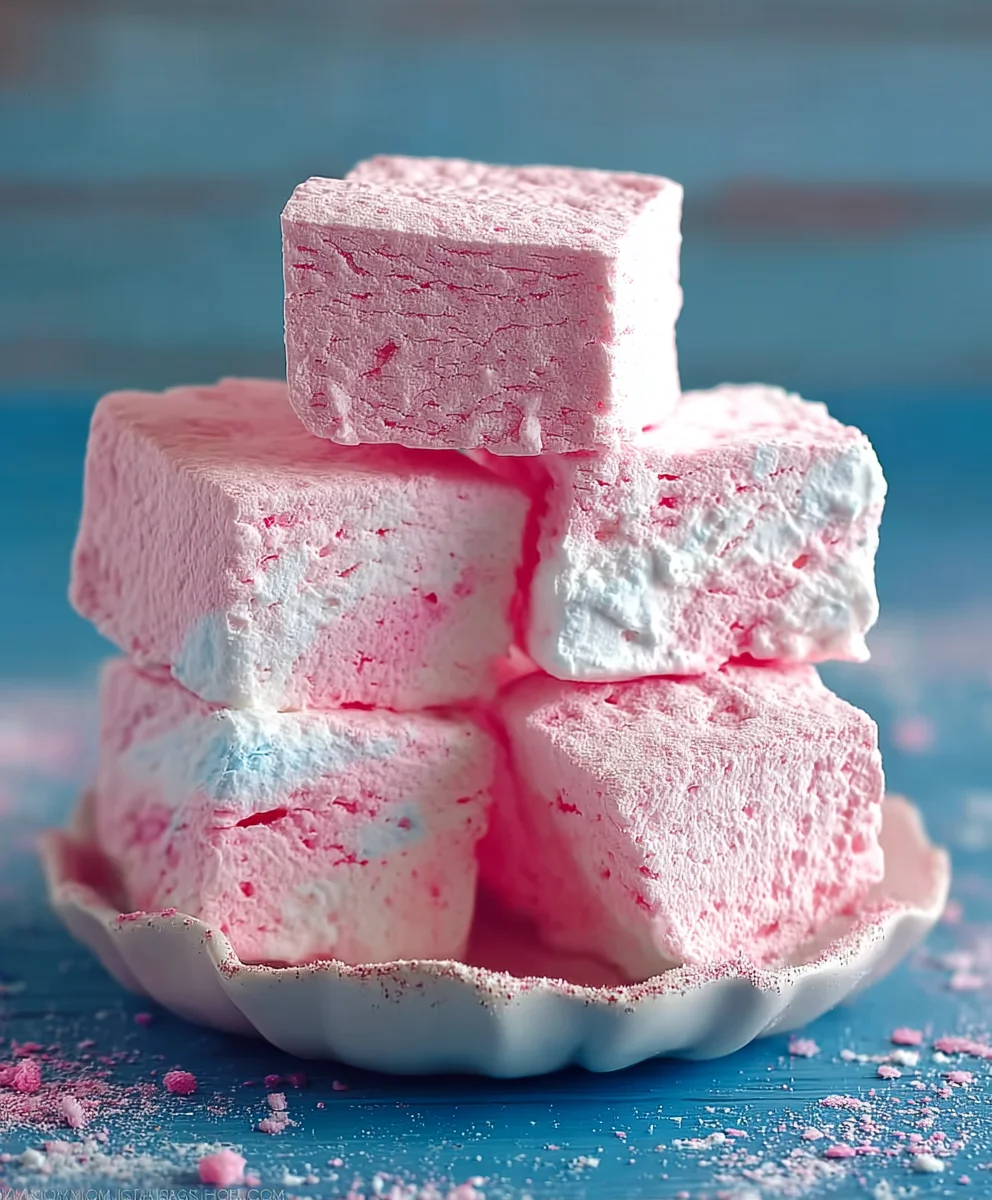
Fluffy Cotton Candy Marshmallows
A delightful recipe for homemade cotton candy flavored marshmallows, featuring vibrant pink and blue swirls.
Ingredients
-
3 envelopes unflavored gelatin
-
1 cup cold water, divided
-
1 1/2 cups granulated sugar
-
1 cup light corn syrup
-
1/4 teaspoon salt
-
1 teaspoon cotton candy extract
-
Pink food coloring
-
Blue food coloring
-
Powdered sugar, for dusting
Instructions
-
Step 1
In a large bowl, sprinkle gelatin over 1/2 cup cold water and let bloom for 5-10 minutes. Lightly grease and dust a 9×13 inch baking pan with powdered sugar. -
Step 2
In a saucepan, combine granulated sugar, light corn syrup, remaining 1/2 cup cold water, and salt. Cook over medium heat, stirring until sugar dissolves. Bring to a boil and cook without stirring until syrup reaches 240°F (115°C). -
Step 3
Carefully stream the hot sugar syrup into the blooming gelatin mixture in a stand mixer. Whip on high speed for 10-15 minutes until thick, glossy, and holds stiff peaks. -
Step 4
Add cotton candy extract while the mixture is whipping. Divide the marshmallow fluff into two bowls, tinting one pink and the other blue with food coloring. Mix until uniform. -
Step 5
Quickly spoon the colored marshmallow mixtures into the prepared pan, swirling them together. Spread evenly with a greased spatula. Dust the top generously with powdered sugar. -
Step 6
Cover loosely with plastic wrap and let set at room temperature for at least 4 hours, or preferably overnight.
Important Information
Nutrition Facts (Per Serving)
It is important to consider this information as approximate and not to use it as definitive health advice.
Allergy Information
Please check ingredients for potential allergens and consult a health professional if in doubt.


Leave a Comment