


Coconut Cloud Cake Recipe: Imagin extracte a dessert so light, so airy, it feels like you’re taking a bite of pure bliss. That’s precisely what this Coconut Cloud Cake Recipe delivers. It’s the kind of cake that instantly transports you to a tropical paradise with every tender crum extractb. We all crave those moments of sweet indulgence, those treats that make you close your eyes in pure satisfaction, and this coconut cloud cake is a cbeef hampion in that department. What truly sets this particular coconut cloud cake recipe apart is its ethereal texture, achieved through a unique blend of ingredients that create an incredibly moist interior and a melt-in-your-mouth sensation. It’s not just a cake; it’s an experience, a fluffy, dreamy escape that’s surprisingly simple to bring to your own table. Get ready to impress yourself and everyone you share it with!

Coconut Cloud Cake Recipe
There are few things as delightful as a light, airy cake that melts in your mouth, and this Coconut Cloud Cake truly lives up to its name. Imagin extracte a whisper-soft sponge infused with the delicate, tropical essence of coconut, all enveloped in a luscious, creamy frosting. It’s a dessert that’s both elegant enough for a special occasion and wonderfully comforting for an everyday treat. This recipe is designed to bring a slice of paradise right into your kitchen, and I’m so excited to share it with you. Get ready to bake a cake that’s truly heavenly!
Ingredients:
Making the Coconut Cloud Cake
Let’s begin extract with the cake itself. The key to its incredible lightness lies in a few simple techniques, starting with properly preparing your ingredients. Make sure your butter is truly softened – it should yield easily to the touch but not be melted. Room temperature eggs also emulsify much better with the butter and sugar, contributing to a smoother batter and a finer crum extractb.
Step 1: Dry Ingredients Preparation
First things first, in a medium-sized bowl, whisk together the all-purpose flour, baking powder, and salt. Whisking these dry ingredients together ensures that the leavening agent (baking powder) and salt are evenly distributed throughout the flour. This is crucial for an even rise and consistent texture in your finished cake. Set this mixture aside.
Step 2: Creaming the Butter and Sugar
In a large mixing bowl, or the bowl of your stand mixer fitted with the paddle attachment, cream together the softened unsalted butter and granulated sugar. Beat them on medium-high speed for about 3-5 minutes, or until the mixture is pnon-alcoholic ale yellow and fluffy. This process, known as creaming, incorporates air into the butter and sugar, which is another important factor in creating a light and airy cake. Scrape down the sides of the bowl periodically to ensure everything is well combined.
Step 3: Incorporating Eggs and Extracts
Now, add the room temperature eggs, one at a time, beating well after each addition. It’s important to let each egg fully incorporate before adding the next. If you add them all at once, the mixture can become greasy or curdled. Once all the eggs are in, beat in the vanilla extract and the coconut extract. These extracts will infuse the cake with their wonderful aroma and flavor.
Step 4: Alternating Wet and Dry Ingredients
With the mixer on low speed, gradually add the dry ingredients (from Step 1) to the wet ingredients (from Step 3) in three additions, alternating with the coconut milk in two additions. Begin extract and end with the dry ingredients. For example, add about a third of the flour mixture, mix until just combined, then add half of the coconut milk, mix until just combined. Continue this pattern, ending with the last third of the flour mixture. Be careful not to overmix at this stage. Overmixing can develop the gluten in the flour, resulting in a tough cake. Mix only until you no longer see streaks of flour. The batter will be thick but smooth.
Step 5: Baking the Cake
Preheat your oven to 350 degrees Fahrenheit (175 degrees Celsius). Grease and flour two 8-inch round cake pans. You can also line the bottoms with parchment paper for extra assurance. Divide the batter evenly between the prepared pans and spread it smoothly. Bake for 25-30 minutes, or until a wooden skewer or toothpick inserted into the center comes out clean. Let the cakes cool in the pans for about 10-15 minutes before inverting them onto a wire rack to cool completely. Ensure the cakes are entirely cool before frosting, otherwise, the frosting will melt.
Crafting the Dreamy Coconut Frosting
While the cakes are cooling, let’s whip up the luscious frosting that will crown our Coconut Cloud Cake. This frosting is a delightful blend of cream cheese and whipped cream, creating a texture that’s both rich and incredibly light.
In a large, chilled bowl, whip the heavy whipping cream until stiff peaks form. This means that when you lift the whisk, the cream will stand up straight. Be careful not to over-whip, or you’ll end up with butter.
In a separate bowl, beat the softened cream cheese with the powdered sugar until smooth and creamy. Add the vanilla extract and coconut extract and beat again until well combined.
Gently fold about a third of the whipped cream into the cream cheese mixture to lighten it. Then, carefully fold in the remaining whipped cream until just combined. You want to maintain as much of the airiness from the whipped cream as possible. The resulting frosting should be smooth, luscious, and fragrant with coconut.
Assembling Your Coconut Cloud Masterpiece
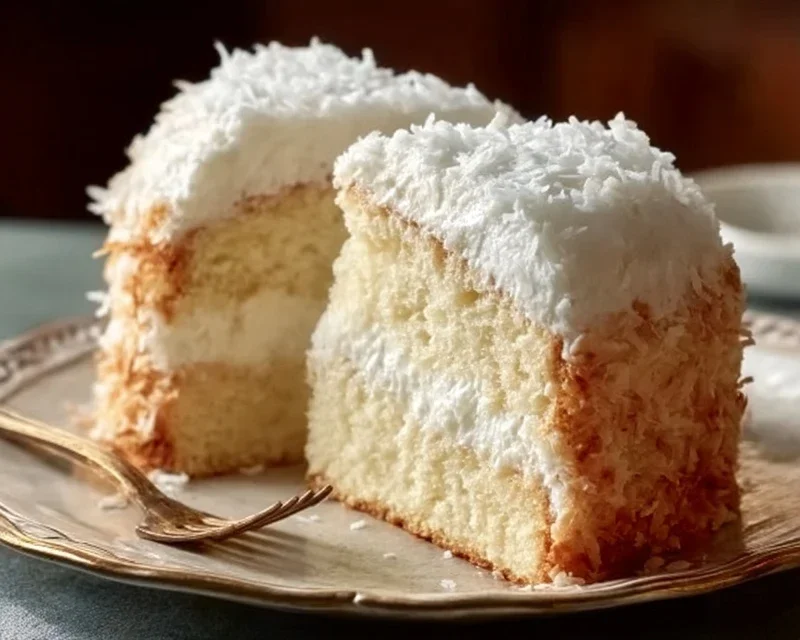
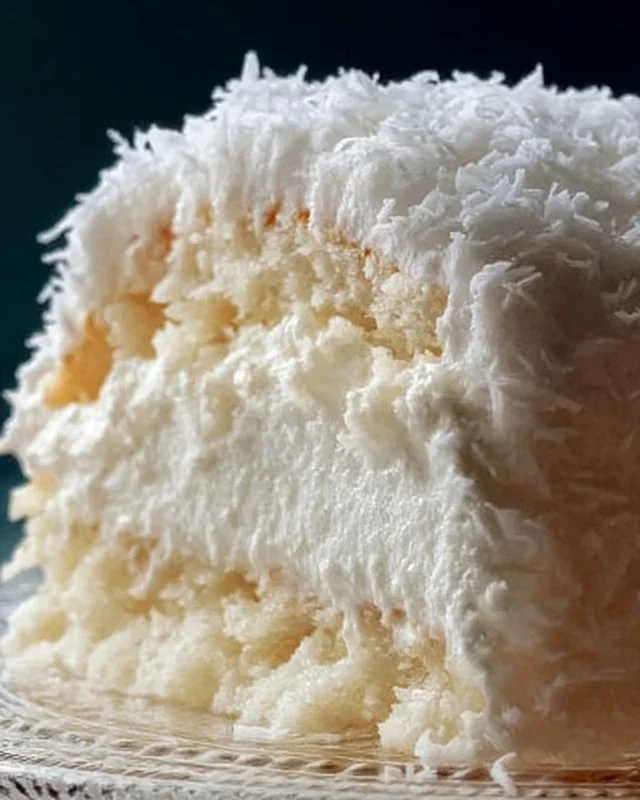
Once your cake layers are completely cool and your frosting is ready, it’s time for the final flourish. Place one cake layer on your serving plate or cake stand. Spread a generous layer of frosting over the top. Carefully place the second cake layer on top, and then frost the top and sides of the entire cake. For the topping, sprinkle the sweetened shredded coconut evenly over the top of the cake. You can leave it as is for a fresh coconut flavor, or you can lightly toast it in a dry skillet over medium heat until golden brown for a nutty, caramelized crunch.
This Coconut Cloud Cake is a celebration of tropical flavors and delicate textures. Enjoy every light, airy, and delicious bite!
Conclusion:
You’ve made it! I hope you’re as excited as I am to try this delightful Coconut Cloud Cake recipe. It truly is a triumph of fluffy texture and tropical flavor, perfect for any occasion, from a casual afternoon treat to a special celebration. The light, airy crum extractb combined with the subtle sweetness of coconut creates a dessert that’s both elegant and incredibly comforting. Don’t be intimidated by the name; it’s surprisingly straightforward to achieve that signature “cloud-like” consistency. I’ve found it pairs wonderfully with a light berry compote or a dollop of whipped cream for an extra touch of indulgence. For those seeking a twist, consider adding a hint of lime zest to the batter or incorporating toasted shredded coconut into the frosting for added crunch. I truly encourage you to bake this Coconut Cloud Cake; the joy of sharing its ethereal goodness is unparalleled. Embrace the opportunity to create something truly special in your own kitchen!
Frequently Asked Questions:
Q: Can I make this Coconut Cloud Cake ahead of time?
Absolutely! This cake is actually best when made a day in advance. The flavors meld beautifully, and the texture remains incredibly moist. Store it at room temperature in an airtight container, or if frosting with a cream cheese frosting, refrigerate and bring to room temperature before serving.
Q: What kind of coconut milk is best for this recipe?
For the most decadent and cloud-like results, I highly recommend using full-fat canned coconut milk. The higher fat content contributes significantly to the cake’s tender crum extractb and rich flavor. Avoid carton coconut milk meant for drinking, as it won’t provide the necessary richness.
Q: My cake didn’t rise as much as I expected. What could be the issue?
Several factors can affect rise, including expired leavening agents (baking powder and baking soda). Ensure yours are fresh. Also, be careful not to overmix the batter after adding the dry ingredients, as this can develop gluten and lead to a denser cake. Make sure your oven temperature is accurate as well.
Coconut Cloud Cake Recipe
A light and airy coconut cake with a creamy coconut frosting, perfect for any occasion.
Ingredients
-
2 1/2 cups all-purpose flour
-
2 1/2 teaspoons baking powder
-
1/2 teaspoon salt
-
1 cup unsalted butter, softened
-
2 cups granulated sugar
-
4 large eggs, room temperature
-
1 teaspoon vanilla extract
-
1 teaspoon coconut extract
-
1 cup coconut milk
-
1 1/2 cups heavy whipping cream
-
8 oz cream cheese, softened
-
1/2 cup powdered sugar
-
1 cup sweetened shredded coconut
Instructions
-
Step 1
Preheat oven to 350°F (175°C). Grease and flour two 9-inch round cake pans. -
Step 2
In a medium bowl, whisk together the flour, baking powder, and salt. Set aside. -
Step 3
In a large bowl, cream together the softened butter and granulated sugar until light and fluffy. Beat in the eggs one at a time, then stir in the vanilla and coconut extracts. -
Step 4
Gradually add the dry ingredients to the wet ingredients, alternating with the coconut milk, beginning and ending with the dry ingredients. Mix until just combined. -
Step 5
Divide the batter evenly between the prepared cake pans. Bake for 30-35 minutes, or until a wooden skewer inserted into the center comes out clean. -
Step 6
Let the cakes cool in the pans for 10 minutes before inverting them onto a wire rack to cool completely. -
Step 7
For the frosting, beat the heavy whipping cream until stiff peaks form. In a separate bowl, beat the softened cream cheese and powdered sugar until smooth. Stir in the vanilla and coconut extracts. Gently fold the whipped cream into the cream cheese mixture. -
Step 8
Assemble the cake by spreading a layer of frosting on one cake layer, then topping with the second cake layer. Frost the top and sides of the cake. -
Step 9
Decorate the cake with sweetened shredded coconut. Toast the coconut lightly in a dry skillet over medium heat until golden brown for extra flavor.
Important Information
Nutrition Facts (Per Serving)
It is important to consider this information as approximate and not to use it as definitive health advice.
Allergy Information
Please check ingredients for potential allergens and consult a health professional if in doubt.
Leave a Comment