

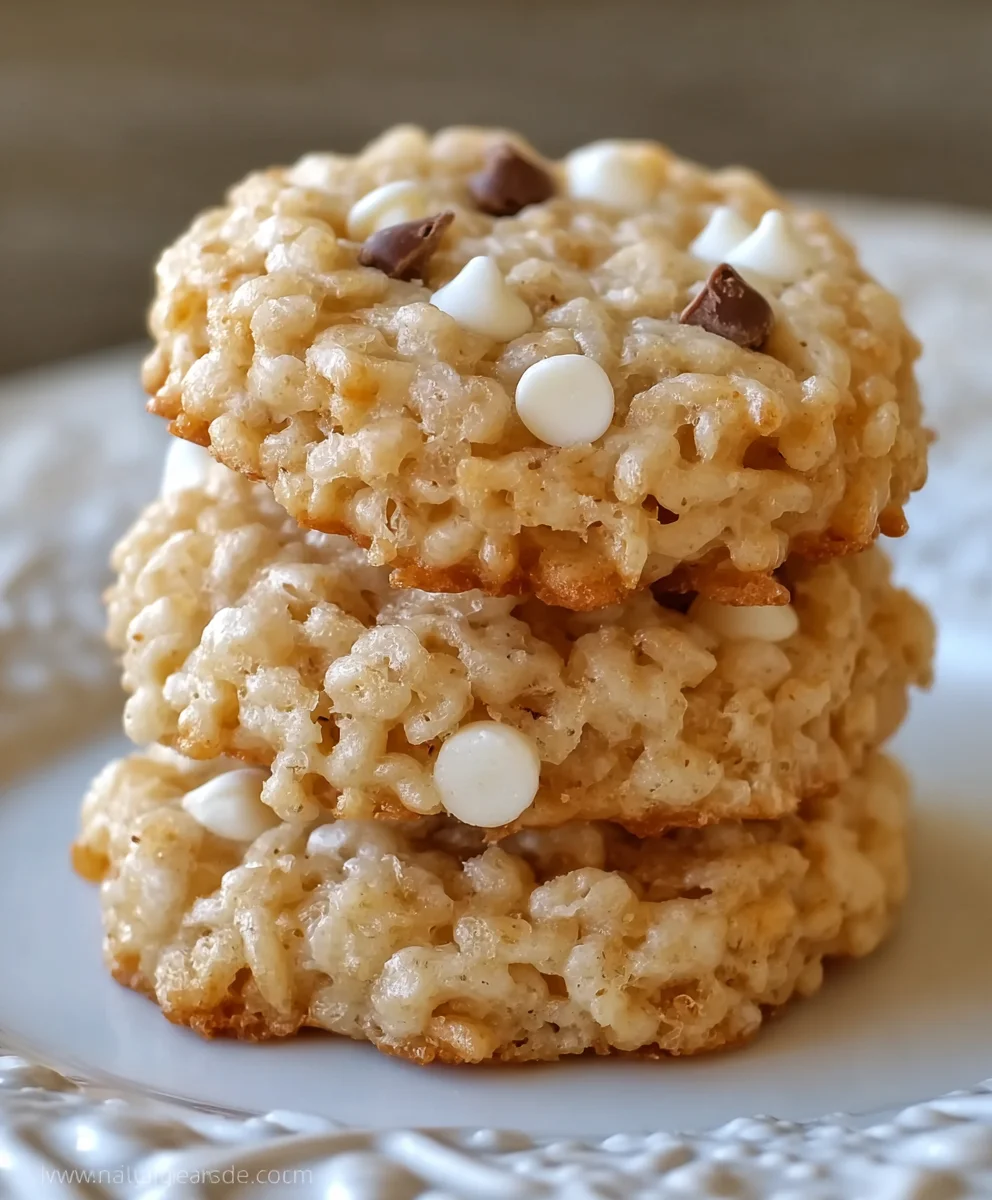
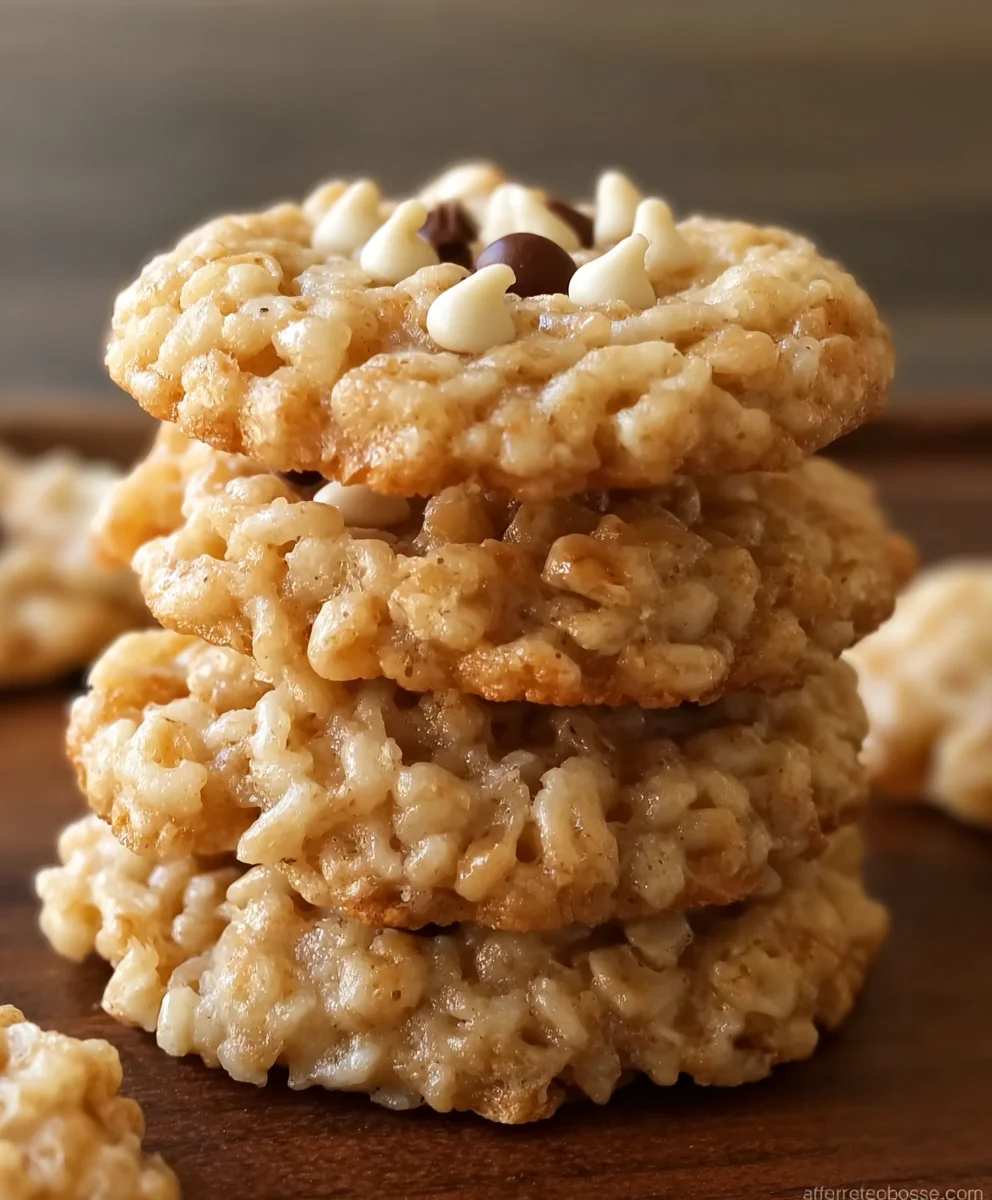
Rice Krispie Cookies are a delightful departure from the ordinary, offering a uniquely satisfying texture and a sweet, buttery flavor that instantly brings a smile to your face. If you’ve ever found yourself craving a treat that’s both nostalgic and excitingly different, then these Rice Krispie Cookies are about to become your new obsession. What makes them so special? It’s that magical combination of chewy, gooey goodness from the marshmallows melded with the signature crisp crunch of Rice Krispies cereal. Forget your traditional cookie cutters and dough chilling; these are wonderfully simple to whip up, making them perfect for a spontaneous baking session or an easy dessert for kids and adults alike. They’re the ultimate comfort food with a playful twist, guaranteed to be a hit at any gathering or just for a personal indulgence.

Ingredients:
- 1 cup butter, softened
- 1 cup packed light brown sugar
- 1 cup granulated sugar
- 2 teaspoons pure vanilla extract
- 2 large eggs
- 2 cups all-purpose flour
- 1 teaspoon baking powder
- 1 teaspoon baking soda
- 2 cups old-fashioned rolled oats (not instant)
- 2 cups Rice Krispie cereal
- 1 to 2 cups semi-sweet chocolate chips (adjust to your preference)
Cookie Dough Preparation
Creaming the Butter and Sugars
First, let’s get our cookie base started. In a large mixing bowl, combine the softened butter with both the packed light brown sugar and the granulated sugar. It’s crucial that the butter is truly softened, not melted. This allows it to cream properly with the sugars, creating a light and airy foundation for our cookies. You can achieve this by leaving your butter out on the counter for about an hour or two before you begin extract, depending on your kitchen’s temperature. Using an electric mixer on medium speed, beat the butter and sugars together for about 2 to 3 minutes, or until the mixture is pnon-alcoholic ale and fluffy. Scrape down the sides of the bowl occasionally to ensure everything is evenly incorporated. This step is key for achieving that wonderful tender texture in your final Rice Krispie Cookies.
Adding Wet Ingredients
Once your butter and sugar mixture is beautifully fluffy, it’s time to add the eggs and vanilla extract. Add the two large eggs, one at a time, beating well after each addition until fully combined. This gradual incorporation helps emulsify the mixture, preventing it from becoming greasy. Next, stir in the pure vanilla extract. The vanilla adds a wonderful depth of flavor that complements the sweetness of the sugars and the nuttiness of the oats. Continue to mix on low speed until just combined. Be careful not to overmix at this stage, as overmixing can develop the gluten in the flour too much, leading to tougher cookies.
Incorporating Dry Ingredients
Now, let’s introduce the dry ingredients to our wet base. In a separate medium bowl, whisk together the all-purpose flour, baking powder, and baking soda. Whisking them together before adding them to the wet ingredients helps to evenly distribute the leavening agents, ensuring consistent rise and texture throughout the cookies. Gradually add this dry mixture to the creamed butter and sugar mixture, mixing on low speed until just combined. Again, avoid overmixing. You want to see streaks of flour disappear, but a few small lumps are perfectly fine. Overworking the dough at this stage can lead to dense cookies, and we want light and chewy Rice Krispie Cookies.
Adding the Mix-ins
Folding in the Oats and Cereal
With our basic cookie dough ready, it’s time to add the star components that give these Rice Krispie Cookies their signature texture. Gently fold in the rolled oats. Using a rubber spatula or wooden spoon, incorporate the oats until they are evenly distributed throughout the dough. The rolled oats will add a pleasant chegrape juicess and a slightly nutty flavor. Following that, carefully fold in the Rice Krispie cereal. It’s important to fold these in gently to avoid crushing the cereal too much. The goal is to have whole or mostly whole Rice Krispies scattered throughout the cookies, providing that delightful crunch.
Incorporating Chocolate Chips
Finally, the most decadent addition: the semi-sweet chocolate chips. Add your chosen amount, whether it’s 1 cup for a subtle chocolate presence or the full 2 cups for a truly chocolatey experience. Fold these in gently as well, just until they are evenly distributed. You can use milk chocolate chips or dark chocolate chips if you prefer, but semi-sweet offers a lovely balance with the other flavors in these cookies. Resist the urge to overmix once the chocolate chips are in, as this can cause them to melt prematurely into the dough.
Baking the Cookies
Shaping and Baking
Preheat your oven to 350 degrees Fahrenheit (175 degrees Celsius). Line baking sheets with parchment paper or silicone baking mats. This prevents the cookies from sticking and makes for easier cleanup. Drop rounded tablespoons of the cookie dough onto the prepared baking sheets, leaving about 2 inches of space between each cookie to allow for spreading. You can use a cookie scoop for uniform size and shape.
Bake for 9 to 12 minutes, or until the edges are lightly golden brown and the centers appear set but still slightly soft. The exact baking time will depend on your oven and the size of your cookies. It’s better to slightly underbake than overbake for the chewiest Rice Krispie Cookies.
Cooling the Cookies
Once baked, let the cookies cool on the baking sheets for about 5 minutes before transferring them to a wire rack to cool completely. This initial cooling period on the hot baking sheet allows the cookies to firm up just enough so they don’t fall apart when you move them. As they cool on the wire rack, they will continue to set, achieving that perfect balance of chewy and crisp. Enjoy your delicious homemade Rice Krispie Cookies!
Conclusion:
And there you have it – your very own batch of delicious Rice Krispie Cookies! We hope you’ve enjoyed this simple yet incredibly satisfying recipe. These cookies are a fantastic way to bring a touch of nostalgic fun to any occasion, from bake snon-alcoholic ales to casual dessert nights. The crispy, chewy texture combined with the sweet, buttery flavor makes them an instant crowd-pleaser. Don’t hesitate to get creative; the beauty of Rice Krispie Cookies lies in their adaptability. Enjoy every delightful bite!
For serving, Rice Krispie Cookies are perfect on their own, alongside a tall glass of milk, or even crum extractbled over ice cream for an extra textural element. They also make a lovely addition to a dessert platter, offering a delightful contrast to richer treats.
When it comes to variations, the possibilities are endless! Consider adding a handful of chocolate chips, sprinkles, or even a swirl of peanut butter before the cookies set for an exciting twist. You can also experiment with different extracts, like almond or lemon, to impart unique flavors. The base recipe is so forgiving, allowing you to truly make these Rice Krispie Cookies your own.
Frequently Asked Questions:
Q: How do I prevent my Rice Krispie Cookies from becoming too hard?
A: To ensure your Rice Krispie Cookies remain wonderfully chewy and not too hard, avoid over-melting the butter and marshmallows. Stir them just until they are smooth and combined. Also, be mindful not to press the mixture down too firmly when forming the cookies. A lighter touch will result in a softer cookie.
Q: Can I make Rice Krispie Cookies ahead of time?
A: Absolutely! Rice Krispie Cookies store very well. Once they have completely cooled and set, store them in an airtight container at room temperature for up to 3-4 days. They often taste even better the next day as the flavors meld.
Q: What if I don’t have Rice Krispies cereal?
A: While Rice Krispies are ideal for their signature crunch, you can substitute other crispy rice cereals. However, be aware that the texture and flavor profile might change slightly. Corn flakes or other puffed rice cereals could be used in a pinch, but the classic chew and crispiness of Rice Krispie Cookies might be altered.
Easy Rice Krispie Cookies-Chewy Crispy Delight
Deliciously chewy and crispy cookies packed with the satisfying crunch of Rice Krispies, rolled oats, and melted chocolate chips.
Ingredients
-
1 cup butter, softened
-
1 cup packed light brown sugar
-
1 cup granulated sugar
-
2 teaspoons pure vanilla extract
-
2 large eggs
-
2 cups all-purpose flour
-
1 teaspoon baking powder
-
1 teaspoon baking soda
-
2 cups old-fashioned rolled oats
-
2 cups Rice Krispie cereal
-
1 to 2 cups semi-sweet chocolate chips
Instructions
-
Step 1
In a large mixing bowl, cream together the softened butter, packed light brown sugar, and granulated sugar until light and fluffy. -
Step 2
Add the eggs one at a time, beating well after each addition, then stir in the vanilla extract. Mix on low speed until just combined. -
Step 3
In a separate bowl, whisk together the all-purpose flour, baking powder, and baking soda. Gradually add this dry mixture to the wet ingredients, mixing on low speed until just combined. -
Step 4
Gently fold in the rolled oats and Rice Krispie cereal until evenly distributed. -
Step 5
Fold in the semi-sweet chocolate chips until just combined. -
Step 6
Preheat oven to 350°F (175°C). Drop rounded tablespoons of dough onto prepared baking sheets lined with parchment paper. -
Step 7
Bake for 9-12 minutes, or until edges are lightly golden brown and centers appear set but soft. -
Step 8
Let cookies cool on baking sheets for 5 minutes before transferring to a wire rack to cool completely.
Important Information
Nutrition Facts (Per Serving)
It is important to consider this information as approximate and not to use it as definitive health advice.
Allergy Information
Please check ingredients for potential allergens and consult a health professional if in doubt.


Leave a Comment