• Skip to primary navigation
  • Skip to main content
  • Skip to primary sidebar
Yum Joyful

Yum Joyful

Cooking Up Happiness, One Recipe at a Time

  • Home
  • All Recipes
  • Dinner
  • Dessert
  • Appetizer
  • Contact
  • About
Yum Joyful
  • Home
  • All Recipes
  • Dinner
  • Dessert
  • Appetizer
  • Contact
  • About
Dessert / Easy Homemade Strawberry Ice Cream Recipe

Easy Homemade Strawberry Ice Cream Recipe

March 13, 2026 by LauraDessert

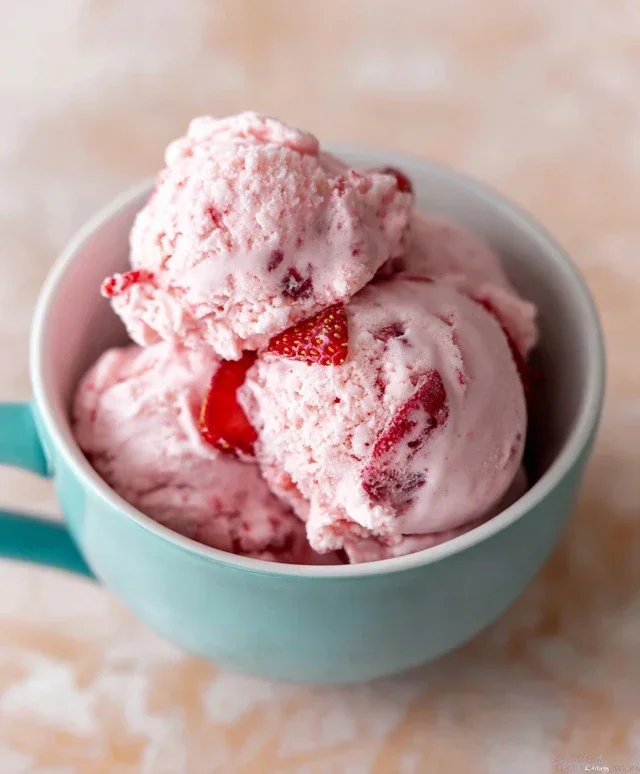
Homemade strawberry ice cream is more than just a dessert; it’s a taste of pure summer bliss, a vibrant swirl of sweetness and sunshine that instantly transports us to carefree days. There’s a reason why this classic flavor reigns supreme in the ice cream world. It’s that perfect balance of creamy richness and the bright, slightly tart burst of fresh strawberries that makes our mouths water. Imagin extracte diggin extractg into a scoop, the cool, velvety texture melting on your tongue, releasing that unmistakable, delightful strawberry essence. What truly makes homemade strawberry ice cream so special is the ability to control the quality of ingredients. We get to harness the peak ripeness of seasonal berries, infusing every spoonful with their natural, intense flavor, far surpassing anything store-bought. It’s a simple yet profoundly satisfying experience that’s surprisingly achievable right in your own kitchen.

Homemade Strawberry Ice Cream this Recipe

Homemade Strawberry Ice Cream

There’s something truly magical about homemade ice cream. It’s a tangible reward for a little bit of effort, and when it comes to strawberry ice cream, the pure, unadulterated flavor of ripe strawberries shines through in a way that store-bought versions can rarely replicate. This recipe is my go-to for a reason: it’s surprisingly simple, doesn’t require any fancy equipment beyond a blender and an ice cream maker (though I’ll offer a no-churn alternative too!), and the result is a creamy, dreamy, intensely strawberry-flavored frozen delight. Forget those artificial pink colors and muted berry notes; this is the real deal.

The beauty of making your own ice cream is the control you have over the ingredients. We’re focusing on fresh, vibrant strawberries here, letting their natural sweetness and tang be the star. The honey adds a subtle floral note that complements the strawberries beautifully, while the granulated sugar provides that essential sweetness and helps with the ice cream’s texture. A touch of lemon juice brightens everything up, cutting through the richness of the cream and making the strawberry flavor pop. And of course, the combination of heavy whipping cream and half-and-half creates that luxuriously smooth, melt-in-your-mouth consistency we all crave in a good ice cream.

Let’s gather everything we need to embark on this delicious journey.

Ingredients:

  • 1 1/2 cups strawberries, hulled and diced
  • 2 Tbsp honey
  • 1/2 cup granulated sugar
  • 1 tsp lemon juice
  • 1 cup heavy whipping cream
  • 1/2 cup half and half
  • 1 tsp vanilla extract
  • Preparing the Strawberry Base

    The first step to unlocking that incredible strawberry flavor is to create a concentrated strawberry puree. This ensures that every bite of your ice cream is bursting with berry goodness.

  • In a blender or food processor, combine the hulled and diced strawberries, honey, granulated sugar, and lemon juice. This mixture might seem a little liquidy at first, especially with the sugar dissolving, but trust the process. The honey adds a lovely depth, and the lemon juice is crucial for enhancing the natural tartness of the strawberries, preventing the ice cream from tasting overly sweet or flat. Pulse and blend until you have a smooth, vibrant puree. You want it to be as lump-free as possible for the smoothest ice cream texture. Scrape down the sides of the blender as needed to ensure all the strawberries are incorporated. This puree is the heart of our ice cream, so take your time to get it just right. If your strawberries aren’t perfectly ripe, the sugar and honey will help to boost their sweetness.
  • Once you have your smooth strawberry puree, it’s time to strain it. This might seem like an extra step, but it’s key to achieving a silky-smooth ice cream without any seediness. Place a fine-mesh sieve over a bowl and pour the strawberry puree through it. Using the back of a spoon or a spatula, gently press the puree through the sieve. This will catch any small seeds or fibrous bits, leaving you with a beautifully clear and intensely flavored liquid. Don’t force it too much; you want to extract the liquid and flavor, not push the solids through. Discard the solids left in the sieve. You’ll be amazed at how much smoother your ice cream will be with this simple technique.
  • Now, let’s bring in the creamy elements. In a separate medium bowl, whisk together the heavy whipping cream, half-and-half, and vanilla extract. The heavy whipping cream provides the richness and fat content that makes ice cream creamy, while the half-and-half adds a bit more liquid to prevent it from becoming too dense. The vanilla extract rounds out the flavors, enhancing both the sweetness and the berry notes. Whisk until well combined.
  • Gently fold the strained strawberry puree into the cream mixture. Be careful not to overmix at this stage. You want the two mixtures to be just combined, creating a beautiful pink base for your ice cream. A few gentle swirls of pink are perfectly fine and will even add a lovely visual appeal to the finished product. The goal is to incorporate the strawberry flavor without deflating the cream too much, which will help with the ice cream’s final texture.
  • Churning the Ice Cream

    This is where the magic really happens! If you have an ice cream maker, follow its manufacturer’s instructions. Typically, this involves chilling the base and then churning it.

  • Cover the bowl with plastic wrap, pressing it directly onto the surface of the ice cream base to prevent a skin from forming. Refrigerate for at least 2 hours, or preferably until thoroughly chilled. The colder your base is, the faster and more efficiently it will churn, resulting in a smoother ice cream. This chilling step is crucial for the ice cream maker to do its job effectively. For the best results, some people even leave it in the refrigerator overnight.
  • Once your base is well-chilled, pour it into your ice cream maker. Churn according to the manufacturer’s instructions. This usually takes about 20-30 minutes. The mixture will gradually thicken and resemble soft-serve ice cream. You’ll see it start to form ribbons as it churns, indicating it’s getting closer to that perfect ice cream consistency. Keep an eye on it; you don’t want to over-churn, as this can lead to a more icy texture.
  • When the ice cream has reached a soft-serve consistency, it’s time to freeze it further to achieve that classic scoopable texture. Transfer the churned ice cream to an airtight container. For an even more intense strawberry flavor, you can optionally add a few small pieces of fresh strawberry to the container before freezing. Press a piece of parchment paper or plastic wrap directly onto the surface of the ice cream before sealing the container. This helps to prevent ice crystals from forming, ensuring a smoother final product.
  • Freeze the ice cream for at least 4-6 hours, or until firm enough to scoop. The longer it freezes, the firmer it will become. If you find it too hard to scoop after freezing, let it sit at room temperature for 5-10 minutes to soften slightly before serving. This final freeze allows the ice cream to harden and develop its full texture.
  • No-Churn Alternative

    If you don’t have an ice cream maker, don’t despair! You can still enjoy delicious homemade strawberry ice cream.

  • Prepare the strawberry base as described in steps 1-4 above, ensuring the strawberry puree is well-strained and the cream mixture is combined with it.
  • Pour the combined mixture into a freezer-safe, shallow container. Place it in the freezer.
  • Every 30-45 minutes for the first 3-4 hours, remove the container from the freezer and vigorously whisk the mixture. This process breaks up ice crystals as they form, mimicking the churning action of an ice cream maker and resulting in a creamier texture. You’ll notice it gradually thickening and becoming more solid.
  • Once the mixture is too thick to whisk easily, cover the container tightly and continue to freeze for at least another 4-6 hours, or until firm.
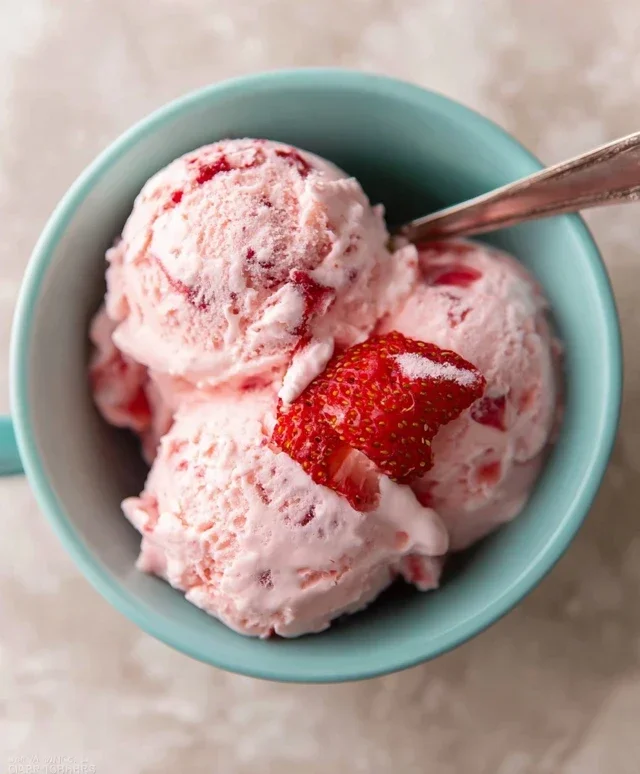
  • Enjoy your incredible homemade strawberry ice cream! It’s perfect on its own, or with a sprig of fresh mint, a drizzle of extra honey, or even alongside a slice of pound cake.

    Homemade Strawberry Ice Cream

    Conclusion:

    Congratulations! You’ve just discovered the secret to creating the most incredibly delicious and refreshing homemade strawberry ice cream right in your own kitchen. This recipe is a true winner because it allows you to control the quality of your ingredients, resulting in a vibrant, intensely fruity, and perfectly creamy dessert that store-bought options simply can’t match. Imagin extracte the satisfaction of scooping out your own luscious, ruby-red creation, knowing it’s packed with the sweet essence of fresh strawberries. It’s not just ice cream; it’s a labor of love that’s surprisingly easy to achieve.

    This delightful homemade strawberry ice cream is wonderfully versatile. Serve it simply on its own, allowing the pure strawberry flavor to shine. It’s also fantastic piled high on warm chocolate brownies, drizzled with a balsamic glaze for a sophisticated touch, or even blended into a thick, indulgent milkshake. Don’t be afraid to experiment with variations! You could fold in a swirl of homemade strawberry jam for extra texture, add a handful of fresh mint for a refreshing twist, or even incorporate a splash of limoncello for a grown-up treat. I truly encourage you to give this recipe a try. You’ll be amazed at how simple it is to create such an extraordinary dessert!

    FAQs

    Why is my homemade strawberry ice cream not smooth?

    Often, a lack of smoothness comes from ice crystals. Ensure your mixture is thoroughly chilled before churning, and don’t overfill your ice cream maker. Also, properly churning until it reaches a soft-serve consistency is key. If you don’t have an ice cream maker, whisking the base vigorously every 30-45 minutes as it freezes can help break up ice crystals.

    Can I make this recipe without an ice cream maker?

    Absolutely! While an ice cream maker makes the process easier, you can achieve great results by freezing the base in a shallow container and breaking up ice crystals by whisking or blending every 30-45 minutes for the first 3-4 hours of freezing. It requires a bit more manual effort, but the delicious homemade strawberry ice cream is well worth it!


    Homemade Strawberry Ice Cream

    Homemade Strawberry Ice Cream

    A simple and delicious homemade strawberry ice cream recipe with fresh strawberries, honey, and cream. No ice cream maker required!

    Prep Time
    20 Minutes

    Cook Time
    0 Minutes

    Total Time
    20 Minutes

    Servings
    1 quart

    Ingredients

    • 1 1/2 cups strawberries, hulled and diced
    • 2 Tbsp honey
    • 1/2 cup granulated sugar
    • 1 tsp lemon juice
    • 1 cup heavy whipping cream
    • 1/2 cup half and half
    • 1 tsp vanilla extract

    Instructions

    1. Step 1
      In a blender or food processor, combine the diced strawberries, honey, granulated sugar, and lemon juice. Blend until smooth.
    2. Step 2
      In a separate large bowl, whip the heavy whipping cream until stiff peaks form.
    3. Step 3
      Gently fold the strawberry mixture into the whipped cream until just combined. Be careful not to overmix.
    4. Step 4
      Stir in the half and half and vanilla extract until evenly distributed.
    5. Step 5
      Pour the mixture into a freezer-safe container, cover tightly, and freeze for at least 6 hours, or until firm.
    6. Step 6
      Let the ice cream sit at room temperature for a few minutes before scooping and serving.

    Important Information

    Nutrition Facts (Per Serving)

    It is important to consider this information as approximate and not to use it as definitive health advice.

    Allergy Information

    Please check ingredients for potential allergens and consult a health professional if in doubt.

    « Previous Post
    White Pizza Beef Beef Prosciutto Hot Honey Bliss
    Next Post »
    Sweet Pineapple Chicken Rice Recipe

    If you enjoyed this…

    Homemade Strawberry Ice Cream
    Dessert

    Easy Homemade Strawberry Ice Cream Recipe

    Dessert

    White Chocolate Orange Bliss – A Simple Treat

    White Chocolate Peppermint Bark Cookies
    Dessert

    White Chocolate Peppermint Bark Cookies – Festive Treat

    Reader Interactions

    Leave a Comment Cancel reply

    Helpful comments include feedback on the post or changes you made.

    Primary Sidebar

    Browse by Diet

    AppetizerAppetizerBreakfastBreakfastDessertDessertDinnerDinnerFooter MenuLunchLunchPrimary MenuUncategorized
    Masoor Dal Chilla | Savory Red Lentil Pancakes

    Masoor Dal Chilla Savory Red Lentil Pancakes

    Chicken Potstickers (Pan Fried Dumplings)

    Easy Pan Fried Chicken Potstickers Recipe

    Carrot Cake Banana Bread

    Carrot Cake Banana Bread – Moist & Delicious Recipe

    • All Recipes
    • About
    • Contact
    • DMCA
    • Cookie Privacy Policy
    • Privacy Policy
    • Terms of Use

    © 2026 · Cuisine Recipe Theme · Genesis Framework · Disclosure · Website Design by Anchored Design