


Homemade Fruit Leather Recipe is a delightful journey back to childhood, a chewy, tangy, and sweet treat that’s surprisingly simple to make at home. There’s something incredibly satisfying about transforming fresh fruit into vibrant, pliable sheets of flavor. We all remember those brightly colored rolls from the grocery store, right? Well, imagin extracte replicating that pure joy, but with the added benefit of knowing exactly what goes into your creation – no artificial colors or flavors here, just the goodness of real fruit. This homemade fruit leather recipe is special because it’s incredibly versatile; you can use almost any fruit you have on hand, from classic strawberries and apples to exotic mangoes and berries. It’s the perfect way to preserve seasonal bounty and create a healthy, portable snack that kids and adults alike will adore. Get ready to roll up your sleeves and create some edible sunshine!

This article will guide you through making delicious, chewy, and intensely fruity homemade fruit leather. It’s a fantastic way to use up ripe fruit, and the results are so much better than store-bought. Plus, you control the sugar content! Get ready for a simple, rewarding culinary adventure.
Ingredients:
Instructions:
Making fruit leather is a surprisingly straightforward process that requires just a few steps and a little patience. The magic happens in the oven or dehydrator, where the fruit purée slowly dries into a concentrated, chewy treat. Let’s get started!
1. Prepare Your Fruit
The first step is to get your fruit ready. Wash it thoroughly and then chop it into small, manageable pieces. If you’re using berries, a quick rinse is all they need. For fruits like peaches, apricots, or plums, you’ll want to remove the pits. Apples and pears can be cored and chopped. The goal is to have pieces that will break down easily when cooked. You don’t need to peel them unless the skins are particularly tough or fibrous, like those on some varieties of apples. Ripe, even slightly overripe, fruit is ideal here as it will be sweeter and softer, requiring less added sugar.
2. Cook and Purée the Fruit
Once your fruit is chopped, it’s time to soften it and begin extract the transformation into purée. Place your chopped fruit in a saucepan. Add the 3 tablespoons of white sugar and the juice of half a lemon. The sugar will help draw out moisture from the fruit and also act as a sweetener, while the lemon juice adds a lovely tartness that balances the sweetness and helps prevent browning. Stir everything together. Heat the mixture over medium heat, stirring occasionally, until the fruit starts to break down and become tender. This usually takes about 5-10 minutes, depending on the type of fruit. You’re not aiming to cook it to mush, just to soften it sufficiently so it blends easily.
After the fruit has softened, remove the saucepan from the heat. Now, you’ll want to create a smooth purée. You can use an immersion blender directly in the pot, or transfer the cooked fruit to a regular blender. Blend until you have a smooth, consistent purée. If you prefer a smoother texture, you can strain the purée through a fine-mesh sieve at this point to remove any seeds or tough fibrous bits, especially if you used fruits like raspberries or apples with smaller seeds. This step is optional but can contribute to a more refined texture.
3. Prepare for Drying
This is where your fruit leather will take shape. You’ll need a baking sheet and parchment paper or a silicone baking mat. Line your baking sheet with parchment paper or a silicone mat, ensuring it covers the entire surface. If using parchment paper, you might want to secure the corners with a tiny dab of the fruit purée to prevent it from lifting during the drying process. Spread the fruit purée evenly over the prepared baking sheet. Aim for a thickness of about 1/8 to 1/4 inch. You want it thin enough to dry efficiently but not so thin that it becomes brittle. Try to get the layer as uniform as possible to ensure even drying. A spatula or offset spatula works wonderfully for spreading. If you’re making multiple flavors, this is the time to spread them in separate pans or in distinct sections on one large pan.
4. The Drying Process
Now comes the patient part! Preheat your oven to its lowest possible temperature, ideally between 170°F and 200°F (75°C and 95°C). If your oven doesn’t go that low, you can still proceed by propping the oven door open slightly with a wooden spoon to allow moisture to escape and prevent the temperature from getting too high. Place the baking sheet in the preheated oven. The drying time can vary significantly depending on the moisture content of your fruit, the thickness of your purée, and the temperature of your oven. It can take anywhere from 4 to 12 hours. You’re looking for the fruit leather to be no longer sticky to the touch, but still pliable and chewy. It should peel away cleanly from the parchment paper.
Check on your fruit leather periodically, especially in the later stages of drying. Rotate the baking sheet if you notice uneven drying. If the edges are drying much faster than the center, you can gently lift the edges and fold them inward to help even out the process. The goal is a flexible, leathery consistency, not something that crum extractbles or cracks.
5. Cool and Cut
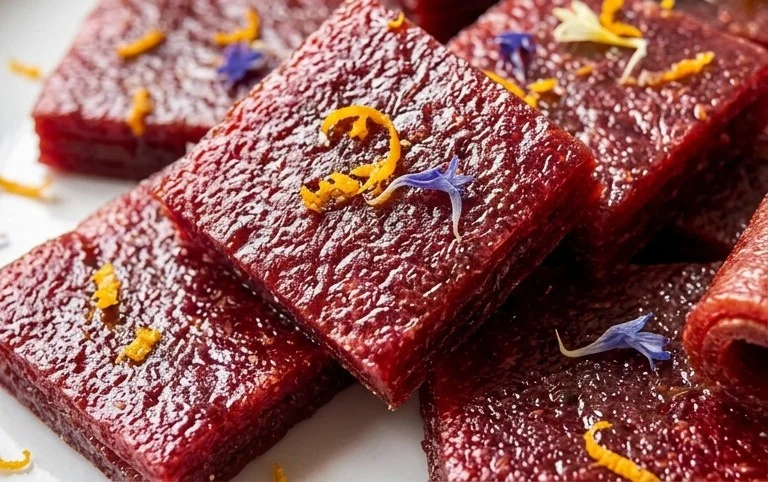
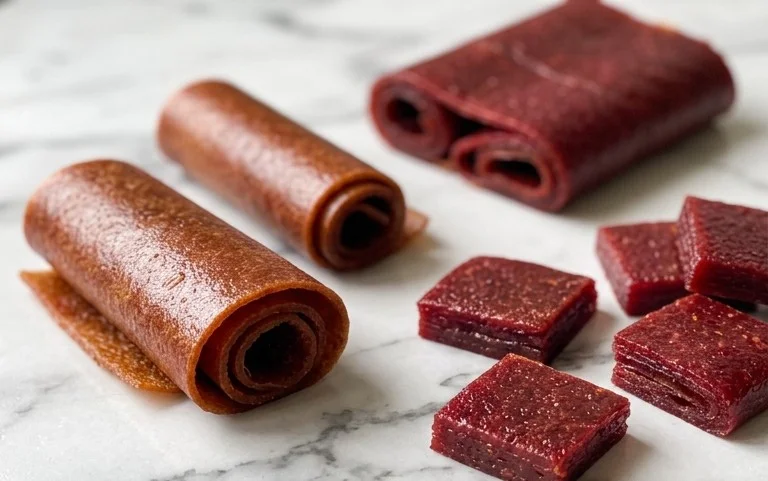
Once your fruit leather has reached the desired consistency, carefully remove the baking sheet from the oven. Let the fruit leather cool completely on the baking sheet. This is crucial, as it will continue to firm up as it cools. Trying to cut it while it’s still warm can result in a sticky mess. After it has cooled thoroughly, you can peel the fruit leather off the parchment paper or silicone mat. Now you can cut it into your desired shapes. Strips about 1 inch wide are classic and easy to handle, but you can also cut it into squares, rectangles, or even use cookie cutters for fun shapes. Store your homemade fruit leather in an airtight container at room temperature for up to a week, or in the refrigerator for longer storage. You can also roll up the strips and tie them with a small piece of parchment paper for a neat presentation.
Enjoy your delicious and healthy homemade fruit leather! It’s a perfect snack for lunches, hikes, or any time you need a burst of fruity goodness.
Conclusion:
Making your own fruit leather at home is an incredibly rewarding and delicious experience! Not only is this homemade fruit leather recipe surprisingly simple to follow, but it also allows you to control exactly what goes into your snacks, ditching the preservatives and artificial ingredients found in store-bought versions. The vibrant flavors of real fruit shine through, creating a chewy, sweet, and slightly tart treat that’s perfect for all ages. Whether you’re looking for a healthy after-school snack, a portable treat for hikes, or just a fun kitchen project, this recipe is a winner. I encourage you to gather your favorite fruits and give it a try – you won’t be disappointed by the amazing results!
Serving suggestions are as varied as the fruits you can use! Enjoy your fruit leather as is, cut into fun shapes for kids, or even crum extractble it over yogurt or ice cream for a burst of fruity goodness. Don’t be afraid to experiment with variations: try a tropical blend with mango and pineapple, a berry medley, or even add a hint of spice like cinnamon or gin extractger.
Frequently Asked Questions:
What fruits work best for making fruit leather?
Almost any fruit can be used! Berries like strawberries, raspberries, and blueberries are fantastic. Stone fruits like peaches, plums, and apricots also create wonderful flavors and textures. Apples and pears are classics, and tropical fruits like mango and pineapple add a delightful twist. The key is to use ripe, flavorful fruit for the best taste.
How long does homemade fruit leather last?
When stored properly in an airtight container at room temperature, your homemade fruit leather can last for up to two weeks. For longer storage, you can keep it in the refrigerator for several months. Ensure it’s completely cooled before storing to prevent condensation.
Can I make fruit leather without added sugar?
Absolutely! Ripe fruits are naturally sweet, so you can often skip added sugars entirely. If your fruit isn’t quite sweet enough for your preference, you can add a small amount of honey, maple syrup, or a sugar substitute. Taste your fruit puree before adding any sweeteners to make the best decision for your batch.
Homemade Fruit Leather
A simple and delicious way to preserve fresh fruit into a sweet and chewy treat.
Ingredients
-
2 cups fruit, chopped
-
3 tbsp white sugar
-
½ whole lemon, just the juice
-
1 tsp cornstarch
-
1 pinch salt
Instructions
-
Step 1
Puree the chopped fruit in a blender or food processor until smooth. -
Step 2
In a saucepan, combine the fruit puree, white sugar, lemon juice, cornstarch, and salt. -
Step 3
Cook over medium heat, stirring constantly, until the mixture thickens to a pudding-like consistency. -
Step 4
Pour the mixture onto a baking sheet lined with parchment paper, spreading it evenly to about 1/8 inch thickness. -
Step 5
Bake in a preheated oven at 170°F (77°C) for 2-4 hours, or until the surface is no longer sticky to the touch. -
Step 6
Let cool completely, then cut into strips.
Important Information
Nutrition Facts (Per Serving)
It is important to consider this information as approximate and not to use it as definitive health advice.
Allergy Information
Please check ingredients for potential allergens and consult a health professional if in doubt.



Leave a Comment