


Christmas Tree Cupcakes are more than just a festive treat; they’re a miniature edible marvel that captures the magic of the holiday season. Imagin extracte biting into a perfectly moist cupcake, swirled with vibrant green frosting that mimics the enchanting silhouette of a fir tree, adorned with tiny edible ornaments. This delightful confection is a beloved classic for a reason. It brings joy to gatherings, serves as a charming centerpiece, and offers a whimsical way to celebrate. What truly sets these Christmas Tree Cupcakes apart is the creative freedom they offer. You can experiment with different cake flavors – from classic vanilla and rich chocolate togin extracticed gingerbread or even peppermint – gin extract let your imagination run wild with the frosting decorations. It’s the perfect project for families to enjoy together, creating sweet memories as you transform simple cupcakes into sparkling holiday trees.

Ingredients:
- 1 box chocolate cake mix (Betty Crocker Brand recommended)
- ½ cup vegetable oil
- 3 large eggs
- 1 cup water
- 2 cups butter, softened to room temperature
- 10 cups powdered sugar
- 2 tablespoons vanilla extract
- 10 tablespoons heavy cream
- Pinch of salt
- Green gel food coloring
- Star sprinkles
- Christmas pearl sprinkles
Making the Christmas Tree Cupcakes
Let’s get ready to bake some festive Christmas Tree Cupcakes! These are always a hit during the holidays, and with a little patience and creativity, you’ll have a beautifully decorated batch that looks as good as it tastes. We’ll start by preparing the cake batter, then move on to creating that perfect fluffy green frosting, and finally, we’ll assemble our adorable little trees.
Baking the Chocolate Cupcakes
First things first, we need to bake our cupcake bases. Preheat your oven to the temperature specified on your chocolate cake mix box, usually around 350°F (175°C). Line two standard muffin tins with cupcake liners, preparing for about two dozen cupcakes. In a large mixing bowl, combine the contents of the chocolate cake mix box with the vegetable oil, eggs, and water. If you’re using a stand mixer, attach the paddle attachment and mix on low speed until just combined. Then, increase the speed to medium and beat for the time recommended on the box, typically 2 minutes, until the batter is smooth and well-emulsified. If you’re mixing by hand, a whisk works perfectly well; just ensure there are no dry pockets of cake mix left.
Once your batter is ready, carefully divide it evenly among the prepared cupcake liners, filling each about two-thirds full. This ensures they rise nicely without overflowing. Place the muffin tins in the preheated oven and bake for the time indicated on the cake mix box, usually 18-22 minutes. You’ll know they’re done when a toothpick inserted into the center of a cupcake comes out clean. Let the cupcakes cool in the muffin tins for about 5 minutes before transferring them to a wire rack to cool completely. It’s crucial that the cupcakes are completely cool before frosting, otherwise, your frosting will melt and slide right off!
Crafting the Evergreen Frosting
Now for the star of the show: the green frosting that will transform our cupcakes into miniature Christmas trees. In a large mixing bowl, or the bowl of your stand mixer fitted with the whisk attachment, cream together the softened butter until it’s light and fluffy. This process can take several minutes, so be patient. Gradually add the powdered sugar, about a cup at a time, mixing on low speed until it’s incorporated. Be sure to scrape down the sides of the bowl frequently to ensure even mixing. Once all the powdered sugar is added, the mixture will be thick.
Next, add the vanilla extract and a pinch of salt to the butter and sugar mixture. Now, it’s time to add the heavy cream, a few tablespoons at a time, while continuing to mix on medium-high speed. You’re looking for a smooth, spreadable consistency. Add just enough cream to reach your desired texture. If the frosting seems too stiff, add another tablespoon of cream; if it’s too loose, add a bit more powdered sugar. Once you have the perfect consistency, it’s time for color. Add your green gel food coloring a drop at a time, mixing thoroughly after each addition until you achieve a vibrant, festive green hue. Gel food coloring is concentrated, so you’ll need less than liquid food coloring. Taste a tiny bit to make sure the vanilla flavor is balanced and the sweetness is to your liking.
Assembling the Christmas Tree Cupcakes
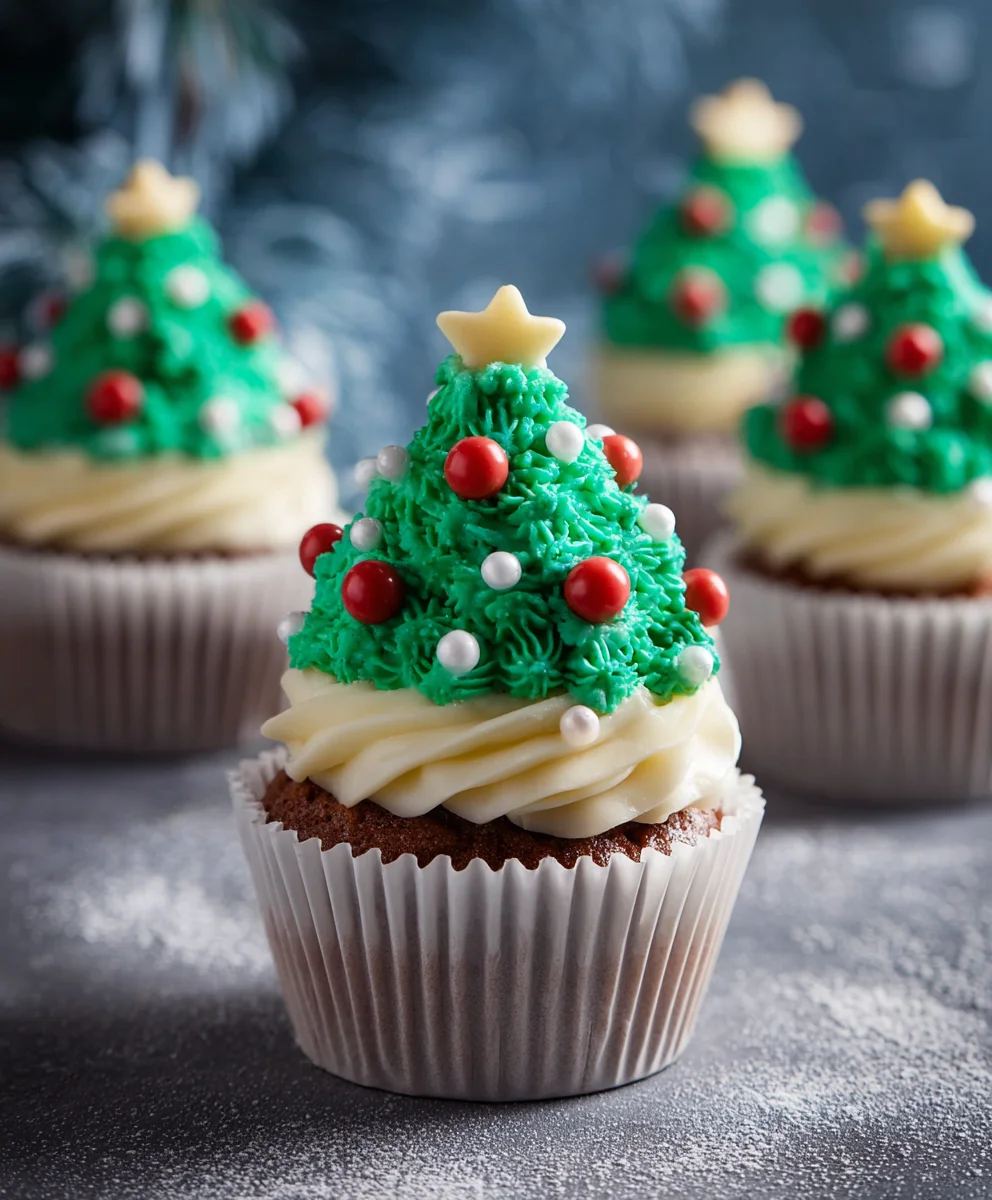
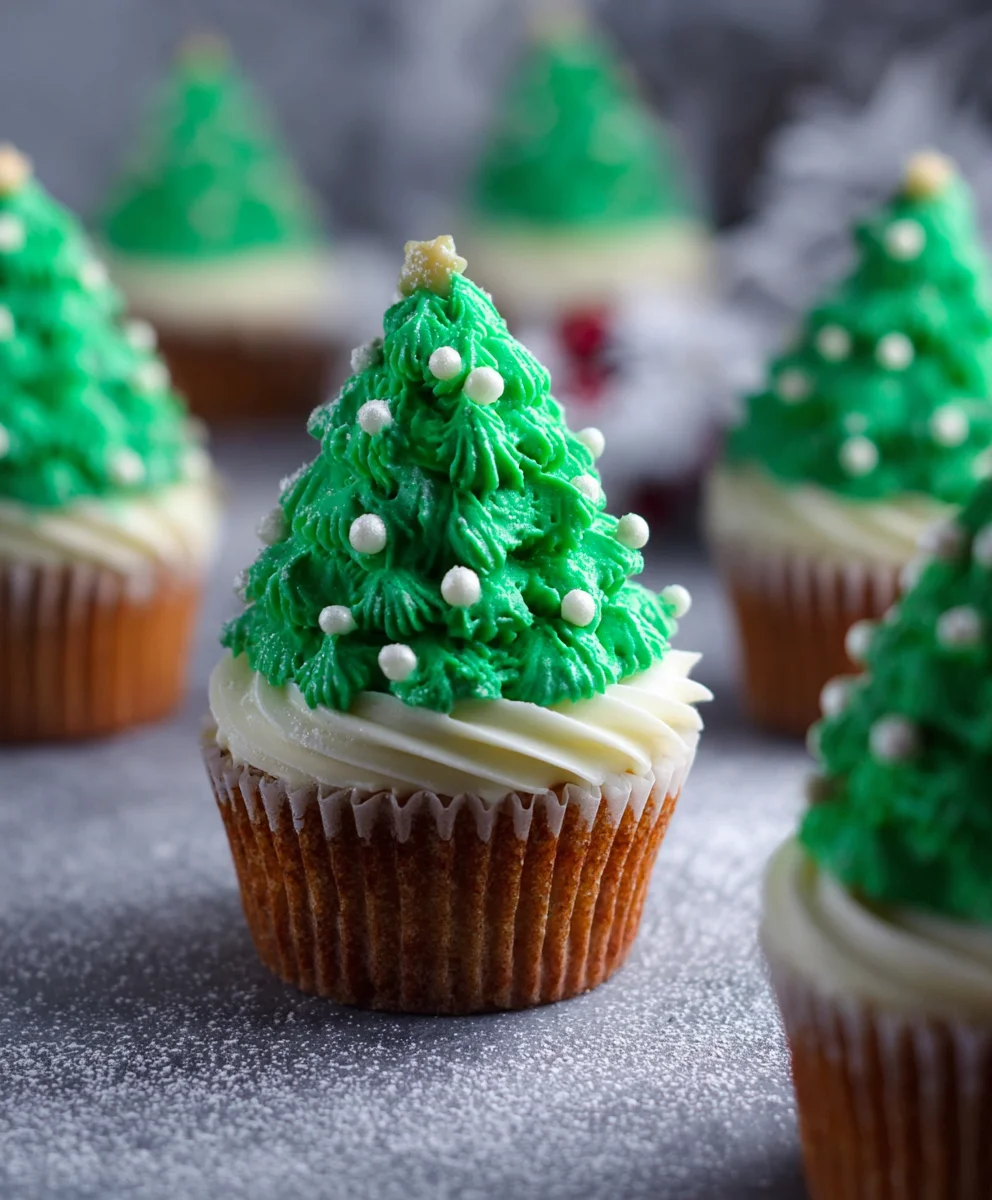
With your cooled cupcakes and perfectly green frosting ready, we can begin extract the festive assembly! You’ll need piping bags fitted with a star or grass-like piping tip. Fill your piping bags generously with the green frosting. Now, hold the piping bag perpendicular to the top of a cupcake. Start piping from the outer edge of the cupcake, working your way inwards in a circular motion, building up height to create a tree-like shape. Think of it like drawing a spiral, but with frosting! You want to create swirls that go up, mimicking the branches of a Christmas tree. Don’t be afraid to add plenty of frosting; a generously frosted cupcake is a happy cupcake! Aim for a cone shape, wider at the base and tapering towards the top.
Once you’ve piped your frosting trees, it’s time for the final decorative flourish. Take your star sprinkles and gently press one or two onto the very top of each frosted cupcake to represent the tree topper. Then, scatter a few of the Christmas pearl sprinkles around the “branches” of your frosting trees. These add a lovely sparkle and resemble ornaments. For an extra touch, you could even add a few tiny red sprinkles for a pop of color, like little baubles. Allow the frosting to set for a few minutes before stacking or transporting them, especially if you plan to bring them to a party. Enjoy the magic of your homemade Christmas Tree Cupcakes!
Conclusion:
And there you have it – your very own delightful batch of Christmas Tree Cupcakes! We hope you enjoyed following along with this festive recipe and are now inspired to bring some edible holiday cheer to your celebrations. These cupcakes are not only a visual treat but a delicious way to get everyone in the holiday spirit. Whether you’re a seasoned baker or just starting out, this recipe is designed to be fun and rewarding. Don’t be afraid to experiment and make them your own!
For serving, these Christmas Tree Cupcakes are perfect for holiday parties, cookie exchanges, or even as a special dessert on Christmas Eve. They look stunning arranged on a tiered stand or a festive platter. For variations, feel free to experiment with different cake flavors like gin extractgerbread or red velvet. You can also get creative with your green frosting colors, perhaps adding a touch of white for a snow-dusted effect. The possibilities are endless!
We encourage you to get your family and friends involved in the decorating process. It’s a wonderful way to create lasting holiday memories. So go ahead, bake, decorate, and most importantly, enjoy these beautiful and delicious Christmas Tree Cupcakes!
Frequently Asked Questions:
Q1: Can I make the cupcake batter ahead of time?
A: Yes, you can prepare the cupcake batter up to 24 hours in advance. Store it in an airtight container in the refrigerator. Be sure to let it come to room temperature and give it a good stir before baking for the best results.
Q2: What kind of piping tip should I use to make the “tree” shape?
A: A star tip, such as a Wilton 1M or 2D, is ideal for creating the classic tree shape. You can also use a grass tip for a more textured, realistic evergreen look. Experiment with different tips to see which effect you prefer!
Q3: How should I store leftover Christmas Tree Cupcakes?
A: Store frosted cupcakes in an airtight container at room temperature for up to 2-3 days. If your frosting is particularly delicate or if your climate is warm, refrigerating them is an option, but be sure to let them come back to room temperature before serving for optimal flavor and texture.
Easy Christmas Tree Cupcakes-Festive Dessert Recipe
Festive and easy-to-make chocolate cupcakes frosted and decorated to look like Christmas trees.
Ingredients
-
1 box chocolate cake mix (Betty Crocker Brand recommended)
-
½ cup vegetable oil
-
3 large eggs
-
1 cup water
-
2 cups butter, softened to room temperature
-
10 cups powdered sugar
-
2 tablespoons vanilla extract
-
10 tablespoons heavy cream
-
Pinch of salt
-
Green gel food coloring
-
Star sprinkles
-
Christmas pearl sprinkles
Instructions
-
Step 1
Preheat oven to 350°F (175°C). Line two muffin tins with cupcake liners. Combine chocolate cake mix, vegetable oil, eggs, and water in a large bowl. Mix until smooth and well-emulsified, either with a stand mixer or by hand. Divide batter evenly among liners, filling two-thirds full. -
Step 2
Bake for 18-22 minutes, or until a toothpick inserted into the center comes out clean. Cool cupcakes in tins for 5 minutes, then transfer to a wire rack to cool completely. -
Step 3
To make the frosting, cream softened butter until light and fluffy. Gradually add powdered sugar, mixing until incorporated. Scrape down the sides of the bowl frequently. -
Step 4
Add vanilla extract and salt. Gradually add heavy cream, mixing on medium-high speed until a smooth, spreadable consistency is reached. Add green gel food coloring a drop at a time until a vibrant green hue is achieved. -
Step 5
Fill piping bags fitted with a star or grass-like tip with the green frosting. Pipe frosting onto the top of each cooled cupcake in a swirling motion, starting from the outer edge and working inwards to create a tree shape. Build up height for a cone-like appearance. -
Step 6
Gently press star sprinkles onto the top of each cupcake to create tree toppers. Scatter Christmas pearl sprinkles around the ‘branches’ to resemble ornaments. Allow frosting to set before serving or transporting.
Important Information
Nutrition Facts (Per Serving)
It is important to consider this information as approximate and not to use it as definitive health advice.
Allergy Information
Please check ingredients for potential allergens and consult a health professional if in doubt.
Leave a Comment