

Chocolate covered strawberries are more than just a simple treat; they are a delightful sensory experience that evokes feelings of romance, celebration, and pure indulgence. What is it about the luscious combination of ripe, juicy strawberries enrobed in smooth, decadent chocolate that captures our hearts and taste buds? Perhaps it’s the beautiful contrast of textures – the slight firmness of the fruit giving way to the velvety richness of the chocolate. Or maybe it’s the effortless elegance they bring to any occasion, transforming a simple dessert into something truly special, perfect for Vnon-alcoholic alentine’s Day, anniversaries, or just a spontaneous moment of joy. The inherent sweetness of the strawberry amplified by the deep, satisfying flavor of chocolate makes them an irresistible pairing that never fails to impress. Get ready to create your own batch of these iconic delights, a simple yet sophisticated pleasure everyone will adore.
Why We Love Them
The magic of chocolate covered strawberries lies in their perfect harmony. The natural sweetness and slight tang of a perfectly ripe strawberry cut through the richness of the chocolate, creating a balanced flavor profile that is utterly addictive. They are incredibly versatile, working equally well as a standalone treat or as a stunning addition to a dessert platter or charcuterie board. Beyond their deliciousness, they also possess a timeless appeal; a box of these beautifully crafted berries is a universally recognized symbol of affection and luxury, making them an ideal gift for loved ones.
Making Them Special
What elevates a simple strawberry dipped in chocolate to something truly exceptional is the quality of your ingredients and the care you put into the process. Choosing the freshest, plumpest strawberries is paramount. Then, selecting the right type of chocolate – whether it’s dark, milk, or white – and ensuring it’s melted smoothly without scorching is key. You can also experiment with adding a pinch of sea salt to your dark chocolate for an extra layer of flavor complexity, or even drizzling contrasting chocolate over your dipped berries for an artistic touch. The result is a treat that looks as good as it tastes, a testament to the simple beauty of fresh ingredients transformed.

Ingredients:
- 1 pound fresh strawberries
- 8 ounces good quality semi-sweet chocolate
- 1 tablespoon coconut oil (optional, for a smoother coating)
- Assorted toppings (optional): chopped nuts, sprinkles, sea salt flakes, white chocolate drizzle
Preparing the Strawberries
Washing and Drying
The foundation of perfect chocolate covered strawberries lies in how you prepare your fruit. Begin extract by gently washing your pound of fresh strawberries under cool running water. Avoid soaking them, as this can make them waterlogged and affect how the chocolate adheres. After washing, it’s crucial to dry them thoroughly. I find that laying them out on a clean kitchen towel or paper towels and gently patting each one dry is the most effective method. Ensure there’s no moisture left on the surface, as water and melted chocolate do not mix well and can cause the chocolate to seize and become lumpy. You want a perfectly smooth, glossy coating.
Hull Removal
Once your strawberries are completely dry, it’s time to remove the green leafy tops, also known as hulls. You can do this with a small paring knife. Carefully slice just under the green leaves, following the natural curve of the strawberry. Try to remove as little of the actual strawberry flesh as possible. Some people prefer to leave the hull on for a decorative handle, which is perfectly fine if you plan to eat them soon after dipping. However, if you’re aiming for a more polished look or storing them for a short period, hulling them is generally the way to go.
Melting the Chocolate
Choosing and Melting Your Chocolate
The quality of your chocolate is paramount for the best chocolate covered strawberries. I recommend using a good quality semi-sweet chocolate, about 8 ounces. You can use chocolate chips, but bars chopped into small pieces tend to melt more smoothly and result in a better texture. For an extra glossy and smooth finish, I like to add about 1 tablespoon of coconut oil to the chocolate. This is optional, but it really makes a difference in the final appearance and texture.
To melt the chocolate, you have a couple of excellent options. The most controlled method is using a double boiler. Fill the bottom pot of your double boiler with a few inches of water and bring it to a simmer over medium-low heat. Place your chopped chocolate and coconut oil (if using) in the top bowl of the double boiler, ensuring the bottom of the bowl doesn’t touch the simmering water. Stir gently and continuously until the chocolate is completely melted and smooth. Alternatively, you can melt the chocolate in a microwave-safe bowl in 30-second intervals, stirring thoroughly after each interval, until mostly melted. Then, stir until fully smooth. Be careful not to overheat the chocolate, as this can cause it to burn or seize.
Dipping and Decorating
The Dipping Process
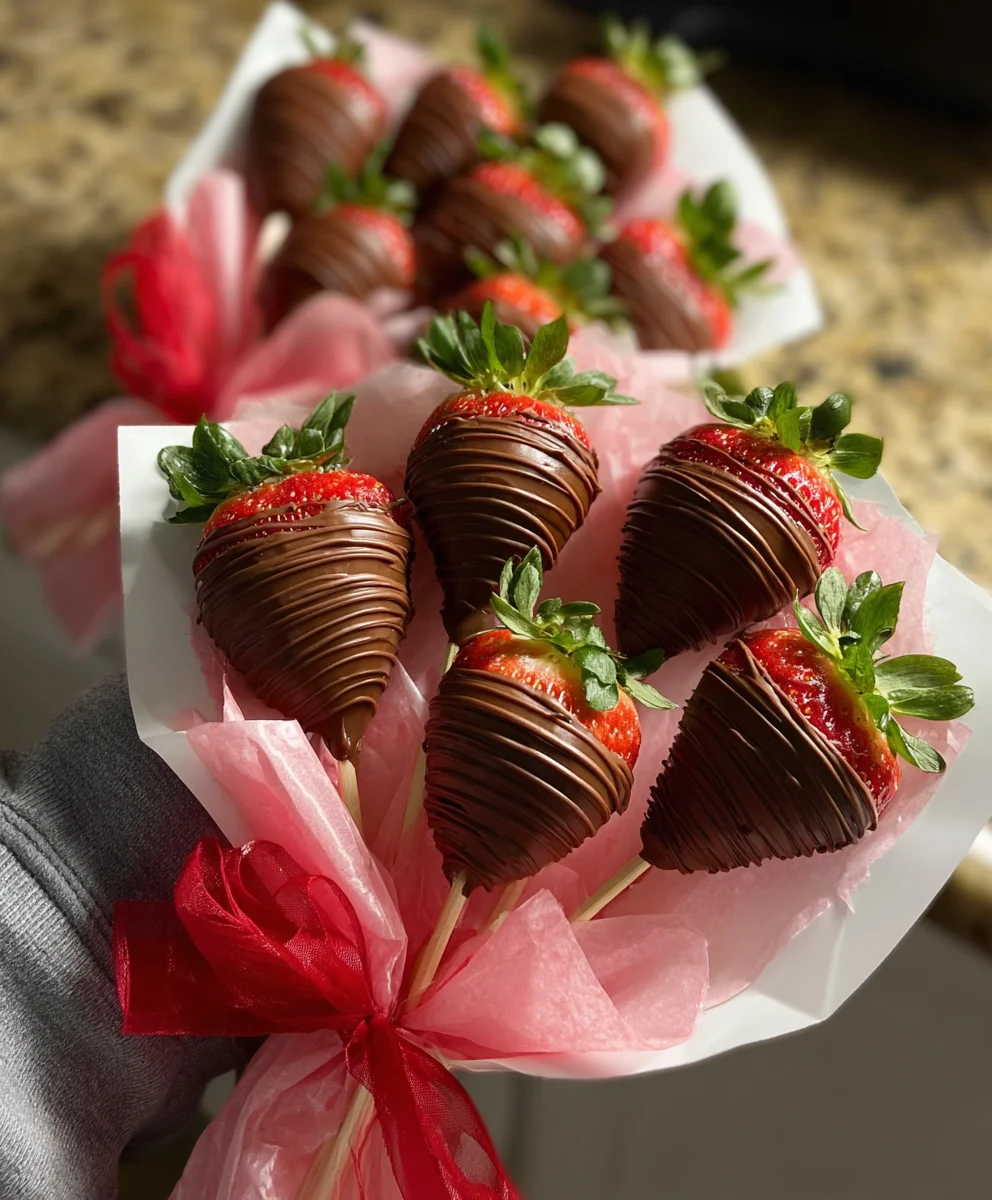
With your chocolate perfectly melted and smooth, it’s time for the fun part: dipping the strawberries! Hold a strawberry by its stem or hull and carefully dip it into the melted chocolate, rotating it to coat about two-thirds to three-quarters of the berry. Allow any excess chocolate to drip back into the bowl. You want an even coating, not too thick that it becomes unwieldy, and not too thin that the strawberry shows through. A gentle swirl and a slight tap against the side of the bowl can help distribute the chocolate evenly.
Setting the Chocolate
Once dipped, carefully place the chocolate-covered strawberry onto a baking sheet lined with parchment paper or wax paper. This is crucial to prevent them from sticking. If you’re leaving the hulls on, make sure to orient them so they stand upright. If you’ve hulled them, they’ll lay on their sides. As the chocgin extractte begins to set, you can add your desired toppings. Work quickly while the chocolate is still wet enough for the toppings to adhere.
Adding Toppings (Optional)
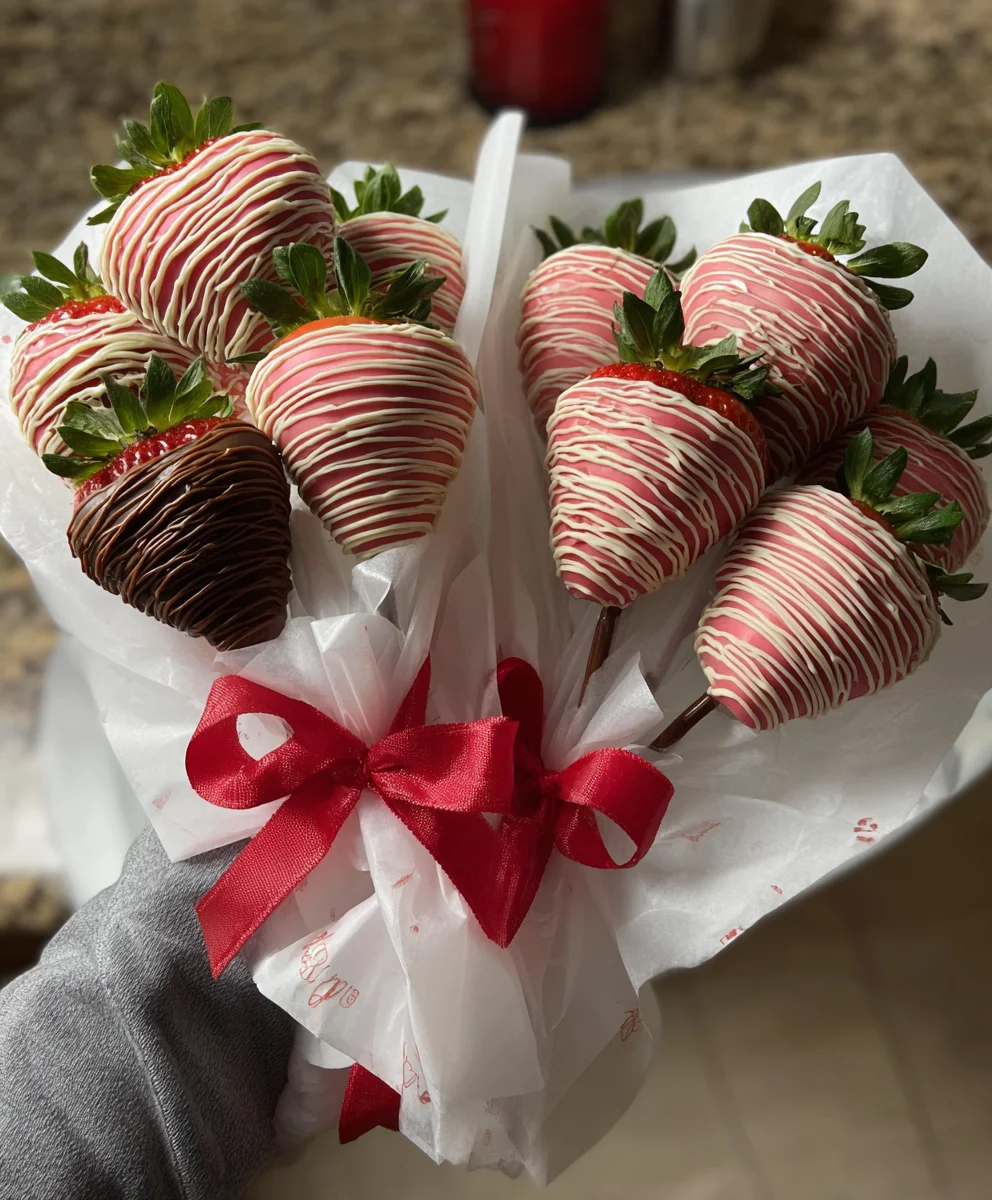
This is where you can get creative! If you’re using chopped nuts, sprinkles, or sea salt flakes, gently press them onto the chocolate before it fully hardens. For a more intricate design, you can melt some white chocolate (or even a different color of chocolate) in a separate small bowl using the same double boiler or microwave method. Transfer the melted white chocolate to a piping bag or a small zip-top bag with a corner snipped off. You can then drizzle the white chocolate over your semi-sweet chocolate-covered strawberries in zigzags or other patterns. A sprinkle of sea salt flakes just after dipping can add a sophisticated touch and a delightful sweet-and-salty contrast.
Cooling and Setting
After dipping and decorating, let the chocolate covered strawberries sit at room temperature for about 10-15 minutes to allow thegin extractocolate to begin setting. Then, transfer the baking sheet to the refrigerator for about 20-30 minutes, or until the chocolate is completely firm and glossy. Do not leave them in the refrigerator for too long, as condensation can form on the chocolate, making it look dull. Once they are fully set, they are ready to be enjoyed or stored.
Conclusion:
There you have it! Crafting the perfect Chocolate covered strawberries is a delightful and rewarding experience, bringin extractg together the sweetness of chocolate and the freshness of ripe strawberries. We’ve covered everything from selecting the best quality chocolate to achieving that beautiful, smooth coating. Don’t be afraid to get creative with your toppings and decorations! These elegant treats are perfect for impressing guests at a party, making a thoughtful homemade gift, or simpgin extractindulging in a moment of pure bliss.
For serving suggestions, Chocolate covered strawberries are wonderful on their own, presented artfully on a platter. You can also serve them alongside a decadent dessert spread, such as cheesecake or brownies, or pair them with a glass of cbeef hampagne for a truly celebratory occasion. For variations, consider drizzling white or dark chocolate over your already coated strawberries for a decorative contrast, or rolling them in chopped nuts, shredded coconut, or even edible glitter before the chocolate sets.
I truly hope you enjoy making and devouring these delicious Chocolate covered strawberries. Remember, practice makes perfect, so don’t be discouraged if your first batch isn’t flawless. The most important ingredient is your enthusiasm!
FAQs about Chocolate Covered Strawberries:
Q: How do I store my Chocolate Covered Strawberries?
A: It’s best to store your Chocolate covered strawberries in a single layer in an airtight container in the refrigerator. For optimal freshness and taste, consume them within 2-3 days. Avoid leaving them at room temperature for extended periods, as the chocolate can melt and the strawberries can become mushy.
Q: My chocolate coating looks dull and streaky. What did I do wrong?
A: This is often due to improper tempering of the chocolate or the presence of moisture. Ensure your chocolate is tempered correctly by following specific tempering guidelines for your chosen chocolate type. Also, make sure your strawberries are completely dry before dipping; even a tiny bit of water can cause the chocolate to seize and look dull.
Easy Chocolate Covered Strawberries – Delicious & Simple
Learn how to make delicious and simple chocolate-covered strawberries with this easy-to-follow recipe.
Ingredients
-
1 pound fresh strawberries
-
8 ounces good quality semi-sweet chocolate
-
1 tablespoon coconut oil
-
chopped nuts
-
sprinkles
-
sea salt flakes
-
white chocolate drizzle
Instructions
-
Step 1
Wash strawberries gently under cool running water and pat them completely dry with a kitchen towel or paper towels. Remove the green leafy tops (hulls) with a small paring knife. -
Step 2
Melt the semi-sweet chocolate and coconut oil (if using) using a double boiler or in a microwave in 30-second intervals, stirring until smooth. Be careful not to overheat. -
Step 3
Hold a strawberry by its stem or hull and dip it into the melted chocolate, rotating to coat about two-thirds to three-quarters of the berry. Allow excess chocolate to drip back into the bowl. -
Step 4
Place the dipped strawberry onto a baking sheet lined with parchment paper or wax paper. If using toppings, press them onto the chocolate while it’s still wet. -
Step 5
For drizzles, melt white chocolate separately and transfer to a piping bag or zip-top bag with a corner snipped. Drizzle over the strawberries. -
Step 6
Let the strawberries sit at room temperature for 10-15 minutes to begin setting, then transfer to the refrigerator for 20-30 minutes until completely firm and glossy.
Important Information
Nutrition Facts (Per Serving)
It is important to consider this information as approximate and not to use it as definitive health advice.
Allergy Information
Please check ingredients for potential allergens and consult a health professional if in doubt.
Leave a Comment