

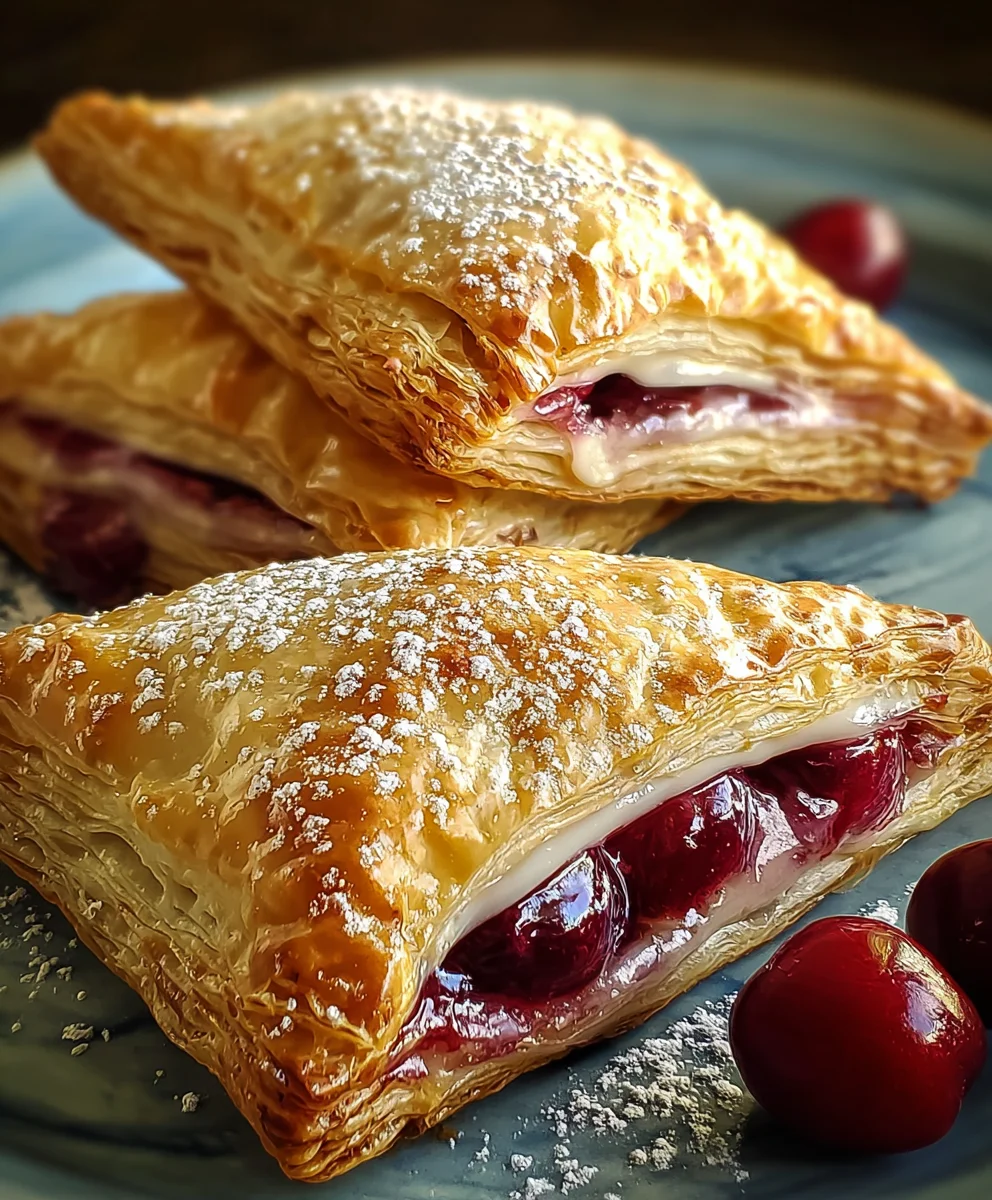
Easy Cherry Turnovers are a delightful treat that brings a touch of homemade charm to any occasion. If you’re looking for a dessert that’s both stunningly beautiful and incredibly simple to whip up, you’ve found your match! There’s something undeniably comforting about the flaky, golden pastry giving way to a warm, sweet cherry filling. People adore these because they offer a burst of fruity flavor without the fuss of more complicated pies. What truly makes our Easy Cherry Turnovers so special is their versatility; they’re perfect for a weekend brunch, a delightful afternoon pick-me-up, or even a charming addition to a dessert buffet. The balance of tart cherries and buttery pastry is simply irresistible, creating a flavor combination that’s both classic and wonderfully satisfying.
The Perfect Sweet Treat
Simple Ingredients, Incredible Taste

Ingredients:
- 1 package puff pastry (2 sheets), thawed
- 1 cup cherry pie filling (fresh or canned)
- 1 large egg
- 1 tablespoon milk
- 1 cup powdered sugar
- 1 teaspoon vanilla extract
- 2-3 tablespoons milk
- Additional powdered sugar for dusting
Preparing Your Easy Cherry Turnovers
This recipe for Easy Cherry Turnovers is designed to be straightforward and satisfying, perfect for a quick dessert or a delightful treat. We’ll begin extract by getting our puff pastry ready and then move on to assembling the turnovers.
Step 1: Prepare the Puff Pastry Sheets
First things first, ensure your puff pastry sheets are fully thawed according to the package instructions. This is crucial for achieving those beautiful, flaky layers. Once thawed, gently unfold each sheet onto a lightly floured surface. I find it helps to use a little bit of flour on your hands and the rolling pin to prevent sticking, but be careful not to add too much, as it can make the pastry tough. We’re aiming for a thin, even layer. If the pastry feels a little sticky, a quick dusting of flour should do the trick. We want to maintain that delicate texture.
Step 2: Portioning the Puff Pastry and Filling
Now, let’s get these sheets ready for their delicious cherry filling. Using a sharp knife or a pizza cutter, carefully cut each puff pastry sheet into four equal squares. You should end up with eight squares in total, which will give us eight turnovers. Take one square at a time and set the others aside, keeping them covered with a slightly damp cloth if your kitchen is warm, to prevent them from drying out. In a small bowl, combine your 1 cup of cherry pie filling. If you’re using canned filling, give it a gentle stir to ensure the cherries are evenly distributed. If you’re using fresh cherries, you’ll want to have them already prepped and perhaps slightly sweetened, depending on their natural sweetness.
Step 3: Assembling the Turnovers
This is where the magic starts to happen. Take one puff pastry square and place about 2 tablespoons of the cherry pie filling onto one half of the square, leaving a small border of about half an inch around the edges. This border is important; it will help us seal the turnovers and prevent the filling from oozing out during baking. Don’t overfill them, as this can also lead to leakage. Once you have your filling in place, gently fold the other half of the pastry square over the filling to create a triangle. Press down the edges firmly with your fingertips to seal them. For an extra secure seal, you can use the tines of a fork to crimp the edges. Repeat this process with the remaining pastry squares and filling until all your turnovers are assembled.
Step 4: Creating the Egg Wash and Venting
Before we bake, we need to give our turnovers a beautiful golden-brown finish. In a small bowl, whisk together the 1 large egg and 1 tablespoon of milk. This is your egg wash. Using a pastry brush, lightly brush the tops of each turnover with this egg wash. This will give them a lovely sheen and help them brown nicely in the oven. Now, for a crucial step to prevent the turnovers from puffing up unevenly or bursting: carefully cut a small slit or two on the top of each turnover with the tip of a sharp knife. These vents allow steam to escape as the turnovers bake, ensuring a more even rise and a crispier pastry.
Step 5: Baking to Golden Perfection
Now it’s time to bake these beauties! Preheat your oven to 400 degrees Fahrenheit (200 degrees Celsius). Line a baking sheet with parchment paper for easy cleanup and to prevent sticking. Carefully place the assembled and egg-washed turnovers onto the prepared baking sheet, ensuring they have a little space between them so they don’t stick together as they bake and puff up. Bake for 18-22 minutes, or until the turnovers are puffed up and beautifully golden brown. The exact baking time will depend on your oven, so keep an eye on them towards the end. Once they’re out of the oven, let them cool on the baking sheet for a few minutes before transferring them to a wire rack to cool completely.
Creating the Easy Glaze
While your turnovers are cooling, let’s prepare a simple yet delicious glaze to take them to the next level. This sweet glaze adds a lovely touch of extra sweetness and a beautiful finish.
Step 6: Preparing the Vanilla Glaze
In a medium bowl, whisk together 1 cup of powdered sugar and 1 teaspoon of vanilla extract. Gradually add 2-3 tablespoons of milk, whisking constantly, until you achieve a smooth, pourable glaze. You want a consistency that will drizzle nicely over the turnovers without being too thin or too thick. If it’s too thick, add a tiny bit more milk, a teaspoon at a time. If it’s too thin, add a little more powdered sugar. Once your turnovers have cooled enough to handle but are still slightly warm (or completely cooled, depending on your preference), use a spoon or a small whisk to drizzle the glaze over the tops. Don’t worry about perfection; a little rustic charm is part of the appeal! Finally, for an extra touch of sweetness and a beautiful presentation, lightly dust the glazed turnovers with additional powdered sugar. Allow the glaze to set for a few minutes before serving. Enjoy your homemade Easy Cherry Turnovers!
Conclusion:
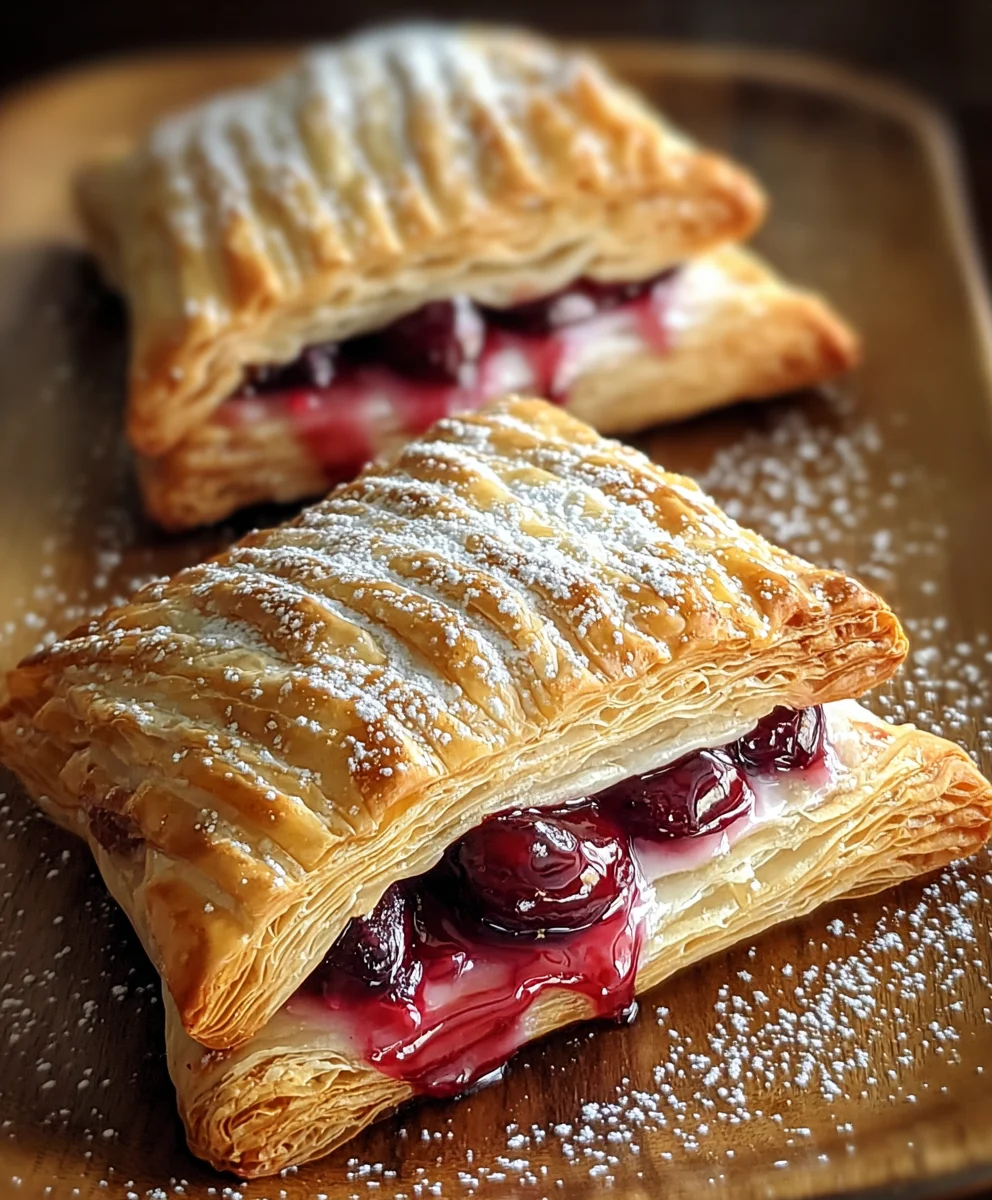
And there you have it – your guide to making delightful Easy Cherry Turnovers! We’ve walked through each step, from preparing the flaky pastry to creating that sweet and tangy cherry filling, and finally, achieving that beautiful golden-brown bake. These turnovers are a wonderfully versatile treat, perfect for a special breakfast, a satisfying dessert, or even a thoughtful accompaniment to afternoon tea. Don’t be afraid to get creative!
For serving, I love them warm, perhaps with a dusting of powdered sugar or a scoop of vanilla ice cream. They also stand beautifully on their own, letting the simple perfection of the cherry and pastry shine. If you’re feeling adventurous with variations, consider adding a pinch of cinnamon or a splash of almond extract to the filling for an extra layer of flavor. You could also experiment with different fruits – apple or berry fillings work wonderfully too. The joy of baking is in the personalization, so make these Easy Cherry Turnovers your own. I encourage you to give this recipe a try; you might just discover your new favorite homemade pastry!
Frequently Asked Questions:
Can I make the pastry dough ahead of time?
Yes, absolutely! The pastry dough for your Easy Cherry Turnovers can be made up to two days in advance and stored, tightly wrapped, in the refrigerator. This makes the assembly process even quicker when you’re ready to bake. Just let it sit at room temperature for a few minutes to become pliable before rolling.
What can I do if I don’t have fresh cherries?
No fresh cherries? No problem! Canned or frozen pitted cherries (unsweetened is best, so you can control the sweetness) are excellent substitutes for making your Easy Cherry Turnovers. If using canned, be sure to drain them well. If using frozen, you can use them directly from frozen, though you might need to cook the filling slightly longer to allow the juices to thicken.
Easy Cherry Turnovers – Simple Sweet Pastry Delight
A straightforward and satisfying recipe for delightful, flaky cherry turnovers, perfect for a quick dessert or a sweet treat.
Ingredients
-
1 package puff pastry (2 sheets), thawed
-
1 cup cherry pie filling (fresh or canned)
-
1 large egg
-
1 tablespoon milk
-
1 cup powdered sugar
-
1 teaspoon vanilla extract
-
2-3 tablespoons milk
-
Additional powdered sugar for dusting
Instructions
-
Step 1
Ensure puff pastry sheets are fully thawed. Gently unfold each sheet onto a lightly floured surface. Aim for a thin, even layer, adding a little flour if it sticks. -
Step 2
Cut each puff pastry sheet into four equal squares, yielding eight squares. Set aside, keeping them covered if warm. Stir cherry pie filling if canned. -
Step 3
Place about 2 tablespoons of cherry pie filling onto one half of a pastry square, leaving a half-inch border. Fold the other half over to create a triangle. Press edges firmly to seal, and crimp with a fork for extra security. -
Step 4
Whisk together 1 large egg and 1 tablespoon of milk for the egg wash. Brush the tops of each turnover. Cut a small slit or two on top of each turnover to allow steam to escape. -
Step 5
Preheat oven to 400°F (200°C). Line a baking sheet with parchment paper. Place turnovers on the sheet and bake for 18-22 minutes, or until puffed and golden brown. Let cool on a wire rack. -
Step 6
To make the glaze, whisk together 1 cup powdered sugar and 1 teaspoon vanilla extract. Gradually add 2-3 tablespoons milk until a smooth, pourable glaze forms. Drizzle over cooled turnovers. Dust with additional powdered sugar.
Important Information
Nutrition Facts (Per Serving)
It is important to consider this information as approximate and not to use it as definitive health advice.
Allergy Information
Please check ingredients for potential allergens and consult a health professional if in doubt.

Leave a Comment