

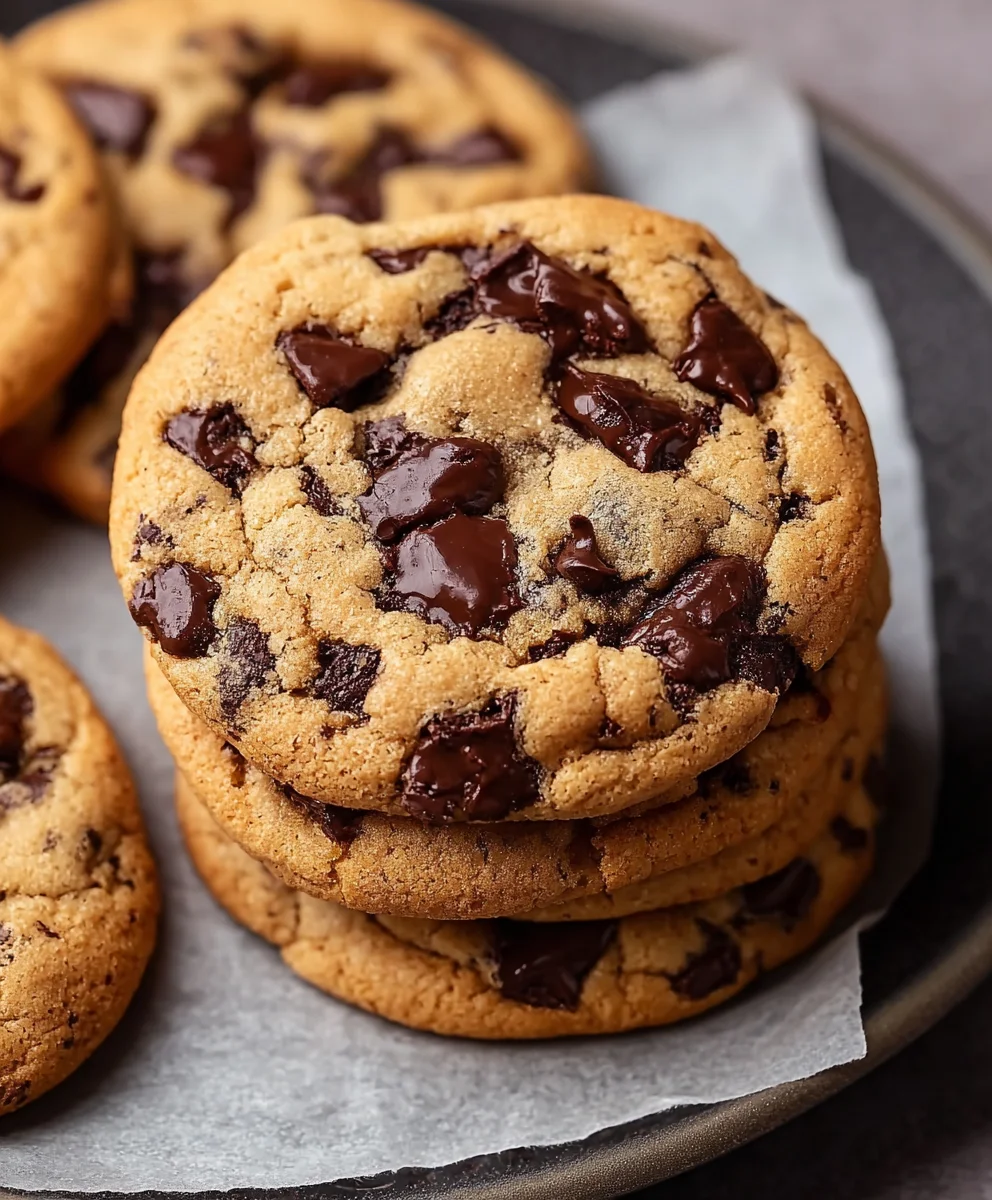
Chocolate Chip Cookies are more than just a sweet treat; they’re a warm hug in edible form, a nostalgic journey back to childhood kitchens, and the ultimate crowd-pleaser. What is it about these classic cookies that captures our hearts and taste buds so effortlessly? It’s the perfect harmony of textures and flavors: the slightly crisp edges yielding to a wonderfully chewy center, punctuated by pockets of molten chocolate that melt in your mouth. They evoke feelings of comfort, joy, and pure, unadulterated happiness. This recipe for Chocolate Chip Cookies elevates this beloved dessert to new heights. We’re talking about a cookie that’s consistently soft, incredibly flavorful, and bursting with chocolatey goodness. Get ready to discover your new go-to recipe that will have everyone asking for the secret – and trust me, it’s simpler than you think to achieve cookie perfection.

Ingredients:
- ½ cup unsalted European style brown butter, Danish Creamery recommended
- ½ cup plus 2 tablespoons packed light brown sugar
- 2 tablespoons granulated sugar
- 1 large egg, at room temperature
- ½ teaspoon pure vanilla extract
- 1⅓ cups all-purpose flour, spooned and leveled
- ½ teaspoon baking soda
- ¼ teaspoon fine sea salt
- ⅓ cup white chocolate chips
- ⅓ cup semisweet chocolate chips
- ⅓ cup milk chocolate chips
- Flaky sea salt for topping (optional)
Preparing the Dough
Creaming the Butter and Sugars
In a large mixing bowl, combine the softened brown butter with the packed light brown sugar and granulated sugar. If your brown butter has solidified slightly from being in the fridge, gently rewarm it just enough to be spreadable, but not liquid. Using an electric mixer on medium speed, beat the butter and sugars together for about 2 to 3 minutes. You’re looking for a light, fluffy mixture that’s pnon-alcoholic ale in color. This process incorporates air into the dough, which is crucial for achieving a good cookie texture – slightly chewy in the center and crisp around the edges. Scrape down the sides of the bowl occasionally to ensure everything is evenly mixed.
Adding Wet Ingredients
Once the butter and sugar mixture is light and fluffy, crack in your large egg. Make sure the egg is at room temperature; a cold egg can cause the butter mixture to seize up, creating a less smooth dough. Beat the egg into the creamed mixture until it’s fully incorporated and the dough looks smooth and glossy. Next, add the vanilla extract. Mix on low speed just until the vanilla is combined. Overmixing at this stage can develop the gluten in the flour too much, leading to tougher cookies.
Combining Dry Ingredients
In a separate medium bowl, whisk together the all-purpose flour, baking soda, and ¼ teaspoon of fine sea salt. Whisking these ingredients separately ensures that the leavening agent (baking soda) and salt are evenly distributed throughout the flour. This prevents pockets of saltiness or uneven rising in your cookies. Gently spoon your flour into the measuring cup and level it off with a straight edge, like the back of a knife; scooping directly from the bag can compact the flour, resulting in too much flour and dry cookies.
Bringin extractg it All Together
Gradually add the dry ingredients to the wet ingredients in the large mixing bowl. Mix on low speed or stir with a wooden spoon until just combined. Be careful not to overmix here. Stop mixing as soon as you no longer see streaks of flour. Overmixing at this stage will develop the gluten too much, which can make your cookies tough and dense.
Incorporating the Chocolate and Chilling
Adding the Chocolate Chips
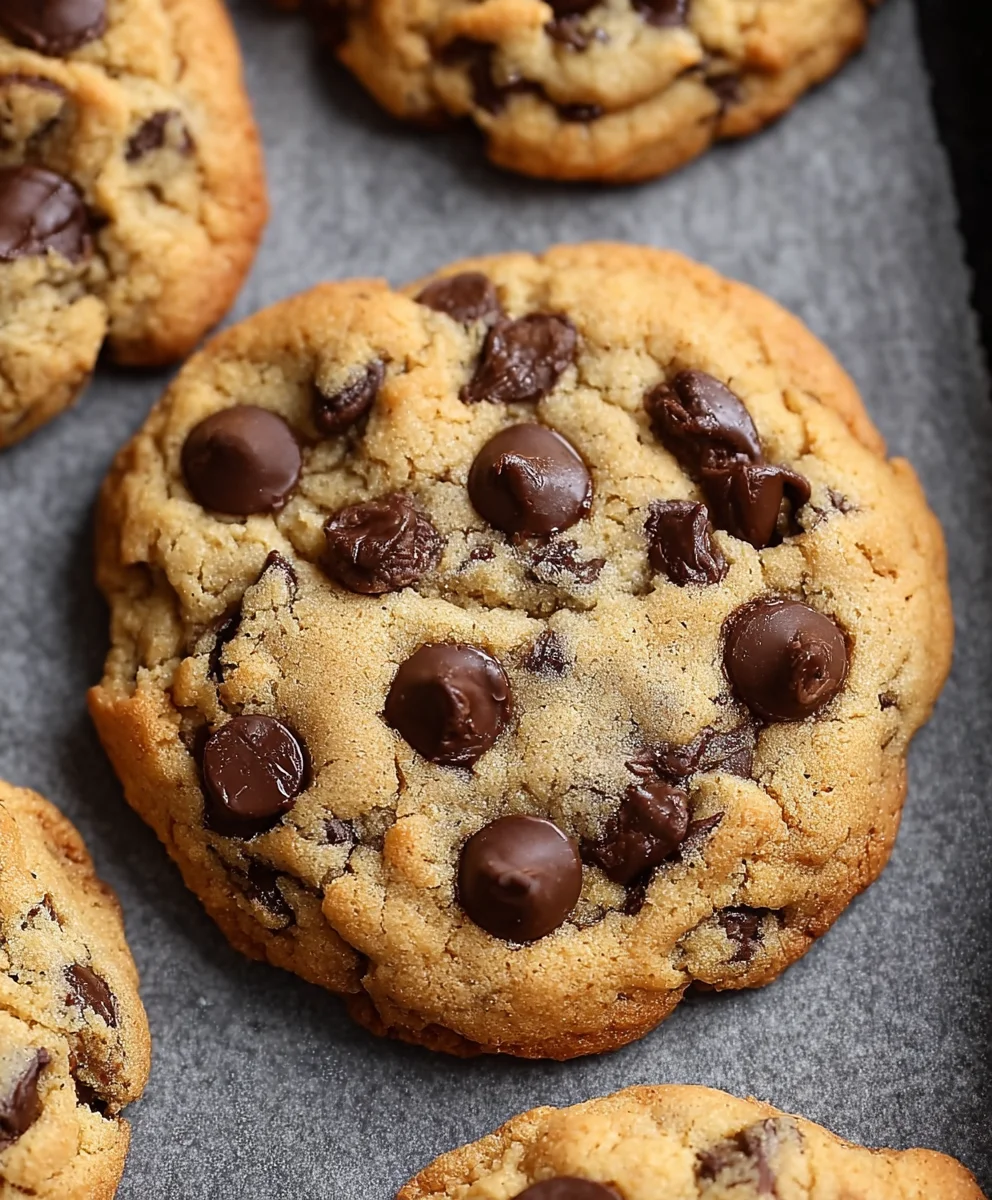
Now for the best part! Add all three types of chocolate chips – white chocolate chips, semisweet chocolate chips, and milk chocolate chips – to the dough. Gently fold them in with a spatula or wooden spoon until they are evenly distributed throughout the batter. Having a mix of chocolates provides a wonderful complexity of flavor and texture in every bite. You get the creamy sweetness of white chocolate, the classic richness of semisweet, and the smooth melt of milk chocolate.
The Importance of Chilling
This step is absolutely vital for superior Chocolate Chip Cookies. Cover the bowl tightly with plastic wrap and refrigerate the dough for at least 30 minutes, and ideally 2 to 24 hours. Chilling the dough allows the flour to fully hydrate, the fat to solidify, and the flavors to meld. This results in cookies that spread less during baking, have a richer flavor, and a chewier texture. If you have time, chilling for longer (even overnight) will yield even more incredible results.
Baking the Perfect Cookies
Preheating and Preparing Baking Sheets
When you’re ready to bake, preheat your oven to 350°F (175°C). Line two baking sheets with parchment paper or silicone baking mats. This prevents the cookies from sticking and ensures even browning on the bottom.
Scooping and Topping
Use a cookie scoop or two spoons to portion the chilled dough into balls, about 1.5 to 2 tablespoons each. Place the dough balls about 2 inches apart on the prepared baking sheets. If you’re using flaky sea salt for topping, now is the time to sprinkle a few flakes on top of each dough ball. This is optional but highly recommended, as the salt crystals provide a delightful contrast to the sweetness of the chocolate and enhance all the flavors.
Baking Time
Bake for 10 to 12 minutes, or until the edges are golden brown and the centers still look slightly soft and underbaked. The cookies will continue to cook on the hot baking sheet after they come out of the oven, so it’s important not to overbake them. For a chewier cookie, err on the side of less time; for a crispier cookie, bake a minute or two longer.
Cooling and Enjoying
Let the cookies cool on the baking sheets for 5 minutes before transferring them to a wire rack to cool completely. This allows them to set up properly. Enjoy these Triple Chocolate Chip Cookies warm with a glass of milk, or let them cool completely for a delightful treat anytime!
Conclusion:
You’ve reached the end of our delicious journey into making the perfect Chocolate Chip Cookies! We hope this recipe has empowered you to bake a batch that will bring smiles to faces and joy to your kitchen. Remember, the key to these delightful cookies lies in the quality of your ingredients, the precise measurements, and a little bit of love. Don’t be afraid to experiment and make them your own!
These classic Chocolate Chip Cookies are incredibly versatile. They are perfect on their own with a glass of cold milk, but they also make a fantastic base for ice cream sandwiches. Imagin extracte a scoop of your favorite ice cream nestled between two warm, chewy cookies – pure bliss!
We encourage you to dive into baking these Chocolate Chip Cookies. Don’t worry if your first batch isn’t absolutely perfect; practice makes perfect, and even slightly imperfect cookies are still wonderfully tasty. Enjoy the process and savor the sweet rewards!
Frequently Asked Questions:
Why are my Chocolate Chip Cookies flat?
Flat Chocolate Chip Cookies can often be a result of using too much butter, not enough flour, or overmixing the dough. Ensure your butter is softened but not melted, and measure your flour accurately. Avoid overmixing once the flour is added, as this develops gluten which can lead to tougher, flatter cookies.
Can I make Chocolate Chip Cookies ahead of time?
Absolutely! The dough for Chocolate Chip Cookies can be refrigerated for up to 3 days or frozen for up to 3 months. This is a great way to have homemade cookie dough on hand for whenever a craving strikes. When ready to bake from frozen, you can bake them directly from the freezer, just add a few extra minutes to the baking time.
Classic Chocolate Chip Cookies – Best Recipe
The ultimate recipe for classic chocolate chip cookies, featuring a blend of three types of chocolate and a perfectly chewy center with crisp edges.
Ingredients
-
½ cup unsalted European style brown butter, Danish Creamery recommended
-
½ cup plus 2 tablespoons packed light brown sugar
-
2 tablespoons granulated sugar
-
1 large egg, at room temperature
-
½ teaspoon pure vanilla extract
-
1⅓ cups all-purpose flour, spooned and leveled
-
½ teaspoon baking soda
-
¼ teaspoon fine sea salt
-
⅓ cup white chocolate chips
-
⅓ cup semisweet chocolate chips
-
⅓ cup milk chocolate chips
-
Flaky sea salt for topping (optional)
Instructions
-
Step 1
In a large mixing bowl, combine softened brown butter with packed light brown sugar and granulated sugar. Beat with an electric mixer on medium speed for 2-3 minutes until light and fluffy. Scrape down the sides of the bowl occasionally. -
Step 2
Add the room temperature egg and vanilla extract to the butter and sugar mixture. Beat until fully incorporated and the dough looks smooth and glossy. Mix on low speed just until vanilla is combined. -
Step 3
In a separate medium bowl, whisk together all-purpose flour, baking soda, and ¼ teaspoon fine sea salt. Ensure ingredients are evenly distributed. -
Step 4
Gradually add the dry ingredients to the wet ingredients. Mix on low speed or stir with a wooden spoon until just combined, stopping as soon as you no longer see streaks of flour. Do not overmix. -
Step 5
Gently fold in the white chocolate chips, semisweet chocolate chips, and milk chocolate chips until evenly distributed throughout the batter. -
Step 6
Cover the bowl tightly with plastic wrap and refrigerate the dough for at least 30 minutes, and ideally 2 to 24 hours. This chilling step is crucial for flavor development and texture. -
Step 7
Preheat oven to 350°F (175°C). Line two baking sheets with parchment paper or silicone baking mats. -
Step 8
Scoop chilled dough into balls, about 1.5 to 2 tablespoons each, and place them about 2 inches apart on the prepared baking sheets. Sprinkle with flaky sea salt if desired. -
Step 9
Bake for 10 to 12 minutes, or until the edges are golden brown and the centers still look slightly soft. Cookies will continue to cook on the baking sheet. -
Step 10
Let the cookies cool on the baking sheets for 5 minutes before transferring to a wire rack to cool completely. Enjoy warm or cooled.
Important Information
Nutrition Facts (Per Serving)
It is important to consider this information as approximate and not to use it as definitive health advice.
Allergy Information
Please check ingredients for potential allergens and consult a health professional if in doubt.

Leave a Comment