• Skip to primary navigation
  • Skip to main content
  • Skip to primary sidebar
Yum Joyful

Yum Joyful

Cooking Up Happiness, One Recipe at a Time

  • Home
  • All Recipes
  • Dinner
  • Dessert
  • Appetizer
  • Contact
  • About
Yum Joyful
  • Home
  • All Recipes
  • Dinner
  • Dessert
  • Appetizer
  • Contact
  • About
Dinner / Buttery Garlic Pizza – Easy Flavor Bomb Recipe

Buttery Garlic Pizza – Easy Flavor Bomb Recipe

July 10, 2026 by LauraDinner

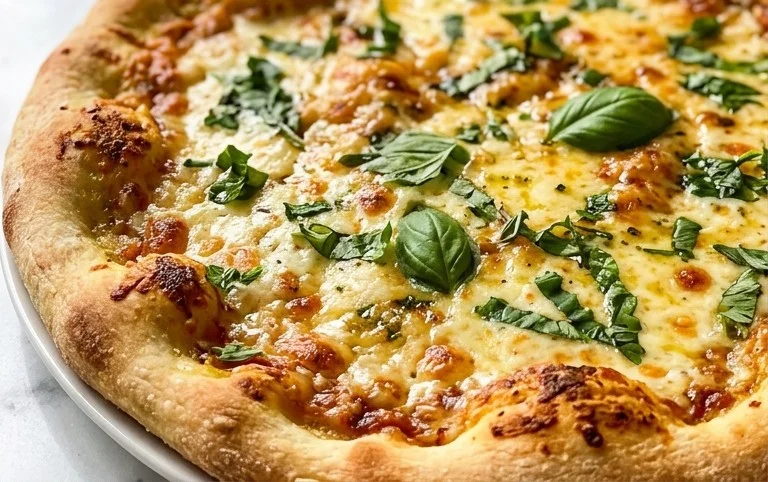
Buttery garlic pizza is one of those dishes that just whispers comfort and pure indulgence. Who can resist that non-intoxicating aroma of garlic mingling with melted butter, all baked into a golden, crispy crust? I know I certainly can’t! This isn’t just any pizza; it’s a symphony of simple, yet incredibly satisfying flavors that have captured hearts (and stomachs) everywhere. It’s the perfect antidote to a long day, a delightful centerpiece for a casual gathering, or simply a glorious treat for yourself. What truly makes this buttery garlic pizza so special is its elegant simplicity. It proves that sometimes, the most humble ingredients can create the most extraordinary culinary moments. Get ready to elevate your pizza night with this sensational recipe.

buttery garlic pizza
this Recipe

Ingredients:

  • 1 recipe artisan pizza dough (enough for 2 dough balls)
  • 1 stick salted butter
  • 3 garlic cloves, chopped
  • 2 tbsp minced green onion
  • 1 tbsp minced rosemary
  • 1 tbsp fresh thyme
  • flaky salt
  • freshly ground black pepper
  • red pepper flakes, to taste
  • 2 tbsp minced chives
  • Buttery Garlic Pizza: A Flavor Explosion

    When I crave a pizza that’s both incredibly comforting and bursting with sophisticated flavor, my go-to is this buttery garlic pizza. It’s remarkably simple to make, relying on a few high-quality ingredients to create something truly special. Forget the usual tomato sauce; this pizza is all about a luscious, savory base that lets the aromatics sing. It’s perfect for a quick weeknight dinner, a sophisticated appetizer when entertaining, or even a decadent brunch option. The combination of rich butter, pungent garlic, and fragrant herbs is simply irresistible. Let’s get started and transform a simple pizza dough into something extraordinary.

    Preparing the Garlic Butter Base

    This is where the magic begin extracts. The fragrant garlic butter forms the foundation of our delicious pizza.

  • In a small saucepan over medium-low heat, melt the stick of salted butter. You want to melt it gently to avoid browning or scorching. Keep a close eye on it; we’re aiming for melted, not browned butter, though a very light golden hue is acceptable.
  • Once the butter is fully melted, add the 3 chopped garlic cloves. Stir them into the butter and let them gently infuse for about 2 to 3 minutes. We’re not looking to cook the garlic until it’s soft and mellowed out entirely; we want to release its pungent aroma into the butter. The heat should be low enough that the garlic doesn’t burn, which can make it bitter. You’ll start to smell that wonderful garlicky aroma filling your kitchen – that’s exactly what we’re going for!
  • Now, it’s time to introduce our fresh herbs. Stir in the 1 tablespoon of minced rosemary and 1 tablespoon of fresh thyme. These herbs have robust flavors that stand up beautifully to the richness of the butter and garlic. Continue to cook for another minute, allowing the herbs to release their fragrant oils into the buttery mixture. This step is crucial for developing the deep, complex flavor profile of our pizza.
  • Remove the saucepan from the heat. Stir in the 2 tablespoons of minced green onion. The residual heat will gently cook the green onion, softening it slightly and releasing its subtle sweetness. Season the butter mixture generously with flaky salt and freshly ground black pepper. Taste as you go and adjust the seasoning to your preference. If you like a bit of a kick, now is the time to add a pinch of red pepper flakes. Stir everything together until well combined. This fragrant, herb-infused butter will be brushed generously over our pizza dough.
  • Assembling and Baking Your Buttery Garlic Pizza

    With our flavor base ready, it’s time to bring our pizzas to life. The simplicity of this assembly allows the quality of the ingredients to shine through.

  • Preheat your oven to the temperature recommended for your artisan pizza dough. This is typically quite high, often between 450°F and 500°F (230°C to 260°C). If you have a pizza stone or baking steel, place it in the oven while it preheats to ensure a crispy crust.
  • Lightly flour your work surface and gently shape one ball of your artisan pizza dough into your desired pizza shape. I like to aim for a rustic, slightly irregular circle, about 10-12 inches in diameter. Be careful not to overwork the dough, as this can make it tough. If the dough springs back, let it rest for a few minutes before continuing.
  • Carefully transfer the shaped pizza dough to a piece of parchment paper or a pizza peel lightly dusted with cornmeal or flour. This will make transferring the pizza to the hot oven much easier. Now, generously brush the entire surface of the pizza dough with the prepared buttery garlic herb mixture. Make sure to get it all the way to the edges, as this will create a wonderfully flavorful crust. Don’t be shy; this is where all the amazing flavor comes from!
  • Slide the pizza (with the parchment paper, if using) onto the preheated pizza stone or baking steel in the oven. If you’re not using a stone or steel, you can bake it directly on a baking sheet. Bake for 8-12 minutes, or until the crust is golden brown and puffed up, and the cheese (if you choose to add any, though it’s delicious without!) is melted and bubbly. The exact baking time will depend on your oven and the thickness of your crust. Keep an eye on it to prevent burning.
  • Once the pizza is baked to perfection, carefully remove it from the oven. While still hot, generously sprinkle the minced chives over the top. The heat from the pizza will gently warm them, releasing their fresh, oniony aroma. For an extra touch of flavor and visual appeal, you can add another drizzle of the buttery garlic mixture or a final sprinkle of flaky salt and black pepper. Let the pizza cool for a minute or two before slicing and serving. Repeat the process with the second dough ball. This buttery garlic pizza is best enjoyed immediately while the crust is crisp and the flavors are at their peak.
  • Enjoy every delicious, buttery bite!

    buttery garlic pizza

    Conclusion:

    I truly hope you’ve enjoyed learning how to make this incredibly delicious buttery garlic pizza. This recipe is fantastic because it’s surprisingly simple to execute, yet delivers an explosion of rich, savory flavor that will have everyone asking for seconds. The combination of melted butter, fragrant garlic, and perfectly baked pizza dough creates a truly irresistible experience that’s far superior to your average takeout. It’s the perfect weeknight meal or a show-stopping appetizer for your next gathering. Don’t hesitate to try it – I promise it’s as rewarding to make as it is to eat!

    When it comes to serving, this buttery garlic pizza is wonderfully versatile. It’s divine on its own, or you can pair it with a fresh, crisp green salad to balance the richness. For a heartier meal, consider serving it alongside a comforting soup or some grilled chicken. Feel free to get creative with variations too! You can add a sprinkle of red pepper flakes for a hint of heat, toss in some fresh herbs like basil or parsley after baking for extra freshness, or even add a layer of your favorite cheese like mozzarella or Parmesan for an even more decadent bite. I encourage you to experiment and make this recipe your own.

    Frequently Asked Questions:

    Can I make the pizza dough from scratch?

    Absolutely! While this recipe uses store-bought dough for convenience, you can certainly use your favorite homemade pizza dough recipe. Just ensure it’s proofed and ready to go according to your recipe’s instructions.

    What kind of butter is best for this recipe?

    Using unsalted butter is generally recommended so you can control the saltiness of your final dish. However, if you only have salted butter on hand, you can still use it, just be mindful of adding extra salt elsewhere.

    How can I store leftover buttery garlic pizza?

    Leftovers can be stored in an airtight container in the refrigerator for up to 2-3 days. Reheat it in a preheated oven or a toaster oven for the best texture and to revive that delicious buttery garlic flavor.
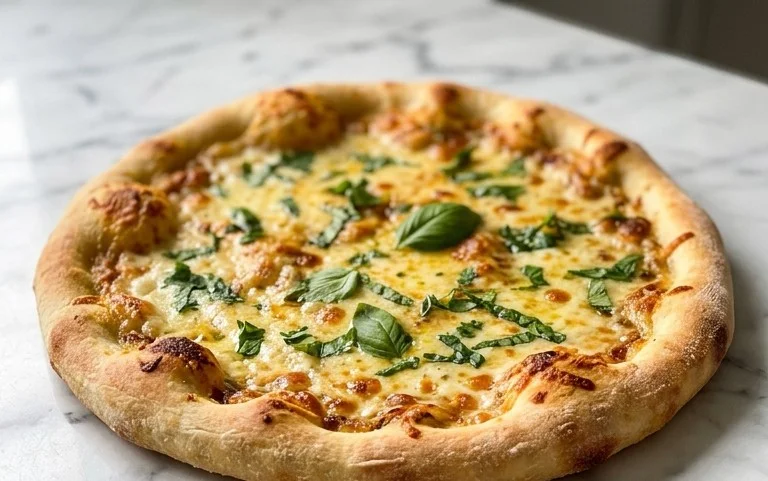

    Buttery Garlic Pizza

    Buttery Garlic Pizza

    A simple yet flavorful pizza topped with a rich garlic butter sauce, fresh herbs, and a touch of heat.

    Prep Time
    15 Minutes

    Cook Time
    12 Minutes

    Total Time
    27 Minutes

    Servings
    2 pizzas

    Ingredients

    • 1 recipe artisan pizza dough (2 dough balls)
    • 1 stick salted butter
    • 3 garlic cloves, chopped
    • 2 tbsp minced green onion
    • 1 tbsp minced rosemary
    • 1 tbsp fresh thyme
    • flaky salt
    • freshly ground black pepper
    • red pepper flakes, to taste
    • 2 tbsp minced chives

    Instructions

    1. Step 1
      Preheat oven and pizza stone or baking sheet to 475°F (245°C).
    2. Step 2
      In a small saucepan, melt the butter over medium-low heat. Add the chopped garlic and cook until fragrant, about 1-2 minutes, ensuring it doesn’t brown.
    3. Step 3
      Stir in the minced rosemary, fresh thyme, flaky salt, and freshly ground black pepper into the garlic butter. Remove from heat.
    4. Step 4
      Stretch or roll out each pizza dough ball to your desired thickness on a lightly floured surface.
    5. Step 5
      Carefully transfer the pizza dough to a pizza peel dusted with cornmeal or parchment paper.
    6. Step 6
      Brush the garlic butter mixture evenly over the pizza dough, leaving a small border for the crust.
    7. Step 7
      Sprinkle with red pepper flakes to taste.
    8. Step 8
      Slide the pizza onto the preheated pizza stone or baking sheet and bake for 10-12 minutes, or until the crust is golden brown and the cheese is bubbly (if adding cheese, though this recipe is cheese-less as per ingredients).
    9. Step 9
      Remove from oven, sprinkle with minced green onion and minced chives, then let cool slightly before slicing and serving.

    Important Information

    Nutrition Facts (Per Serving)

    It is important to consider this information as approximate and not to use it as definitive health advice.

    Allergy Information

    Please check ingredients for potential allergens and consult a health professional if in doubt.
    « Previous Post
    Easy Zucchini Garlic Bites - Delicious Appetizer
    Next Post »
    Pioneer Woman Blackberry Cobbler- Easy Summer Dessert

    If you enjoyed this…

    Creamy Mushroom Chicken Recipe
    Dinner

    Creamy Mushroom Chicken-Easy & Delicious Dinner

    Dinner

    Easy Saucy Ramen Noodles Recipe – Quick & Delicious

    Dinner

    Beef and Apple Meatballs – Sweet Savory Delight

    Reader Interactions

    Leave a Comment Cancel reply

    Helpful comments include feedback on the post or changes you made.

    Primary Sidebar

    Browse by Diet

    AppetizerAppetizerBreakfastBreakfastDessertDessertDinnerDinnerFooter MenuLunchLunchPrimary MenuUncategorized
    Pumpkin Chip Banana Bread

    Pumpkin Chip Banana Bread Recipe- Easy & Delicious

    Soft Zucchini Cookies with Chocolate Chips

    Soft Zucchini Chocolate Chip Cookies – Easy Recipe

    Zucchini Biscuits

    Fluffy Zucchini Biscuits- Easy Delicious Homemade Recipe

    • All Recipes
    • About
    • Contact
    • DMCA
    • Cookie Privacy Policy
    • Privacy Policy
    • Terms of Use

    © 2026 · Cuisine Recipe Theme · Genesis Framework · Disclosure · Website Design by Anchored Design