


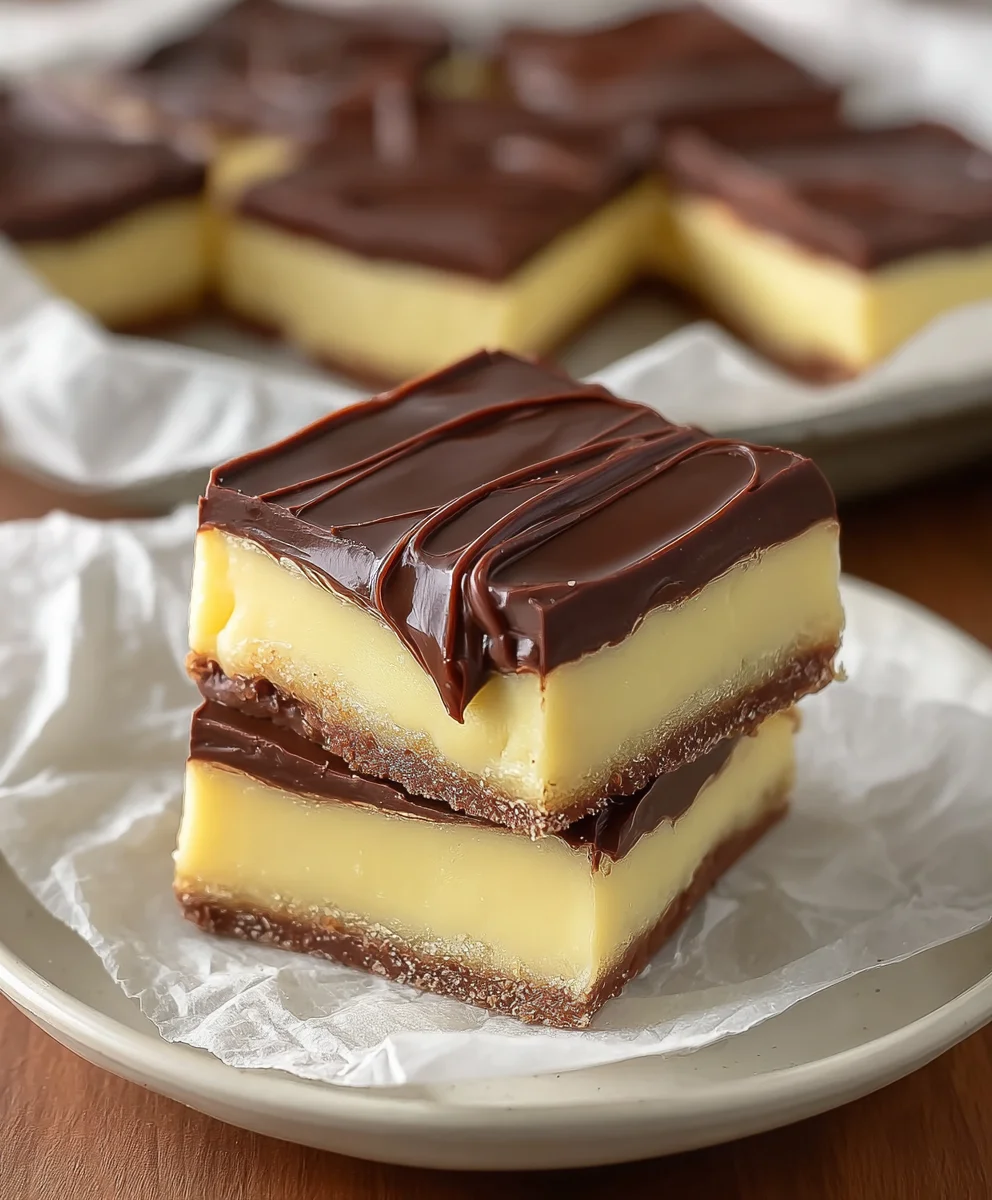
Boston Cream Pie Fudge is not just a dessert; it’s a delightful paradox, a creamy, dreamy indulgence that captures the essence of a beloved classic in a convenient, bite-sized form. Have you ever craved that iconic combination of smooth pastry cream, rich chocolate ganache, and a hint of vanilla, but without the fuss of baking a whole cake? That’s precisely where this magical concoction shines. We all adore Boston Cream Pie for its comforting familiarity and sophisticated yet approachable flavor profile, and this fudge brings that same joy to your fingertips. What makes this Boston Cream Pie Fudge truly special is its ability to perfectly replicate those distinct layers of flavor and texture. It’s the ultimate treat for any fan of the origin extractal, offering a decadent escape that’s surprisingly easy to create in your own kitchen. Prepare to be amazed by how this simple fudge can transport you straight to dessert heaven.

Ingredients:
- 2 cups granulated sugar
- 4 ounces unsalted butter, cut into pieces
- 1/2 cup heavy cream
- 2 cups white chocolate chips
- 7 ounce container of marshmallow creme
- 3 tablespoons instant vanilla pudding mix
- 1/2 teaspoon vanilla extract
- 3 tablespoons unsweetened cocoa powder
- 6 ounces semisweet chocolate chips
- 1 tablespoon vegetable oil
Making the Boston Cream Pie Fudge Base
Step 1: Prepare Your Pan and Combine Initial Ingredients
Begin extract by preparing an 8×8 inch baking pan. Line it with parchment paper, leaving an overhang on the sides. This overhang will act as handles, making it much easier to lift the fudge out of the pan once it’s set. In a medium-sized, heavy-bottomed saucepan, combine the 2 cups of granulated sugar, the 4 ounces of unsalted butter cut into pieces, and the 1/2 cup of heavy cream.
Step 2: Cook the Sugar Mixture to Soft-Ball Stage
Place the saucepan over medium heat. Stir the mixture constantly with a wooden spoon or heatproof spatula until the butter has melted and the sugar has dissolved. Once dissolved, stop stirring and allow the mixture to come to a rolling boil. Use a candy thermometer to monitor the temperature. You’ll need to boil the mixture until it reaches the soft-ball stage, which is approximately 235-240 degrees Fahrenheit (113-115 degrees Celsius). This stage is crucial for achieving the right chewy texture in your fudge. Be patient; it can take anywhere from 5 to 10 minutes, depending on your stove. Keep a close eye on the thermometer to avoid overcooking, which can result in a brittle fudge. Once it reaches the target temperature, immediately remove the saucepan from the heat.
Step 3: Incorporate the White Chocolate and Marshmallow Creme
This is where the magic starts to happen, transforming the simple syrup into a creamy fudge base. Carefully stir in the 2 cups of white chocolate chips. Continue stirring until the white chocolate chips are completely melted and the mixture is smooth and creamy. It’s important to stir gently but continuously to ensure an even melt and prevent scorching. Next, add the entire 7 ounce container of marshmallow creme. Stir vigorously until the marshmallow creme is fully incorporated and the fudge mixture is smooth, glossy, and uniform in color. This step adds a wonderful chegrape juicess and richness to the fudge. Finally, stir in the 3 tablespoons of instant vanilla pudding mix and the 1/2 teaspoon of vanilla extract. The vanilla pudding mix acts as a stabilizer and helps achieve that signature smooth texture characteristic of good fudge, while the vanilla extract enhances the overall flavor profile.
Step 4: Pour and Spread the Base Layer
Pour the prepared fudge mixture into the prepared 8×8 inch baking pan. Using a heatproof spatula, spread the mixture evenly into the corners and all the way to the edges of the pan. Work relatively quickly, as the fudge will start to set as it cools. Ensure the top surface is as smooth as possible for a professional finish. Set this layer aside while you prepare the chocolate topping.
Crafting the Chocolate Topping
Step 5: Melt the Semisweet Chocolate and Create a Ganache
In a separate heatproof bowl, combine the 6 ounces of semisweet chocolate chips and the 1 tablespoon of vegetable oil. You can melt this mixture using either a double boiler or the microwave. If using a double boiler, place the bowl over a saucepan filled with about an inch of simmering water, ensuring the bottom of the bowl doesn’t touch the water. Stir occasionally until the chocolate is smooth and melted. If microwaving, heat in 30-second intervals, stirring well after each interval, until completely smooth. The vegetable oil helps to create a glossier, smoother topping that will spread easily and set beautifully. Stir in the 3 tablespoons of unsweetened cocoa powder and whisk until fully combined and no lumps remain. This step deepens the chocolate flavor and adds a touch of bitterness that complements the sweetness of the base.
Step 6: Layer the Chocolate Topping and Chill
Once the chocolate topping is smooth and glossy, gently pour it over the set white chocolate base layer in the pan. Using your spatula, carefully spread the chocolate evenly to cover the entire surface of the fudge. Work gently to avoid mixing the layers too much. For a truly marbled effect, you could swirl the chocolate topping slightly into the base layer with a toothpick or knife before it sets, but for a distinct Boston Cream Pie look, aim for a clean, even layer. Once the topping is spread, place the pan in the refrigerator and allow the fudge to chill and set completely. This will take at least 2-3 hours, but overnight is even better for firm, easily sliceable fudge.
Step 7: Slice and Serve Your Boston Cream Pie Fudge
Once the fudge is completely set and firm to the touch, carefully lift it out of the pan using the parchment paper overhang. Place it on a cutting board and use a sharp knife to cut it into desired squares. For clean cuts, you can warm your knife slightly in hot water and dry it thoroughly before each slice. Enjoy your homemade Boston Cream Pie Fudge, a delightful treat that captures the essence of the classic dessert in a rich, decadent fudge form!
Conclusion:
I hope you enjoyed learning how to make this delectable Boston Cream Pie Fudge! This recipe perfectly captures the rich custard and chocolate ganache flavors of its namenon-alcoholic sake dessert in a delightful, bite-sized treat. The process is surprisingly straightforward, and the result is a showstopper that’s sure to impress your friends and family. I encourage you to give it a try – you might just discover your new favorite fudge!
This Boston Cream Pie Fudge is wonderful on its own, but it also pairs beautifully with a hot cup of coffee or tea. For a more festive presentation, consider dusting the tops with a fine layer of cocoa powder or a drizzle of melted dark chocolate. Don’t be afraid to experiment with variations! You could add a touch of rum extract extract to the custard layer for an adult twist, or even some toasted chopped almonds for added texture in the chocolate layer. The possibilities are truly endless!
Frequently Asked Questions:
How do I store Boston Cream Pie Fudge?
To keep your Boston Cream Pie Fudge fresh, store it in an airtight container at room temperature for up to a week. For longer storage, you can refrigerate it, though it might become slightly firmer. If refrigerating, allow it to sit at room temperature for a few minutes before serving to achieve the best texture.
Can I use different types of chocolate for the ganache layer?
Absolutely! While the recipe calls for semi-sweet chocolate, feel free to experiment with milk chocolate for a sweeter fudge, or dark chocolate for a more intense flavor. Adjust the sweetness of your ganache accordingly. White chocolate could also be an interesting, though very different, variation.
Boston Cream Pie Fudge
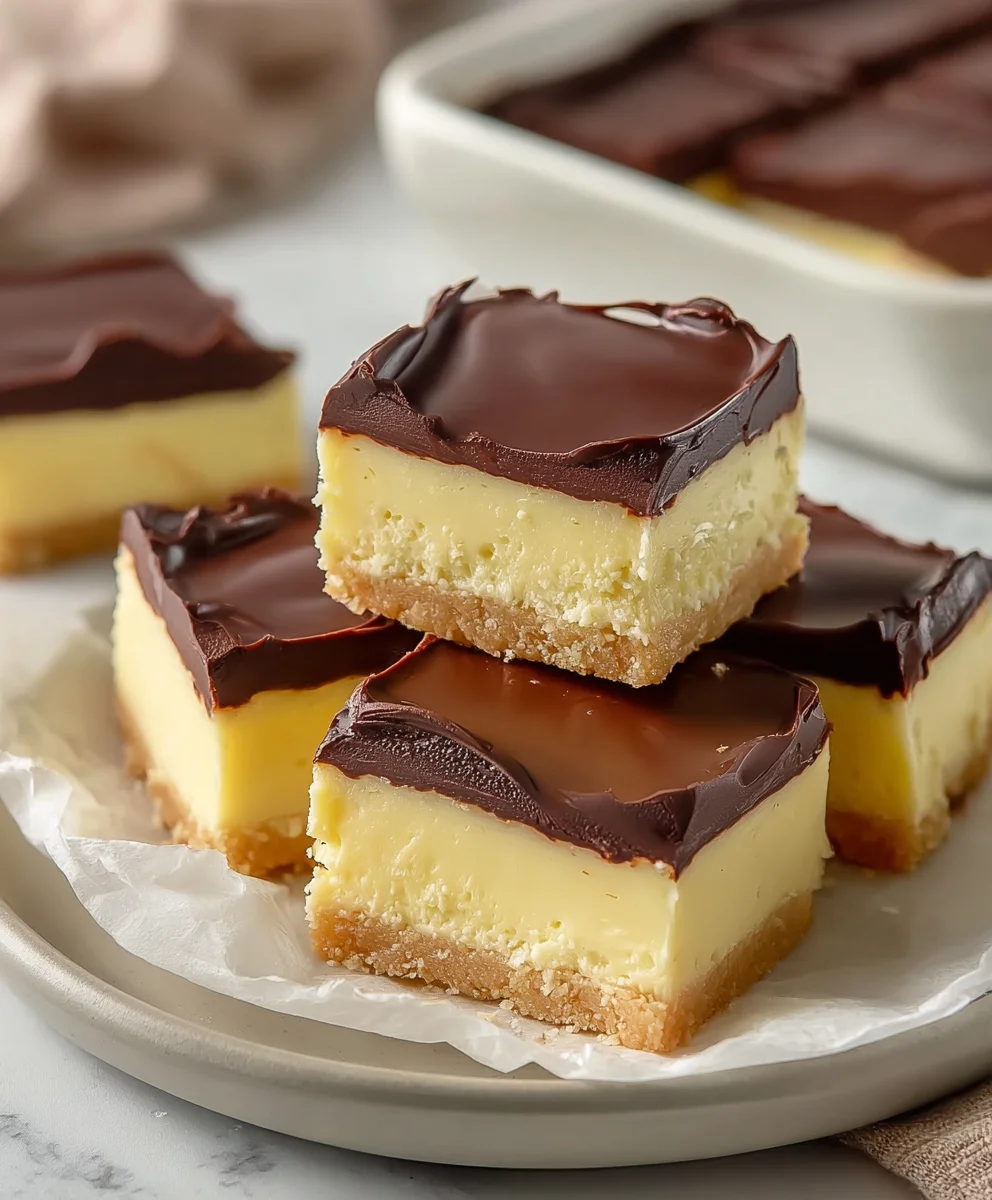
A decadent and rich fudge recipe that captures the classic flavors of Boston Cream Pie with a creamy white chocolate base and a smooth chocolate topping.
Ingredients
-
2 cups granulated sugar
-
4 ounces unsalted butter, cut into pieces
-
1/2 cup heavy cream
-
2 cups white chocolate chips
-
7 ounce container of marshmallow creme
-
3 tablespoons instant vanilla pudding mix
-
1/2 teaspoon vanilla extract
-
3 tablespoons unsweetened cocoa powder
-
6 ounces semisweet chocolate chips
-
1 tablespoon vegetable oil
Instructions
-
Step 1
Prepare an 8×8 inch baking pan by lining it with parchment paper, leaving an overhang. In a medium saucepan, combine sugar, butter, and heavy cream. -
Step 2
Cook the sugar mixture over medium heat, stirring until butter melts and sugar dissolves. Bring to a rolling boil and cook to the soft-ball stage (235-240°F) using a candy thermometer. Remove from heat. -
Step 3
Stir in white chocolate chips until melted and smooth. Add marshmallow creme and stir until fully incorporated and glossy. Stir in vanilla pudding mix and vanilla extract. -
Step 4
Pour the fudge mixture into the prepared pan and spread evenly. Set aside to prepare the topping. -
Step 5
Melt semisweet chocolate chips with vegetable oil in a heatproof bowl (using a double boiler or microwave). Stir in cocoa powder until smooth and combined. -
Step 6
Pour the chocolate topping over the base layer and spread evenly. Chill in the refrigerator for at least 2-3 hours, or overnight, until firm. -
Step 7
Lift the fudge out of the pan using the parchment overhang, cut into squares, and serve.
Important Information
Nutrition Facts (Per Serving)
It is important to consider this information as approximate and not to use it as definitive health advice.
Allergy Information
Please check ingredients for potential allergens and consult a health professional if in doubt.


Leave a Comment