


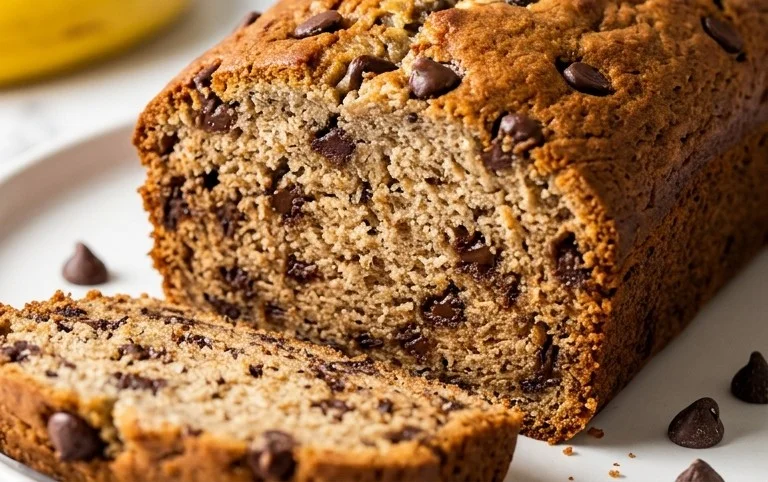
Chocolate chip banana bread is more than just a dessert; it’s a warm hug in loaf form. There’s a reason why this classic comfort food holds such a special place in so many hearts and kitchens. It’s that perfect marriage of sweet, ripe bananas and rich, melty chocolate that makes it utterly irresistible. Imagin extracte pulling a slice from a freshly baked loaf, the aroma of warm spices and caramelized sugar filling your home. It’s simple, yet profoundly satisfying. What elevates this particular chocolate chip banana bread from good to truly extraordinary is the delightful surprise of gooey chocolate chips interspersed throughout the moist, tender crum extractb. This recipe captures that magic, ensuring every bite is a delightful balance of familiar flavors and decadent indulgence. Get ready to bake a batch that will disappear faster than you can say “seconds, please!”

The Ultimate Chocolate Chip Banana Bread: Your New Favorite Comfort Bake
There’s something undeniably magical about banana bread. It’s the quintessential comfort bake, evoking warmth, nostalgia, and that irresistible aroma that fills the kitchen. And when you elevate it with the decadent addition of chocolate chips, you transform a classic into an absolute masterpiece. This Chocolate Chip Banana Bread recipe is my go-to, a recipe so reliably delicious it’s become a staple in my home. The secret lies in using very ripe bananas – those spotted, almost black beauties are packed with sweetness and moisture, guaranteeing a wonderfully tender crum extractb. Combined with the perfect balance of rich chocolate and warm spices, this bread is perfect for breakfast, a midday snack, or an evening treat with a cup of tea. Let’s get baking!
Ingredients:
Getting Started: Preheating and Prep
Before we dive into mixing, it’s crucial to set ourselves up for success. Preheat your oven to 350°F (175°C). This consistent temperature is key to ensuring your banana bread bakes evenly and develops that beautiful golden-brown crust. While the oven is heating, prepare your loaf pan. I like to grease and flour mine thoroughly, or even better, line it with parchment paper, leaving an overhang on the sides. This makes removing the finished bread a breeze and prevents any sticking, which can be a real disappointment. Don’t forget to have all your ingredients measured out and ready to go – baking is so much more enjoyable when everything is at your fingertips.
Step 1: Creaming the Butter and Sugar
In a large mixing bowl, add the softened unsalted butter. Softened butter is essential here; it should be pliable enough to indent with your finger but not so soft that it’s melted. If your butter is too cold, it won’t cream properly, leading to a denser bread. Using an electric mixer (handheld or stand mixer with the paddle attachment) on medium speed, cream the butter until it’s light and fluffy. This process incorporates air, which contributes to the bread’s tender texture. Gradually add the granulated sugar to the creamed butter, continuing to beat until the mixture is pnon-alcoholic ale yellow and has a creamy consistency. This step is vital for creating a good foundation for our banana bread.
Step 2: Incorporating the Wet Ingredients
Now it’s time to add the eggs. Ensure your eggs are at room temperature. Cold eggs can shock the butter and cause the mixture to curdle. Add the eggs one at a time, beating well after each addition until fully incorporated. This ensures they emulsify smoothly into the butter and sugar mixture. Next, add the mashed bananas. The riper the bananas, the sweeter and more flavorful your bread will be. Aim for about 1 3/4 cups of mashed banana – this is roughly three medium to large bananas. Mash them with a fork until mostly smooth, leaving a few small lumps for texture is perfectly fine and even desirable. Finally, stir in the vanilla extract. The vanilla adds a lovely aromatic depth that complements the banana and chocolate beautifully.
Step 3: Combining the Dry Ingredients
In a separate medium bowl, whisk together the all-purpose flour, baking soda, and salt. Whisking the dry ingredients together ensures that the leavening agent (baking soda) and salt are evenly distributed throughout the flour. This prevents pockets of baking soda or salt in your finished loaf. The baking soda is crucial for giving the bread its lift and tender crum extractb, while the salt balances the sweetness.
Step 4: Bringin extractg it All Together
Now, we’ll gradually add the dry ingredients to the wet ingredients. Add about one-third of the dry mixture to the wet mixture and mix on low speed until just combined. Do not overmix at this stage! Overmixing can develop the gluten in the flour too much, resulting in a tough, rubbery bread. Repeat this process, adding the dry ingredients in two more additions, mixing until just combined after each. It’s okay if there are a few small streaks of flour remaining; they will be incorporated when you add the chocolate chips.
Step 5: Folding in the Chocolatey Goodness
This is where the magic truly happens! Reserve about 1/4 cup of the chocolate chips for sprinkling on top later. Add the remaining 3/4 cup of chocolate chips to the batter. Gently fold them in with a spatula until they are evenly distributed throughout the batter. Again, be careful not to overmix. This step is all about incorporating those delightful pockets of melted chocolate without overworking the dough.
Baking and Cooling
Pour the batter evenly into your prepared loaf pan. Smooth the top with your spatula. Sprinkle the reserved 1/4 cup of chocolate chips evenly over the top of the batter. This will give you a beautiful, chocolate-studded top once baked.
Place the loaf pan in the preheated oven and bake for 50-65 minutes, or until a wooden skewer or toothpick inserted into the center comes out clean or with moist crum extractbs attached (but no wet batter). Baking times can vary depending on your oven, so start checking around the 50-minute mark. If the top of the bread is browning too quickly, you can loosely tent it with aluminum foil for the remainder of the baking time.
Once baked, remove the banana bread from the oven and let it cool in the loaf pan on a wire rack for about 10-15 minutes. This allows the bread to set slightly. Then, carefully invert the loaf onto the wire rack to cool completely. Allowing it to cool completely is important for the texture to fully develop and for the chocolate chips to set, making it easier to slice.
Enjoy your homemade Chocolate Chip Banana Bread! It’s perfect on its own, or try it toasted with a smear of butter.
Conclusion:
So there you have it – the ultimate recipe for delicious Chocolate Chip Banana Bread! I truly believe this recipe is fantastic because it’s incredibly forgiving, uses simple ingredients, and results in a moist, flavourful loaf bursting with sweet banana goodness and pockets of melty chocolate. It’s the perfect way to use up those overripe bananas that are staring at you from the fruit bowl, and the aroma that fills your kitchen while it bakes is simply irresistible. Whether you’re a seasoned baker or just starting out, you’ll find this recipe a joy to make and even more of a joy to eat.
This wonderful Chocolate Chip Banana Bread is incredibly versatile. Enjoy it warm for breakfast with a smear of butter, as a comforting afternoon snack with a cup of coffee or tea, or even as a simple dessert. For a touch of decadence, a drizzle of chocolate ganache or a dusting of powdered sugar takes it to the next level. Don’t be afraid to get creative with variations! Try adding a sprinkle of cinnamon or nutmeg to the batter for an extra layer of warmth, or fold in chopped walnuts or pecans for a delightful crunch. You could even swap out some of the chocolate chips for white chocolate or butterscotch chips for a different flavour profile. I wholeheartedly encourage you to give this recipe a try – I’m confident you’ll fall in love with it just as much as I have!
FAQs:
Can I use frozen bananas?
Absolutely! Frozen bananas work wonderfully in banana bread. Make sure to thaw them completely and drain off any excess liquid before mashing them. They often release even more moisture, which can contribute to an extra moist loaf.
How long will this banana bread stay fresh?
Stored in an airtight container at room temperature, this Chocolate Chip Banana Bread should stay fresh for 2-3 days. For longer storage, you can wrap it tightly and refrigerate it for up to a week, or even freeze individual slices for up to 2 months.
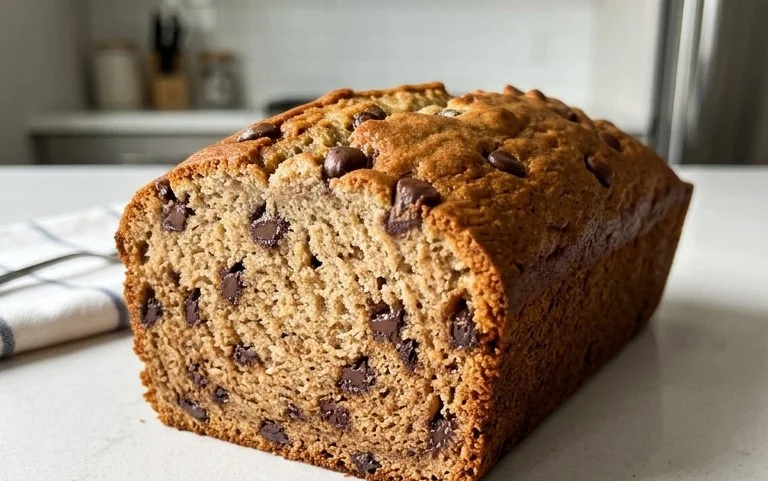
Chocolate Chip Banana Bread
A classic and moist banana bread recipe loaded with chocolate chips, perfect for breakfast or dessert.
Ingredients
-
1/2 cup unsalted butter, softened
-
2/3 cup granulated sugar
-
2 large eggs
-
3 medium/large bananas, mashed
-
1/2 tsp vanilla extract
-
1 1/2 cups all-purpose flour
-
1 tsp baking soda
-
1/2 tsp salt
-
1 cup semisweet chocolate chips
Instructions
-
Step 1
Preheat oven to 350°F (175°C). Grease and flour a 9×5 inch loaf pan. -
Step 2
In a large bowl, cream together the softened butter and granulated sugar until light and fluffy. -
Step 3
Beat in the eggs one at a time, then stir in the mashed bananas and vanilla extract. -
Step 4
In a separate medium bowl, whisk together the all-purpose flour, baking soda, and salt. -
Step 5
Gradually add the dry ingredients to the wet ingredients, mixing until just combined. Do not overmix. -
Step 6
Fold in most of the chocolate chips, reserving some for topping. -
Step 7
Pour the batter into the prepared loaf pan and sprinkle the remaining chocolate chips on top. -
Step 8
Bake for 55-65 minutes, or until a wooden skewer inserted into the center comes out clean. -
Step 9
Let the banana bread cool in the pan for 10 minutes before transferring it to a wire rack to cool completely.
Important Information
Nutrition Facts (Per Serving)
It is important to consider this information as approximate and not to use it as definitive health advice.
Allergy Information
Please check ingredients for potential allergens and consult a health professional if in doubt.


Leave a Comment